
Every year I take one of my kids’ DIY Halloween costumes from the previous year and we share here on the blog how to make it. Last Halloween we gave you our DIY 3-headed ghost costume. This year I’m showing you How to Make a DIY Mad Scientist Brain Halloween Costume. This post contains affiliate links.
This one is pretty dang easy. The only real “DIY” is the bloody brain cap, which will take about 3 days to complete and fully dry.
Table of Contents
How do you have Halloween in a pandemic?
Even though there might not be traditional trick or treating this year due to the pandemic, we are still having Halloween here to give our kids some fun in this uncertain time.
We have already planned out their Halloween costumes. They are still dressing up and having Halloween. We are definitely decorating our house to the nines for Halloween. If people can’t go anywhere, it’s still fun to drive by all the decorated houses.
There are some fun ideas on the blog like:
- Free Printable Witch Hat Twister Halloween Game
- Halloween Spider Slime
- Free Printable Halloween Name That Tune Game & More Halloween Games
- Make Halloween Eyeball Slime
- Halloween Surprise Balls
I have more fun ideas to share with you in the next few weeks for how we plan to still have Halloween for our family. Even if it’s just family this year, it’s still going to be totally fun!
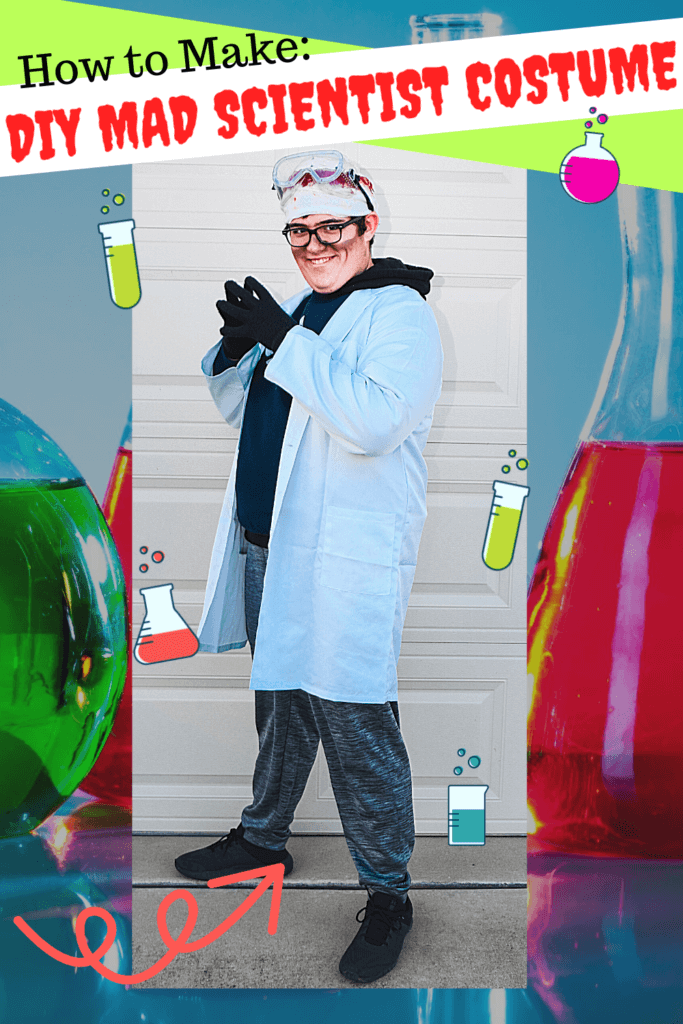
How do you make a DIY Mad Scientist Brain Halloween Costume?
You’ll need:
- a basic white lab coat
- a pair of latex gloves
- a pair of safety lab googles
- bloody brain hat
- black or dark gray matte eye shadow
- powder brush
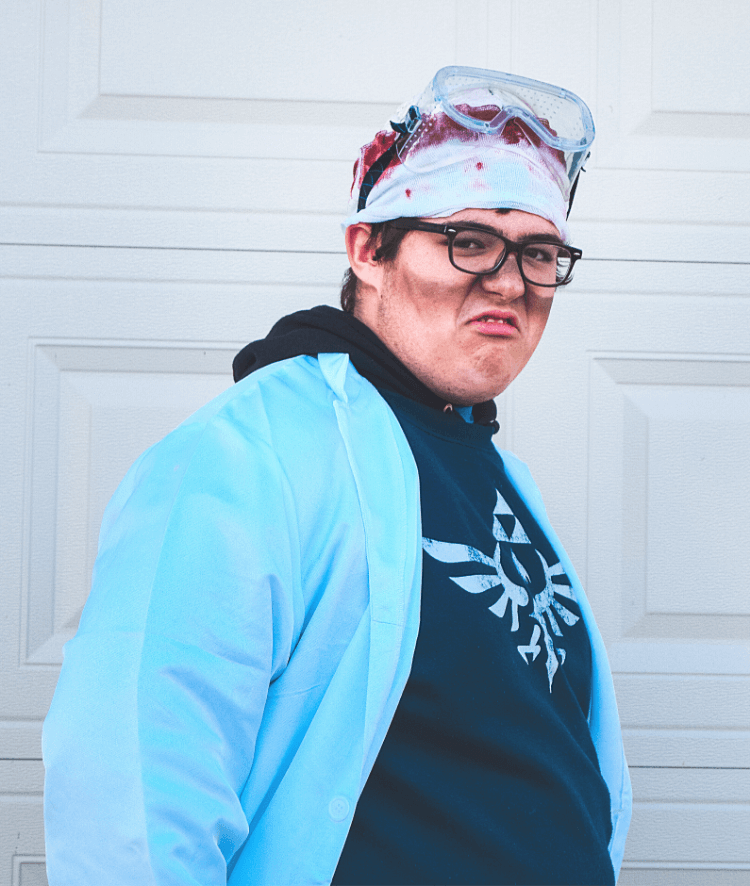
The nice thing about this costume is that you can wear your regular clothes underneath it.
We live in Texas and it was pretty cold, so instead of the latex gloves, my son choose to wear regular black gloves for warmth.
How do you do the makeup for a DIY Mad Scientist Costume?
I put the safety googles on my son, then I used black eye shadow with a big powder style brush to brush the black eye shadow all around the edge of the safety googles, so it looks like he had an explosion happen in his face.
Once his makeup was done, we put on his bloody brain cap. It’s fine to let their hair stick out the bottom of the cap because it’s just supposed to look like the top of their brain with a bandage wrapped around the bottom edge.
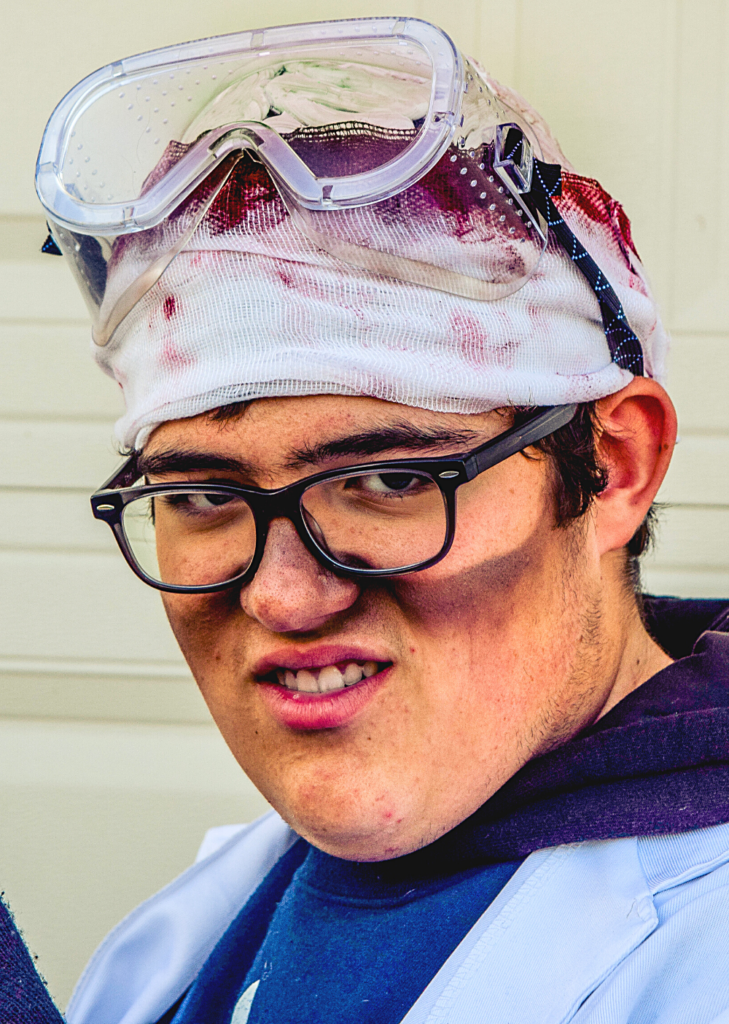
Then, we put the goggles on and pushed them up on the brain hat, so his makeup would show.
How do you make a Bloody Brain Cap?
I had quite a bit of anxiety over this until I actually started doing it. Then, it was very straight forward. I used these instructions to make the cap – How to Caulk a Bloody Brain Cap.
It’s a great tutorial with lots of pictures. There were a few things that I didn’t agree with in the instructions:
- It took about 3 days for the caulk to completely dry.
- When mixing the red and black paint with water, use a tiny, tiny, minuscule amount of black because it will take over.
- The cap was a bit heavy to wear.
- It did not give instructions for the gauze at the bottom of the cap. Find them below:
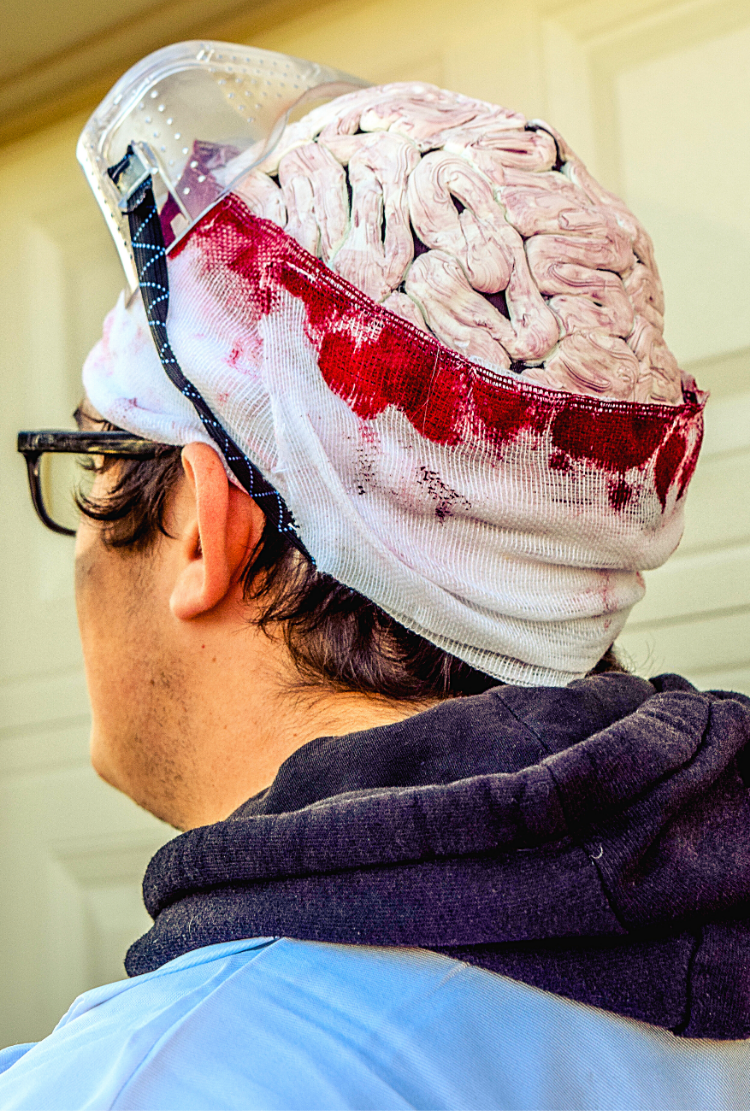
How do you add the bloody gauze to the Bloody Brain Cap?
Once the cap was completely dry after painting the brain, I added bloody gauze to the bottom of the hat. It helps hide the last inch or so of the hat.
Materials:
You will need:
- 2-4 inch gauze (I recommend 2-inch gauze)
- Red acrylic paint
- Brown acrylic paint
- Paint brush
- Water
- Hot Glue & Glue Gun
Instructions:
Measure around the bottom of the cap and use that measurement to roll out the needed amount of gauze. You’ll need 3-5 layers of gauze to make it opaque. Otherwise, the cap will be seen through the gauze. Make sure to add a couple inches to that measurement for overlap.
I could only find 4-inch gauze, but 2-inch gauze will work fine as well. In fact, I think 2-inch gauze might be a better choice.
Lay out the gauze flat on newspaper or paper towels. Make sure to lay it out in the same layers of thickness you’re going to wrap around the cap. You want the paint to look like blood coming through the layers of gauze.
Mix up the paint with a lot more red than brown. Then, water it down so it’s very runny.
There’s two methods I’ve seen for painting the gauze.
- Some people paint the center of it, so it’s more like the skull area is leaking blood.
- I chose to paint the upper edge of the gauze, so it looked like the brain was leaking blood onto the gauze.
Whichever one you choose, make sure to paint the entire length of the gauze so it goes all the way around, including the overlap. Then, add dabs and dots further down on the gauze, somewhat sparingly, along the entire length.
Allow it to completely dry before hot gluing the middle of the gauze along the edge of the cap. I did add hot glue here and there to attach the gauze to some of the brain, but it was mostly on the cap.
This allows the top of the gauze to come up and slightly cover the lowest part of the brain. This hides the rest of the cap that was visible at the bottom.
Once that’s cooled off, you’re ready to put on your bloody brain cap!
More Halloween Costume Ideas!
- How to Make an DIY Easy Pennywise Clown Costume
- DIY Crazy Cat Lady Costume for Halloween
- Hot Air Balloon Boxtume
- DIY Fleece Peppa Pig Halloween Costume
- Free Kittens Boxtume