
I just love Halloween. I have been dreaming up these Monster Mash Halloween Cheesecake Bars for two Halloweens, and I finally spent an afternoon baking this yummy dessert along with a few other spooky treats like my Brimstone Brownies.
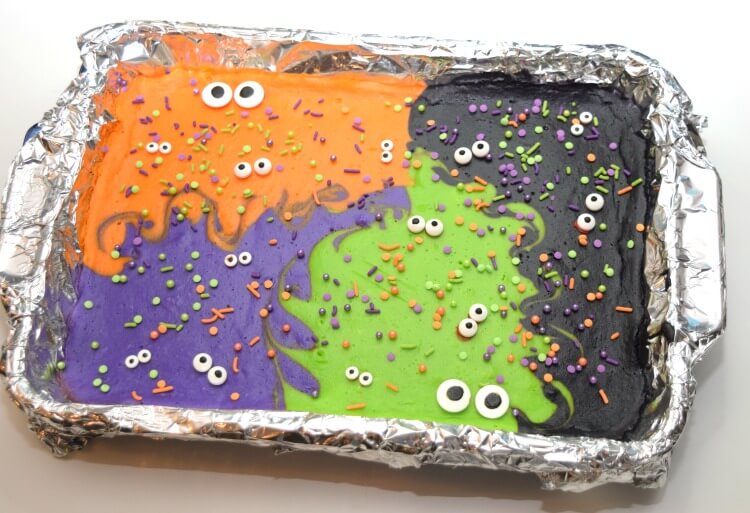
It sounds kind of silly, but my inspiration for this Halloween-themed cheesecake was a four-pack of gel food coloring at Walmart that was all Halloween colors. It had green, purple, orange, and black. I thought combining them all together would make a fun whimsical cheesecake.
Pin these Monster Mash Halloween Cheesecake Bars for later!
How to make Monster Mash Halloween Cheesecake Bars
This cheesecake is perfect for a party. It’s made in a 9 x 13 pan. You can cut large bars and get about a dozen, or you can cut them smaller and get about 15-16 bars.
Before you begin, cover the bottom and sides of the 9 x 13 pan in foil, so you can easily lift out the cheesecake for cutting into squares.

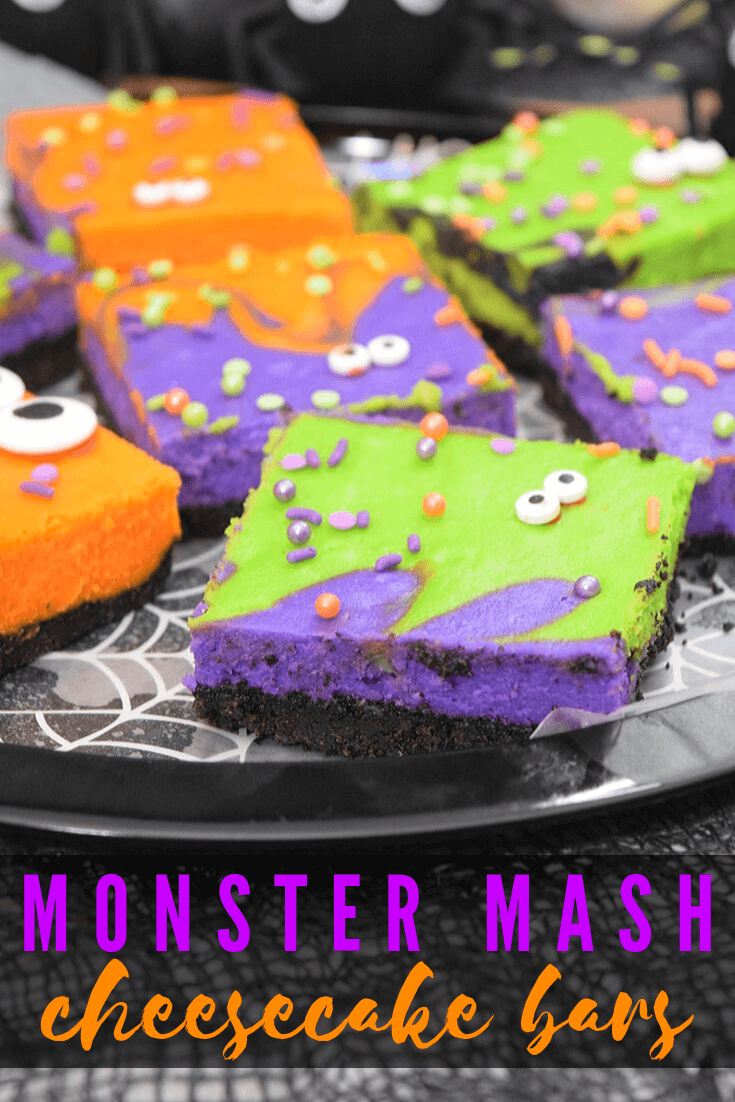
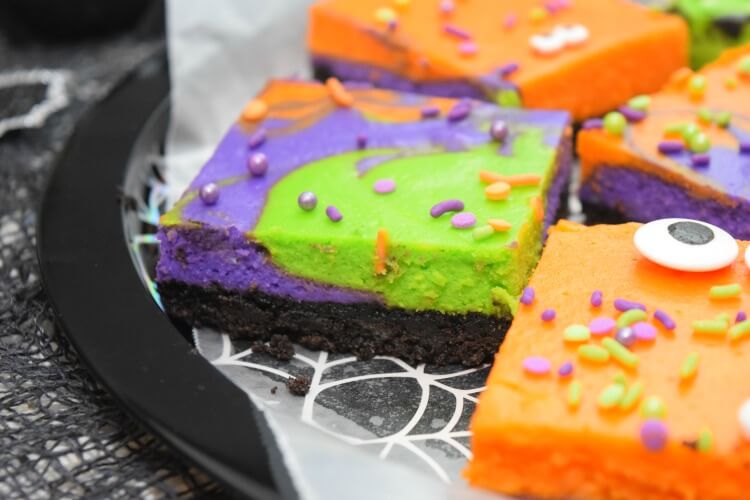
I felt it was best to have an OREO cookie crust because a black crust would pair perfectly with these Halloween colors. I feel it works better than graham crackers because the creme fillings add some stickiness to help keep the crust together.
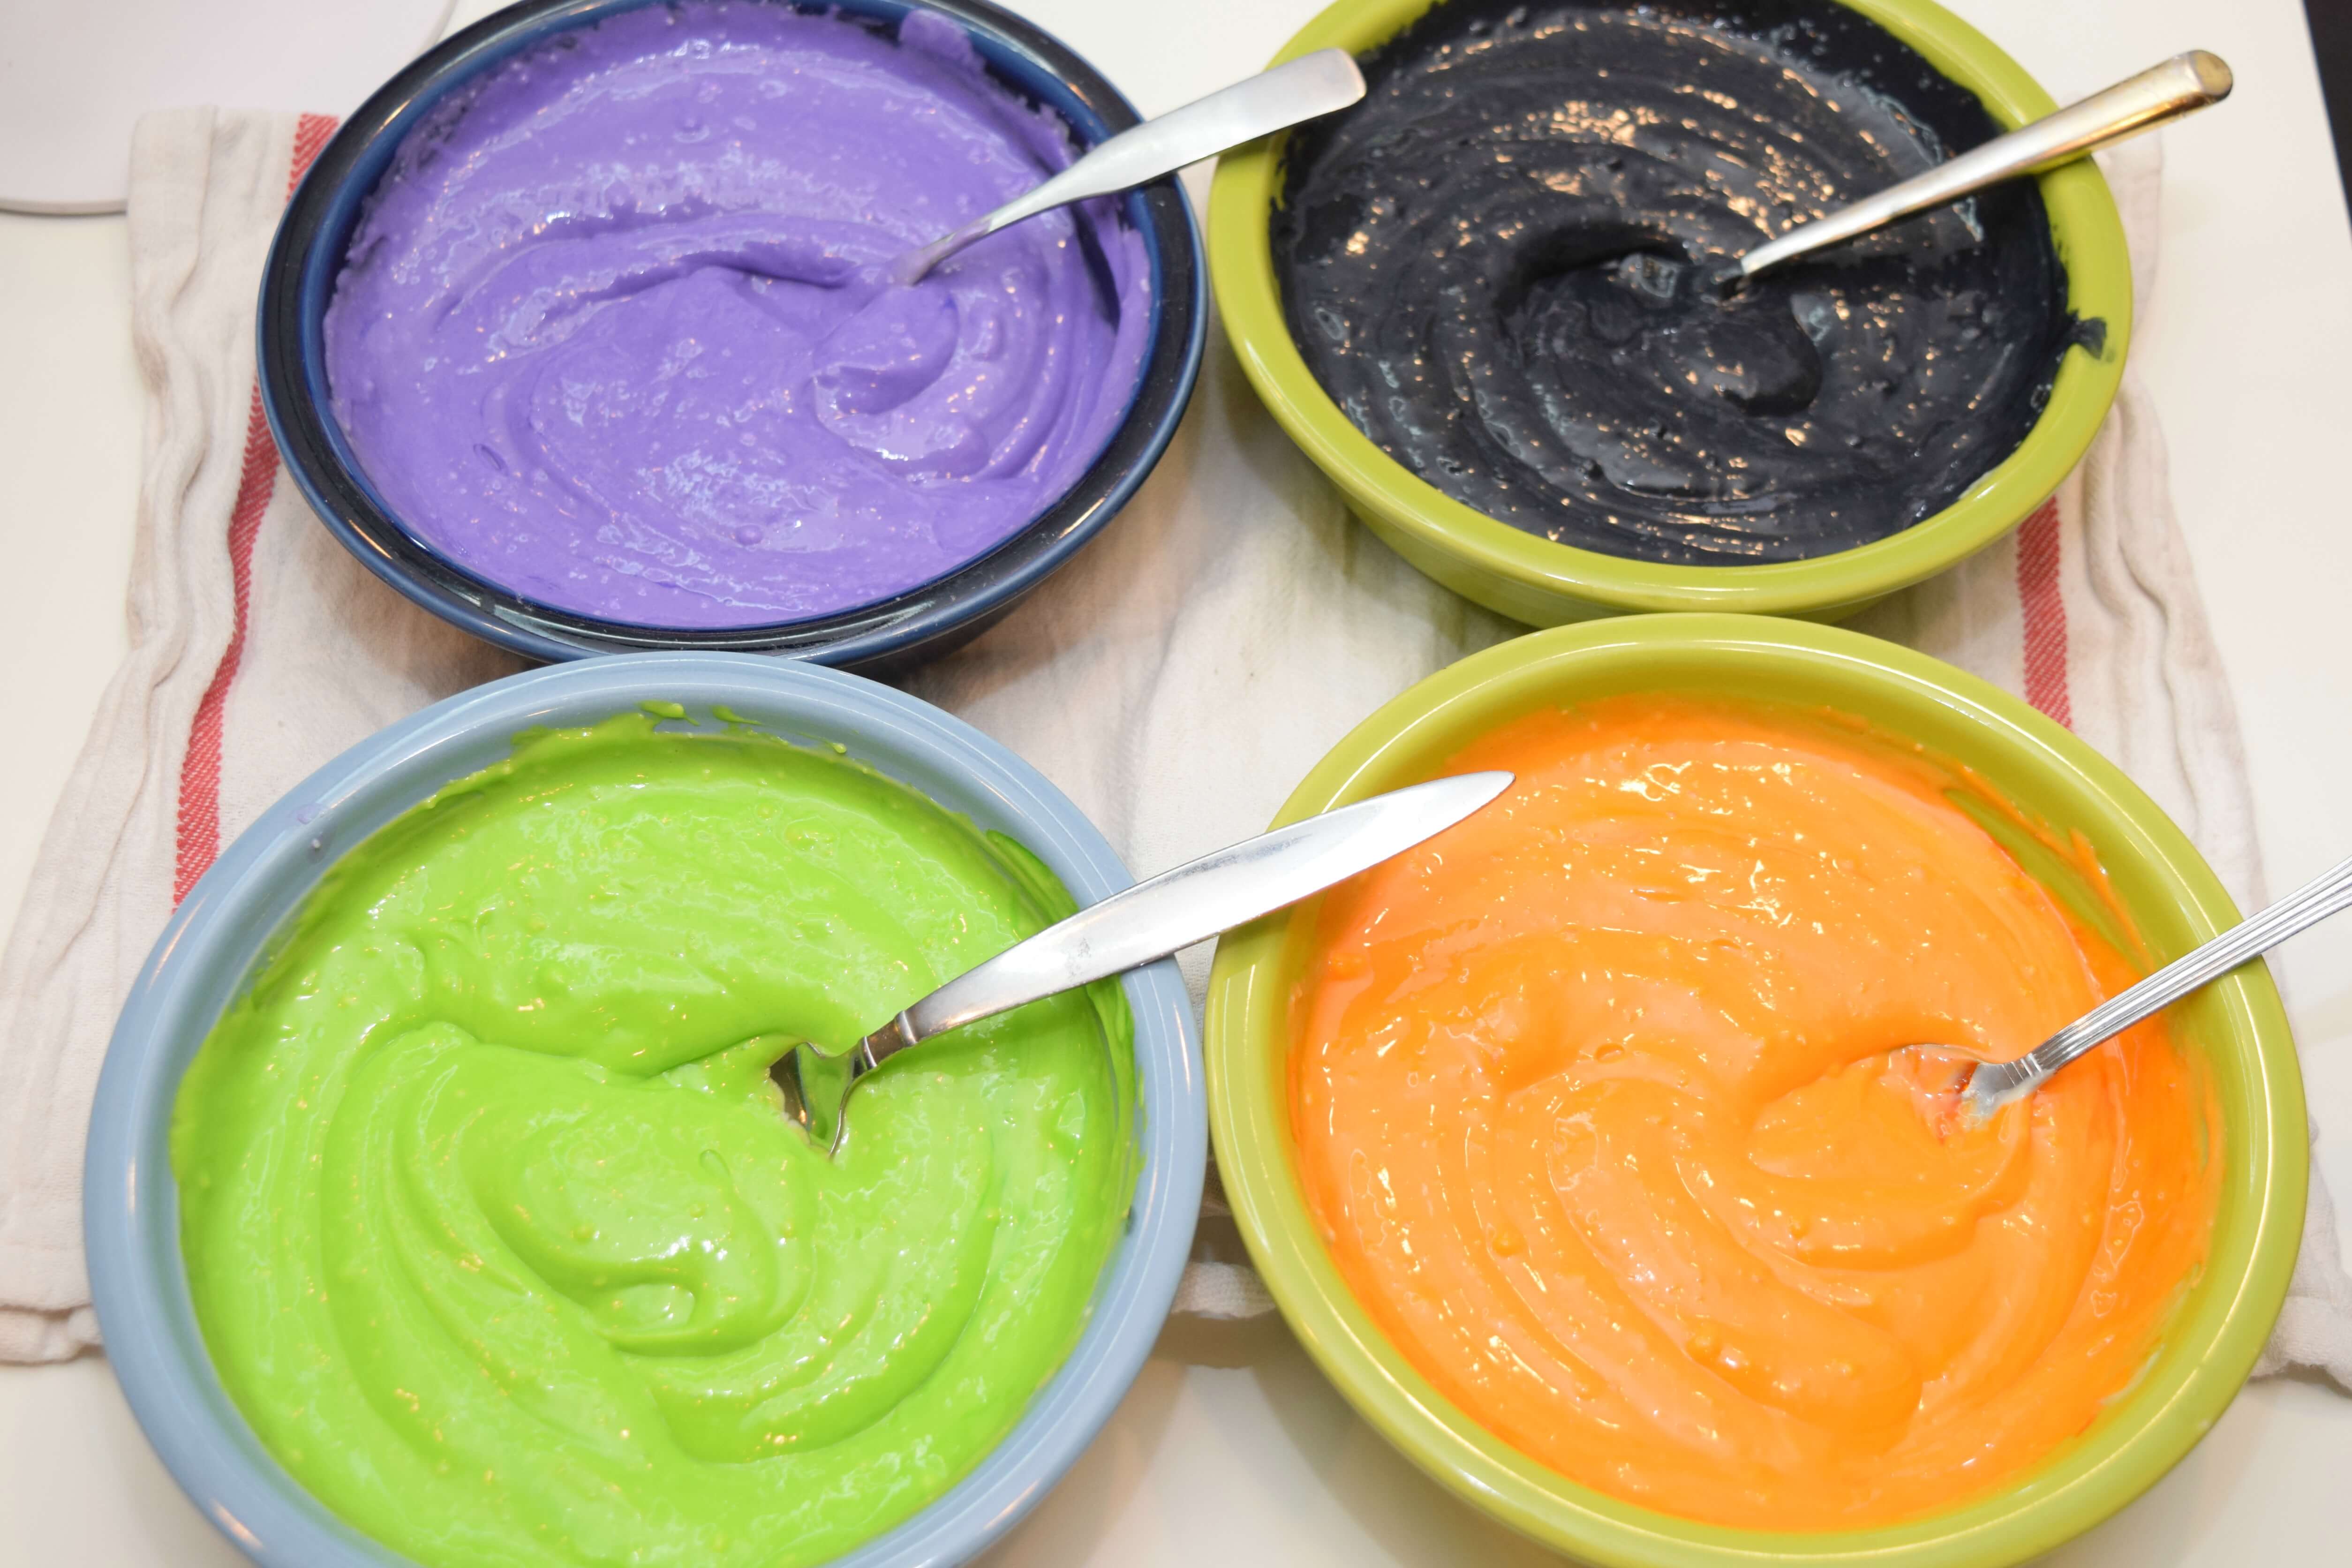
While the crust is cooling, make the cheesecake batter. Once you have made the batter, divide it into four bowls – one each for green, orange, black, and purple. You want bright vibrant colors, so just eyeball how much gel food coloring you need. I add a bit at a time until I get the color I want.
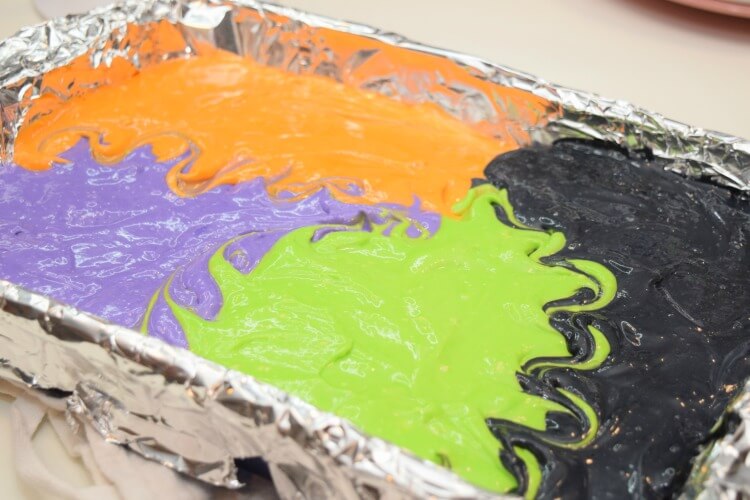
I did not want to really swirl the colors together. You can totally do that and randomly switch off adding a spoonful of each color of the batter. Instead, I just added one whole color at a time. Then, I gently swirled right at the color lines just a bit.
How do you prevent cracks in a cheesecake?
The secret to a good cheesecake without cracks is preventing it from getting too hot. I’ve read about placing the pan directly in a water bath while it cooks, but I don’t like that.
Awhile ago, I found What’s Cooking America recommends just setting a baking pan like a cookie sheet half filled with water on the lower rack and placing the cheesecake in the middle of the top rack with the top rack set at the middle level of the oven.
When I cook cheesecakes this way, they come out beautifully. This one had no cracks and baked to perfection.
To keep it looking lovely, I let the cheesecake cool on the counter for an hour or so, and then I put it in the fridge overnight.
Decorating your Monster Mash Halloween Cheesecake
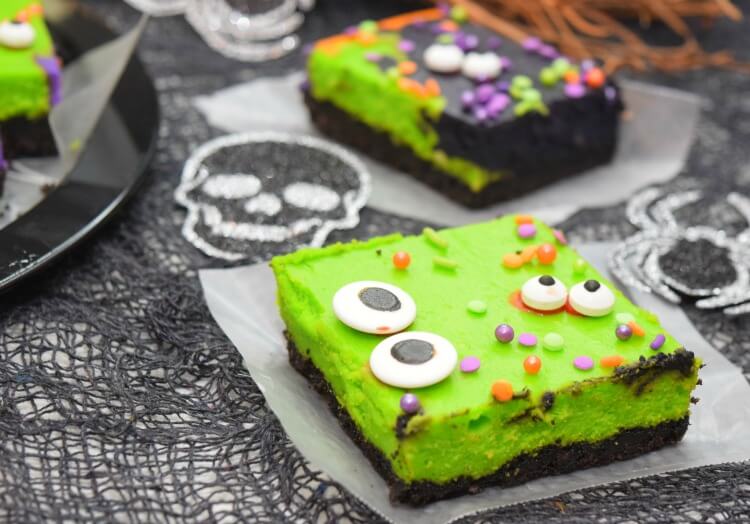
After the cheesecake has set overnight, I pull it out of the fridge about an hour before I want to decorate it. You can decorate however you’d like. I decided to go with candy eyes and sprinkles in the same coordinating colors – orange, purple, and green.
How do you cut a cheesecake into bars?
My secret to cutting pretty squares of cheesecake is using a hot knife. I run it under hot water until the knife is completely hot. Then, I wipe off the water and slice. This will make pretty squares without any extra clumps of cheese.
Looking for more Halloween treats and eats?
- Halloween Peanut Butter Ghost Brownies with Fudge Frosting
- Monster Toe on a Stick
- Poison Apple Punch
- Edible Eyeballs on a Stick
- Hocus Pocus Spell Book Brownie Halloween Treats
- Turn Your Twinkies into Halloween Twinkie Mummies
- Brimstone Brownies
Halloween Fun
- How to Make a Halloween Escape Room at Home
- Free Kids Printable Halloween I Spy Games
- Halloween Games for Kids and Adults – Free Printables
- Free Kids Halloween Printable Games
- Free Printable Neighborhood Halloween Scavenger Hunt
- Let’s Go on a Halloween Treasure Hunt – Free Printable

Monster Mash Halloween Cheesecake Bars
These Monster Mash Halloween Cheesecake Bars are perfect for the party with their whimsical colors and decorations.
Ingredients
Crust Ingredients
- 32 OREO cookies
- 6 tablespoons of butter
Cheesecake Ingredients
- 24 oz cream cheese, softened
- 3 eggs
- 1 1/2 cups white sugar
- 1 1/2 teaspoons vanilla
- 1/4 cup flour
- 1/4 cup sour cream
- green, orange, purple, and black gel food coloring
Decorations
- confetti sprinkles in orange, green, and purple
- candy eyes in assorted sizes
Instructions
Crust Instructions
- Preheat oven to 325 F degrees.
- In a blender or food processor add the 32 OREOs with their creme filling. Pulse on high until they are crumbs.
- Melt 6 tablespoons of butter. Pour the butter into the food processor and pulse a few times to thoroughly mix it into the cookie crumbs.
- Layer a 9 x 13 pan completely with foil so you can lift out the cheesecake when it's done.
- Press the OREO crumbs into the bottom of the pan.
- Bake for 10 minutes.
- Let cool while making cheesecake batter.
Cheesecake Instructions
- Preheat the oven to 325 F degrees.
- Place the top rack in the middle of the oven.
- Add a large cookie sheet to the lower rack, and fill it halfway with water.
- Cream together the sugar and cream cheese until they are smooth.
- Add the eggs and mix until they are incorporated.
- Add the vanilla, sour cream, and flour and mix until smooth.
- Divide the batter into four bowls and color each one a different food coloring gel -- black, green, purple and orange.
- Spoon each color in its entirety in one section of the crust.
- Gently swirl where each color butts against each other.
- Place the cheesecake into the oven right above the pan of water and bake for 45 minutes. Do not open the oven.
- If it's no longer jiggly in the middle, it's done. Otherwise, check back every 2-3 minutes until no longer jiggly.
- Allow it to cool for an hour or so on the counter. Then, place it in the fridge for at least 6 hours, preferably overnight.
Decorations
- Let the cheesecake sit on the counter for about an hour after pulling it out of the fridge before decorating.
- Add coordinating sprinkles to each color.
- Use a tube of frosting to add pairs of eyes all over the cheesecake.
- Use a hot knife to cut into squares.
Come Join Us!
Liked this article and want more? Follow along on Instagram, Facebook, Twitter, Pinterest, TikTok, and YouTube!
Come over and join us on Facebook in the group Recipes, Crafts, and more with TipToe Fairy or Sewing and Crafting with The TipToe Fairy!