
Want an easy decoration to dress up the mantle, table, or even your desk this Halloween? Make a Ghost in a Jar! Or make this a fun craft for the kids! This post contains affiliate links.
One of my favorite crafts is creating little worlds in a mason jar from fairy gardens to terrariums to even cemeteries for Halloween.
They are so much fun, and the kids can help make these as a fun crafts. Tweens and teens will love making a ghost in a jar to keep in their room.
Check out this video to see it flickering in the dark:
Table of Contents
What do you need to make a Ghost in a Jar?
There’s a few things you need.
- quart size mason jar
- tiny styrofoam balls
- tiny glass bottles
- school glue
- water
- cup and spoon
- cheesecloth
- creepy cloth
- glue dots
- electronic flickering tea lights
How do you make a ghost in a mason jar?
If you have an old jar from pasta or pickles or mayonnaise, you can use that instead of quart size mason jar.
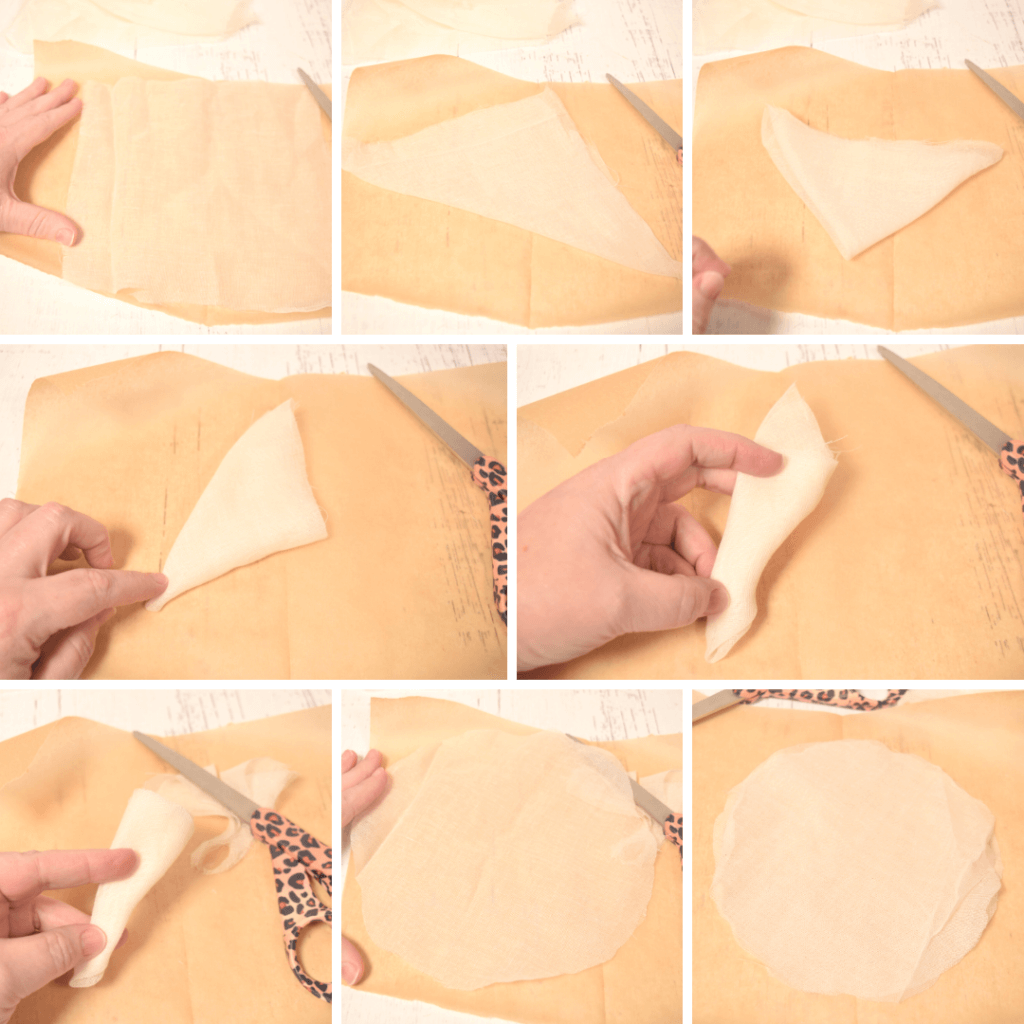
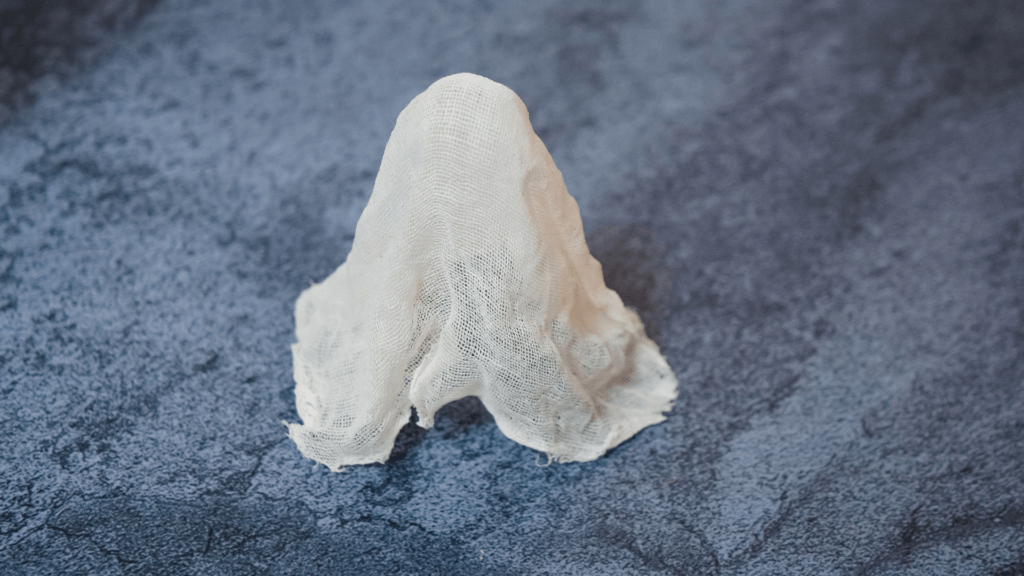
Cut circles of cheesecloth with a radius of 3-4 inches. The diameter would be 6-8 inches in size.
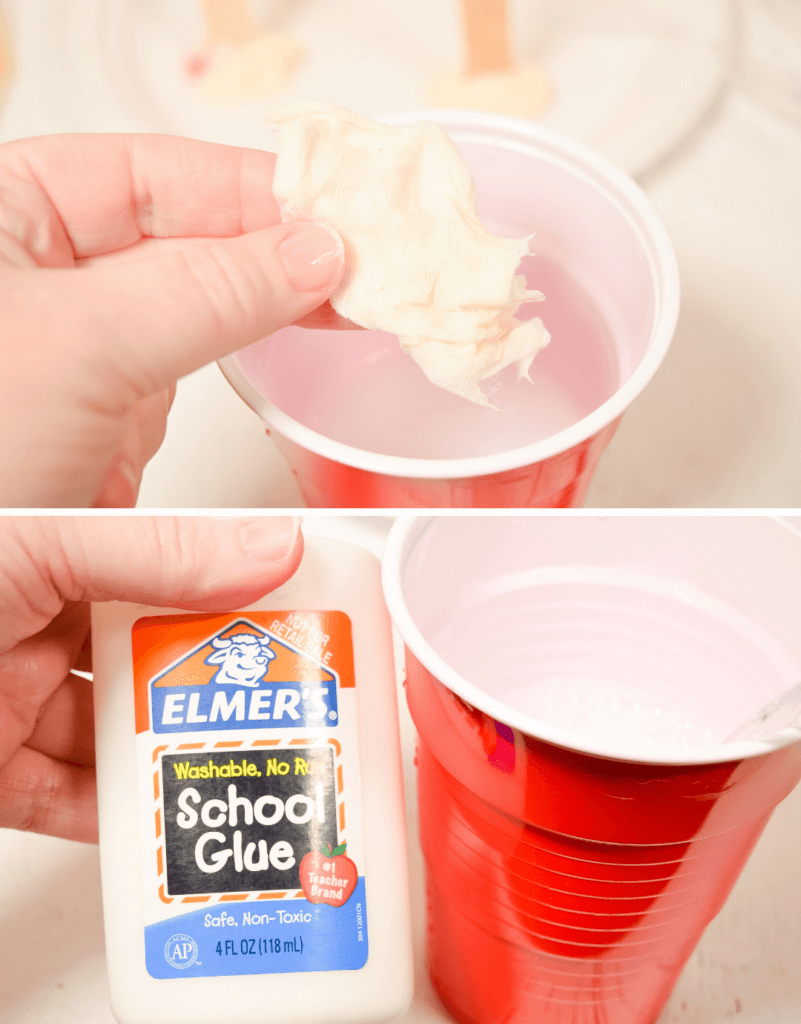
Combine about a tablespoon of white school glue and about 1/3 cup of water in a cup or bowl and mix it up with a spoon until it’s completely combined.
I recommend using warm water. Otherwise, it might not mix well, and you might end up with clumps of glue.
Soak the cheesecloth circles into the glue mixture and wring out the excess water.
First, you’ll need to make a little armature to hold the cheesecloth while it dries. You’ll need one for each cheesecloth. I used 1-inch styrofoam balls hot glued to some 2-inch tall glass bottles I found in the craft section of Dollar Tree.
You can make yours with whatever you’d like. I found about a 3-inch tall size was best. I did try using playdough and popsicle sticks, but it wasn’t as good as using this bottle/styrofoam combination.
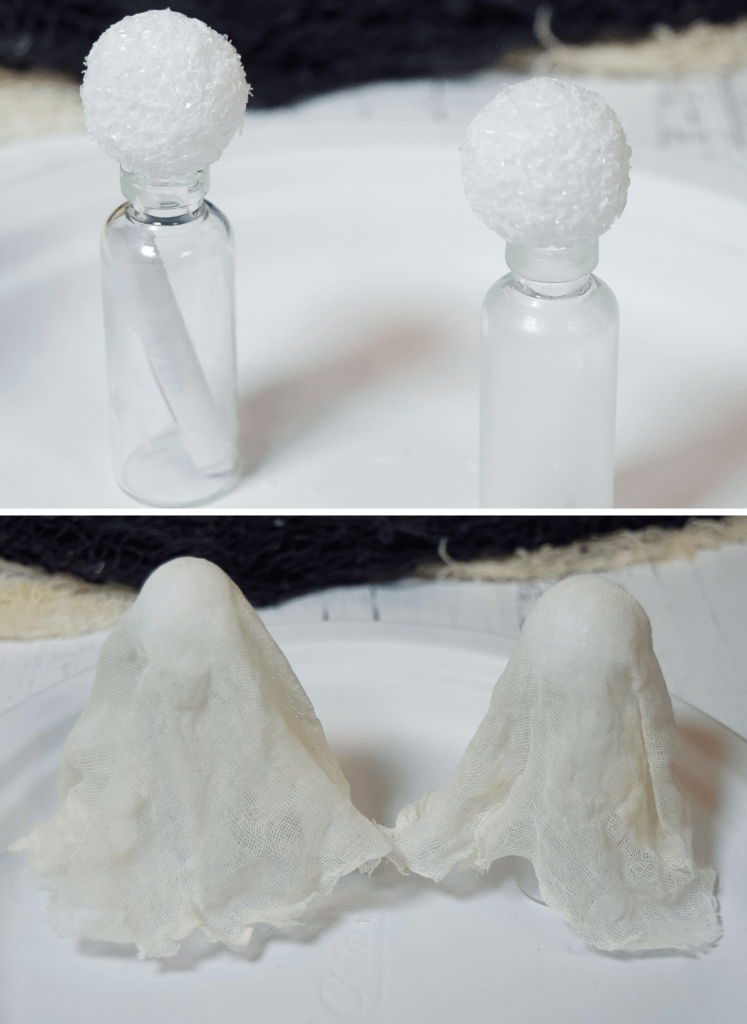
Drape a cheesecloth over the armature and position the cheesecloth how you want it. Make sure it’s down all the way on both sides. I like to make sure there’s some excess fabric down at the bottom hem in the very front. I found it looks very creepy like that.
Let them dry for at least 2-3 hours; though, I usually leave my ghosts to dry overnight.
Carefully remove each ghost from its armature.

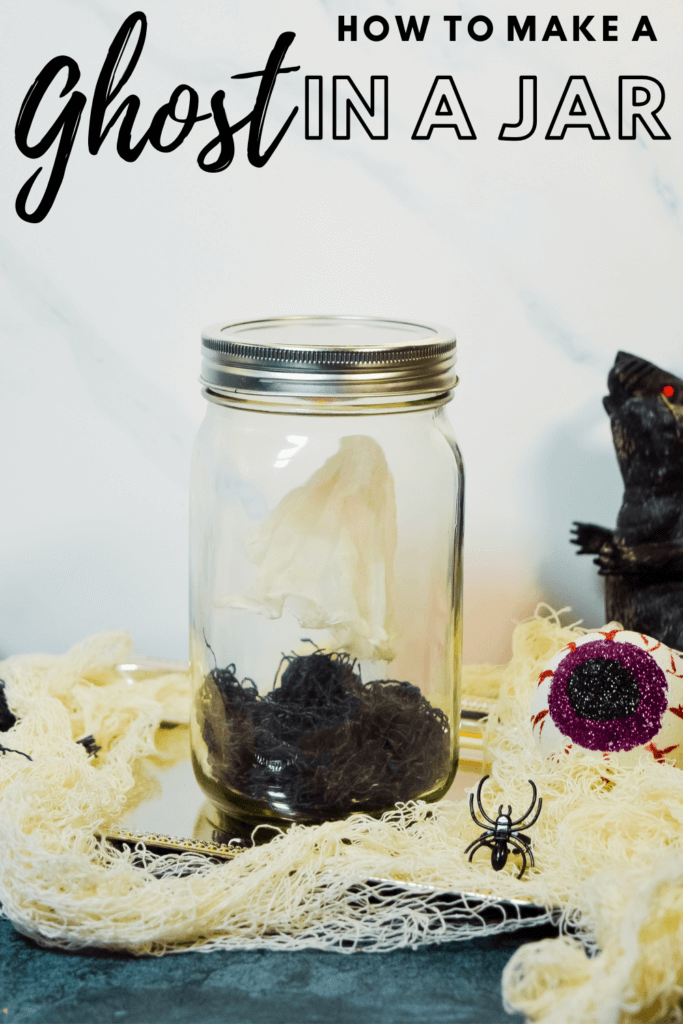
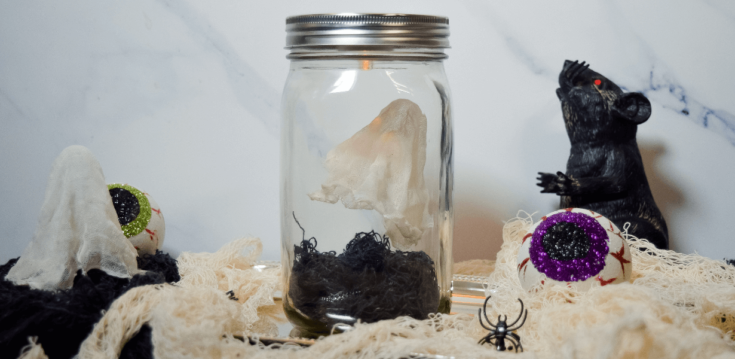
Cut a third of the black creepy cloth off and wad it up into the bottom of the jar. I usually add enough creepy cloth to fill about 2 inches up from the bottom. If you added too much or not enough, it’s easy to trim or cut another piece.
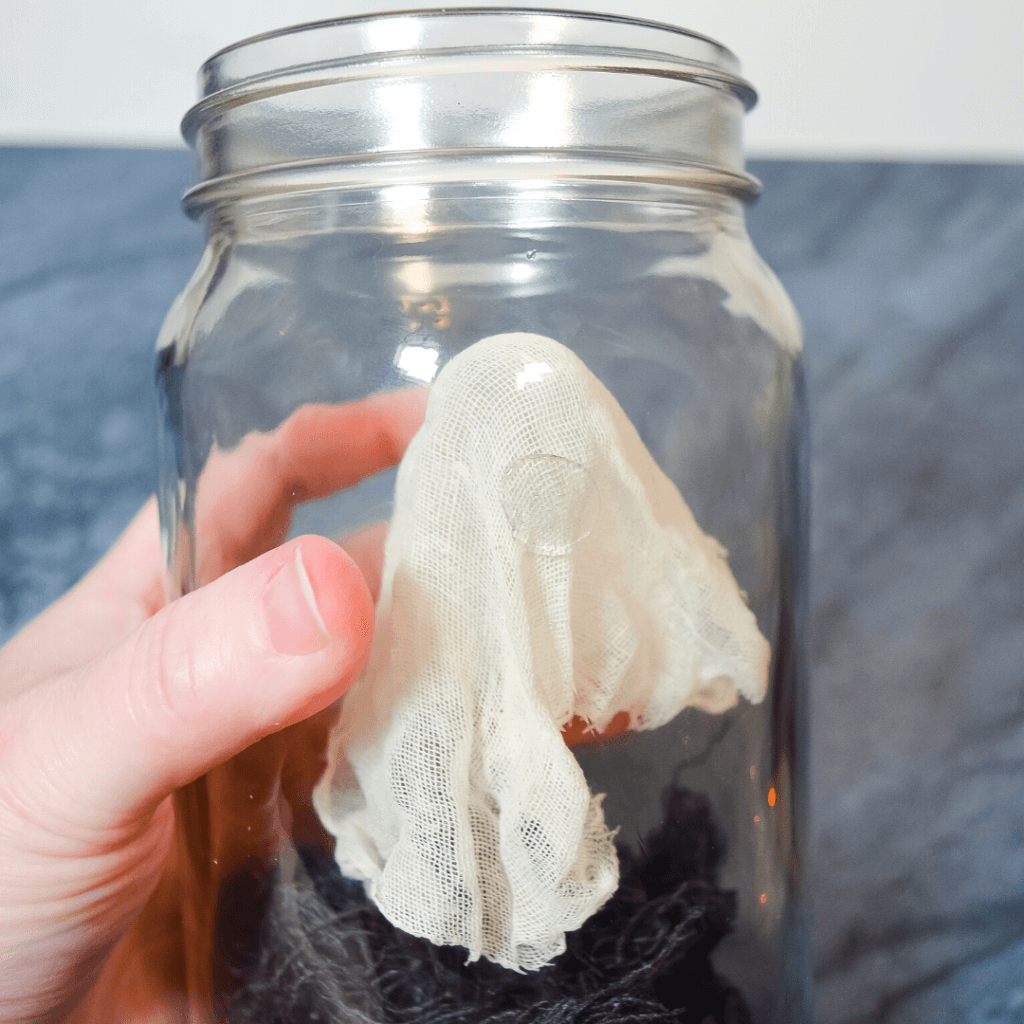
Determine where you want to place the ghost in the jar. I usually put it 1-2 inches above the creepy cloth, so it looks like it’s hovering. Also, pick the best side of the ghost to appear forward.
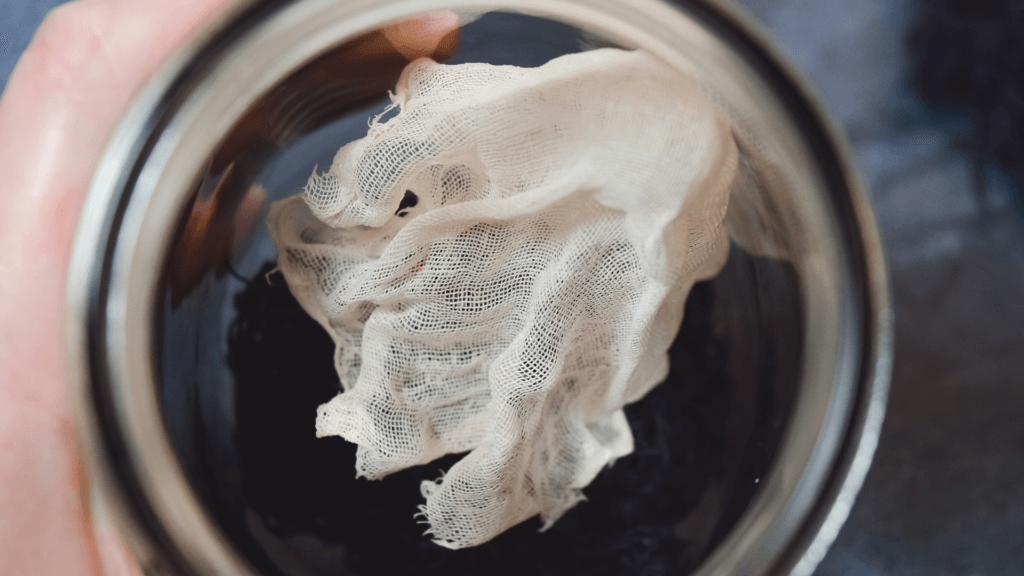
Now add a glue dot to the back of the ghost and push it up against the jar firmly. You might need to ‘fluff” out your ghost after this. This way it looks like it’s floating in the air.
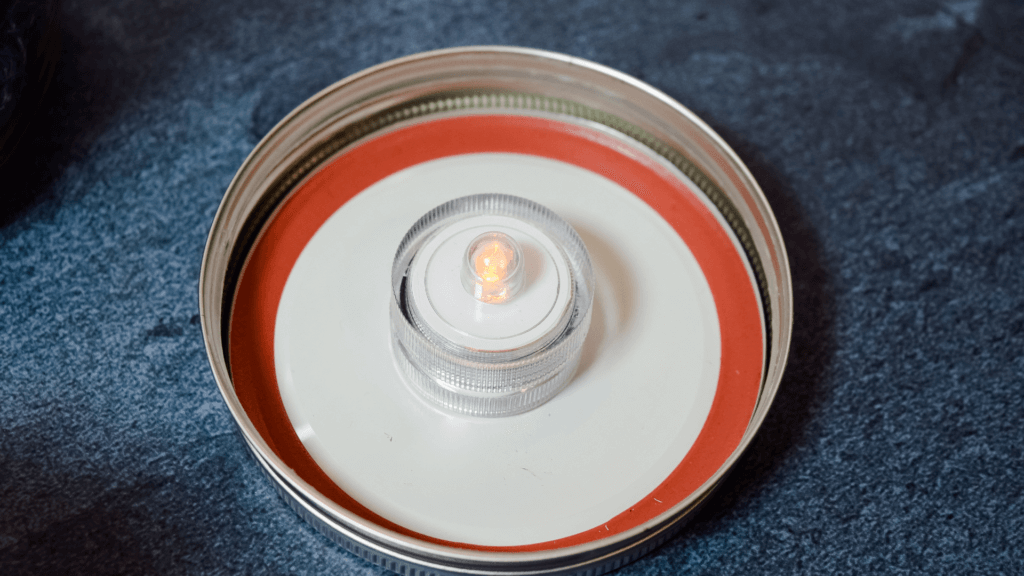
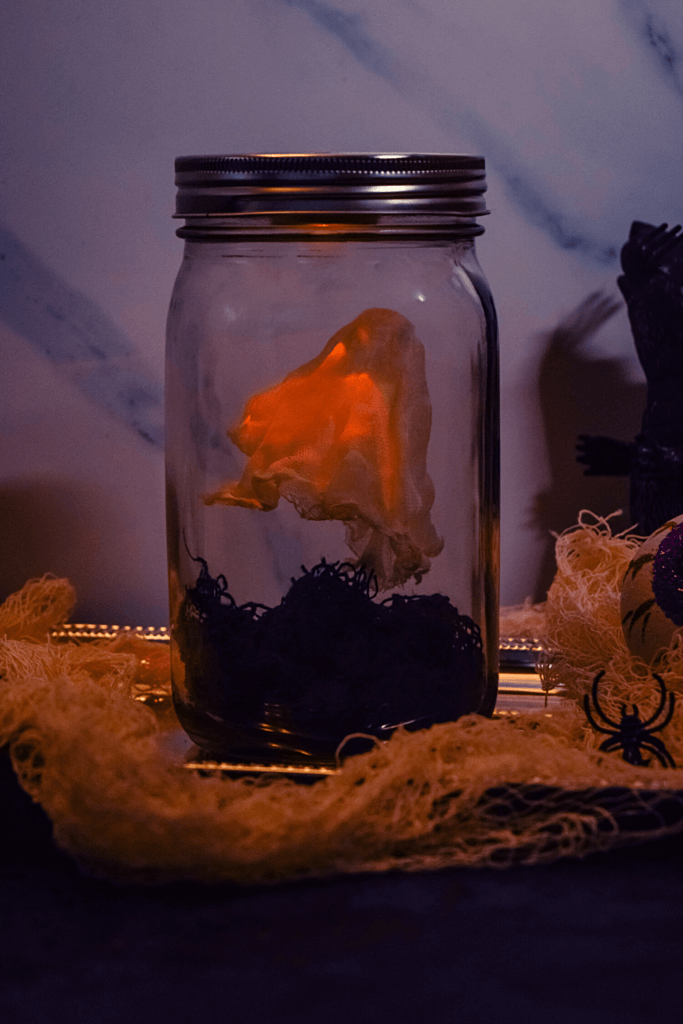
Add a couple more glue dots to the center of the inside of the lid and add a flickering light.
Turn on the light and screw on the lid.
Now you’ve captured a spooky ghost in a jar to display on the mantle or your tablescape!
More Halloween Decor
- How to Make DIY Vintage Halloween Ornaments
- How to Make a Halloween Cotton Spider Web Wreath
- Halloween DIY: Flickering Spider Lights
- How to Make Halloween Glowing Eyes
- How to Make a Halloween Spooky Tree Wreath
Halloween Activities
- Free Printable Halloween Name That Tune Game
- Halloween Games for Kids and Adults
- How to Make a Halloween Escape Room at Home
- Free Kids Printable Halloween I Spy Games
Halloween Ghost in a Jar
Materials
- quart size mason jar
- tiny styrofoam balls
- tiny glass bottles
- school glue
- water
- cup and spoon
- cheesecloth
- creepy cloth
- glue dots
- electronic flickering tea lights
Instructions
Make a little armature to hold the cheesecloth while it dries. You'll need one for each cheesecloth ghost. I used 1-inch styrofoam balls hot glued to some 2-inch tall glass bottles from Dollar Tree.
Cut circles of cheesecloth with a radius of 3-4 inches. The diameter would be 6-8 inches in size.
Combine a tablespoon of white school glue and 1/3 cup of water in a cup or bowl and mix it up with a spoon until it's completely combined.
Soak the cheesecloth circles into the glue mixture and wring out the excess water.
Drape each cheesecloth over each armature and position the cheesecloth how you want it.
Let them dry for at least 2-3 hours; though, I usually leave my ghosts to dry overnight.
Carefully remove each ghost from its armature.
Cut a third of the black creepy cloth off and wad it up into the bottom of the jar. I usually add enough creepy cloth to fill about 2 inches up from the bottom.
Determine where to place the ghost to the jar, and pick the best side of the ghost to appear forward -- usually an inch or two above the creepy cloth.
Now add a glue dot to the back of the ghost and push it up against the jar firmly. You might need to 'fluff" out your ghost after this.
Add a couple more glue dots to the center of the inside of the lid and add a flickering light.
Turn on the light and screw on the lid.
Now you've captured a spooky ghost in a jar to display on the mantle or your tablescape!