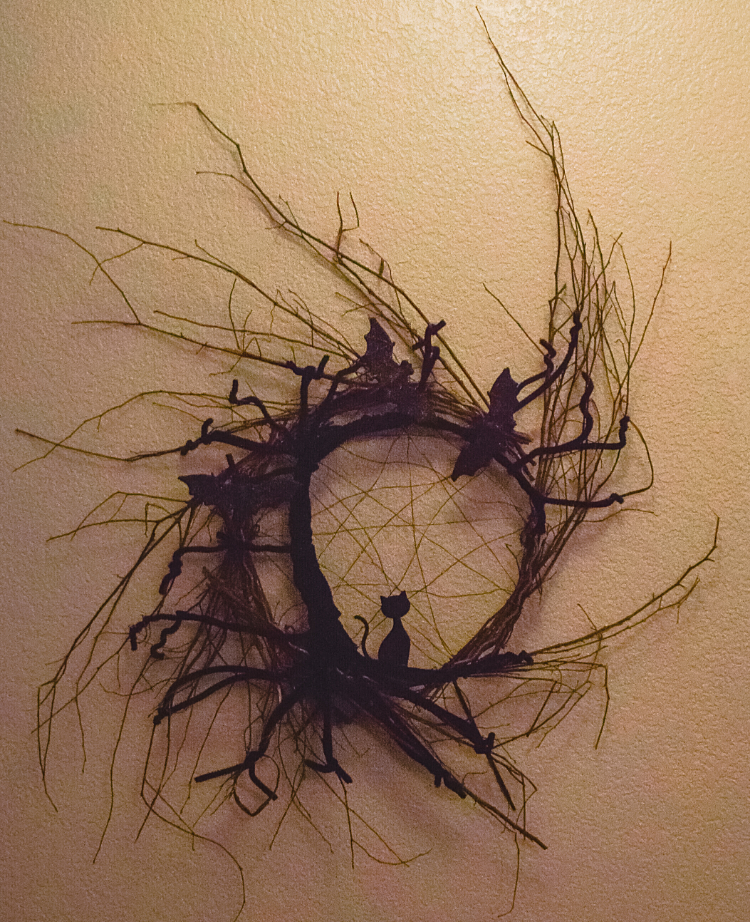
Have you ever made a silhouette wreath? I never thought of making one until I saw one on eBay. This silhouette Spooky Tree Halloween Wreath was really easy to put together. I am so happy with how it came out. This post contains affiliate links.

Table of Contents
What is a Silhouette Wreath?
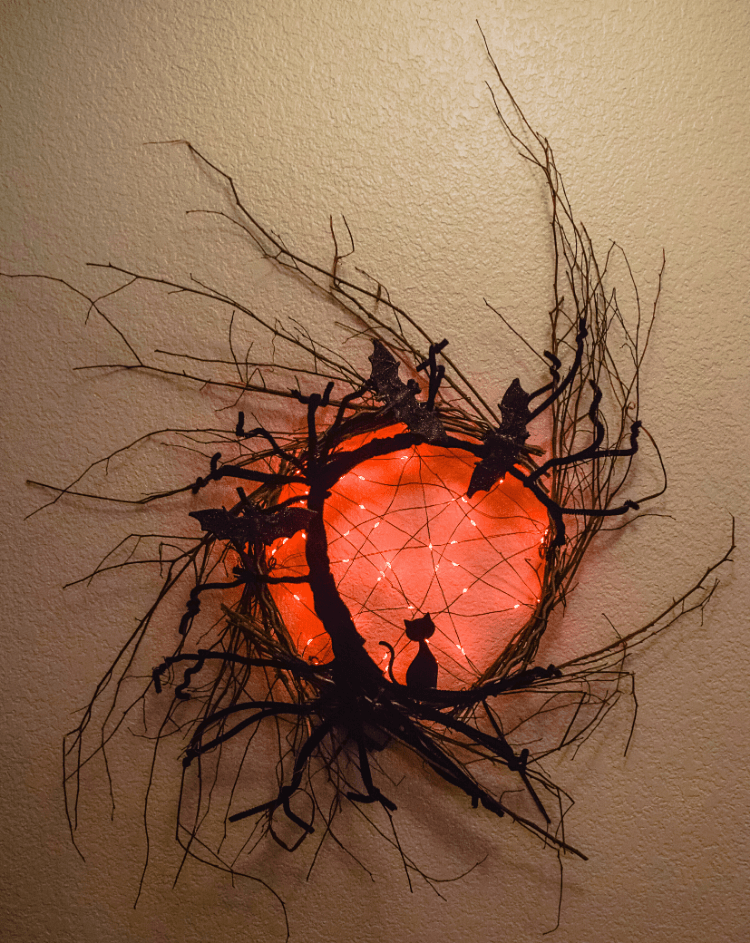
This wreath basically works with back lighting to give a silhouette look. There are small fairy lights strung at the back of the wreath to light up the spooky setting.
What do you use to make a Spooky Tree Wreath?
I got most of my supplies from Michaels craft store. I did have the shrink plastic from my Silhouette supplies.
The black cat was a little tricky because I needed something sturdier than card stock or a sticker. I tried to find a miniature black cat, but I just couldn’t find the right one. I decided that shrink plastic would be the best choice as it will hold up well to being on the front door.
I got a black cat silhouette from Canva and turned it into an SVG file to print out. You can download your own copy below to print out on shrink plastic and have your cutting machine like Silhouette or Cricut cut it out.
Get the Download
How do you make a Spooky Tree Wreath?
Originally when I planned to make this wreath, I was going to spray paint the wreath black. Then, I decided it would look better with a natural wreath. You might prefer a black wreath or a natural-colored one.
When I picked up the fairy lights, they had purple and orange and a set that changes colors to both. I thought that orange was the best choice for more of a sunset look for the silhouette. These are tiny, tiny fairy lights that have 50 lights on a battery operated string. These are strung back and forth on the back of the wreath. The set I found at Michaels has 7 or 8 different settings from flashing to waves to glowing. I love how you can change the settings with the click of the switch.
The tree is made from black pipe cleaners twisted together and curled around the wreath.
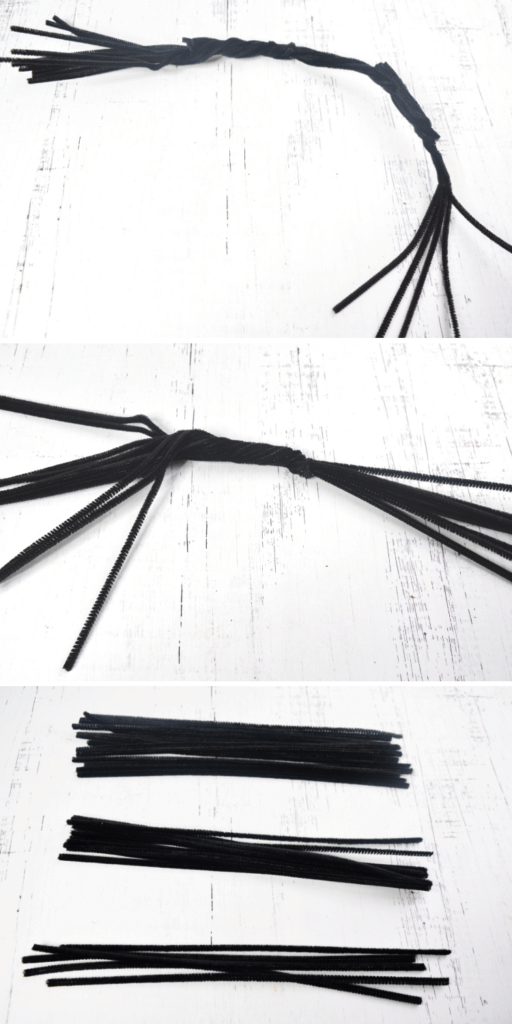
I also picked up some small glitter bats with alligator clips from the Dollar Tree. I attached those around the tree as if they were circling and old dead tree.
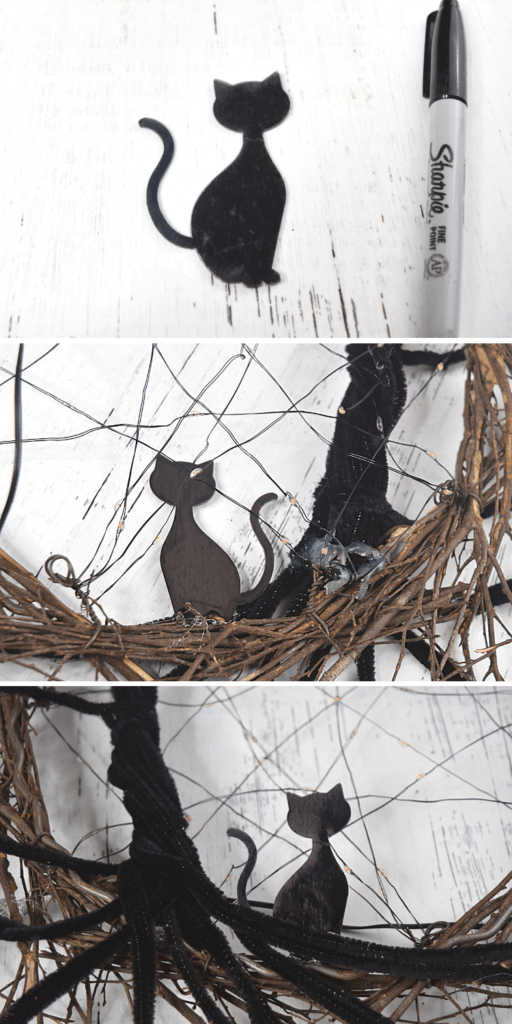
The black cat shrinky dink I hot glued next to the tree. I recommend going over the shiny side with a black Sharpie to make it even blacker. I attempted to use the Black Sharpie on the printed side, but it looked better after using it on the smooth, shiny side.
How do you string the lights on a silhouette wreath?
I waited to string the lights on the back of the wreath after I had attached everything else. They are mini fairy lights, so I didn’t want to chance ruining them with hot glue.
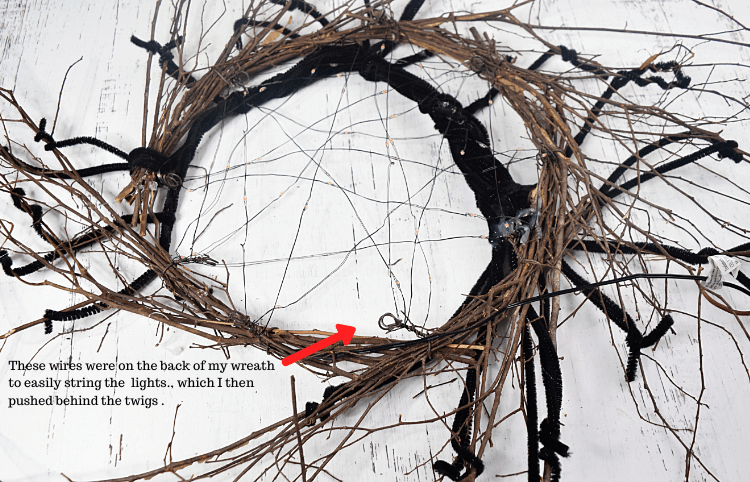
My wreath had these wire loops on the back. (I got this primitive wreath at Michaels, so you might find one there with these wire loops, too). Those wire loops made it very easy to string the lights and wrap around the loops securely.
Once I was happy with the placement of the lights, I attached the battery back with zip ties behind the wreath and hidden behind the base of the tree.
More Halloween Wreath Ideas
- Black Cat Wreath
- White Pumpkin Ghost Wreath
- Halloween Bone Wreath
- Spider Web Wreath
- Beware of Monster Wreath

Halloween Spooky Tree Wreath
Materials
- 8.5 x 11 inch Shrink Dink plastic
- 1 package of black pipe cleaners
- 1 package of Dollar Tree glitter bats clips (4 pk)
- 1 12-16 inch wreath
- String of 50 tiny fairy lights in purple or black (battery powered)
- 3-4 black zip ties
Tools
- Ink jet printer
- Cricut or Silhouette cutting machine
- Hot Glue Gun
Instructions
- Print the SVG image on shrink plastic and cut it out on a cutting machine.
- Shrink the shrink plastic in the oven. When it comes out of the oven, press it flat for 5-10 seconds with something flat like a stamp block.
- Spray paint the wreath, if desired, and allow to dry for 24 hours.
- Begin twisting 14 pipe cleaners and creating the tree roots and base of the tree.
- Add 8 more pipe cleaners twisted into the top to continue creating the tree and branches.
- Add 5-6 more pipe cleaners to round the tree and create more branches.
- Attach the tree roots by twisting around the bottom of the wreath's twigs on the lower left side.
- Keep working your way around the tree and gently bend and round it to the right.
- Add additional pipe cleaners to fill out the tree as needed.
- Begin hot gluing the pipe cleaners to each other and to the wreath to secure the tree.
- Once you are happy with the tree and it's glued in place, next hot glue the bat clips around the upper part of the tree to look like they are perched or circling the tree.
- Determine where to place the black cat next to the bottom of the tree. Then, hot glue it in place.
- Flip the wreath over and begin stringing the lights and wrapping the lights to small sections of the wreath. My wreath had small wires holding the twigs, so I wrapped the lights around those as I strung them back and forth and up and down.
- Make sure the lights are secure and work correctly before using zip ties to attach to the battery pack to the back of the wreath hiding it near the base of the tree.
- Hang the wreath and light it up.
