
This is totally not a sponsored post for Dollar General, but it does contain affiliates links for the supplies used. I just have to show you what I found at the Dollar General the other day. I was walking to the back of the store for paper towels, and I happened to walk down the outdoor aisle. Oh my gosh! They had Disney garden decor from flower bed decor like the Mickey and the Seven Dwarfs to planters made to look like Mickey or Minnie’s pants. They were all so cute!
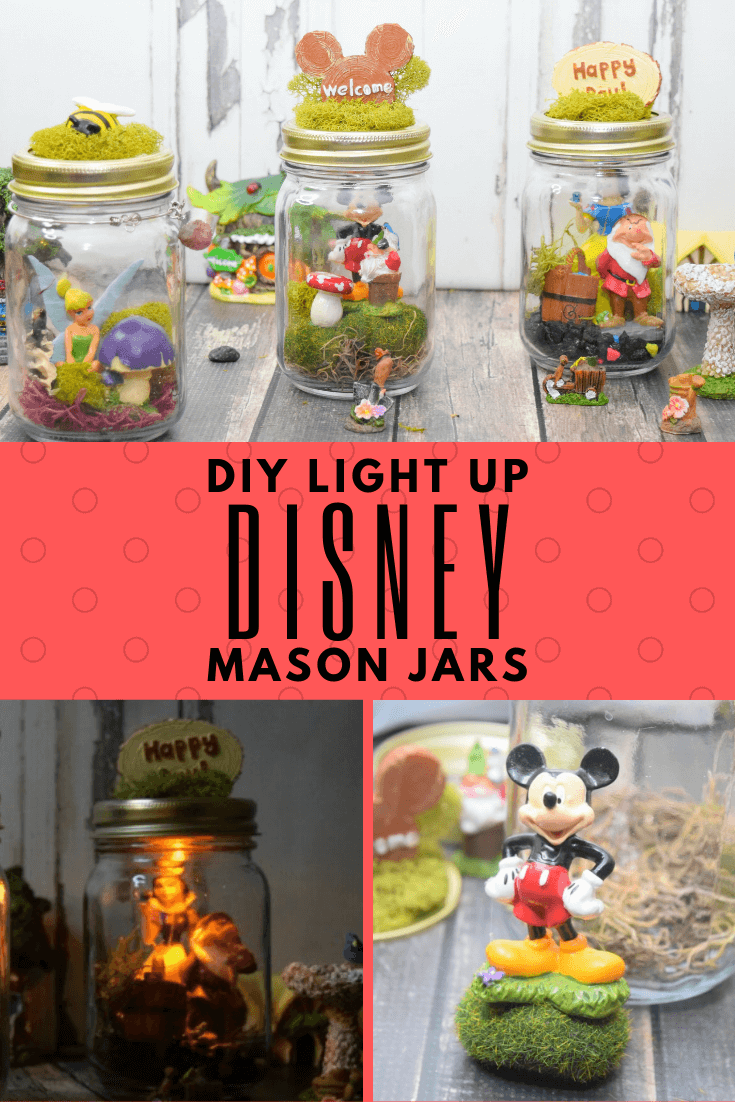
Then, I noticed they had Disney fairy garden kits with Mickey and Tinkerbelle and even Grumpy! I had to buy them. I used part of the kits for something I can’t wait to show you. And…I used the rest of the kits to make Disney Light Up Mason Jars! My daughter could not wait to use these for her nightlights.
In addition to the kits, they also had little fairy garden figurines like Snow White and Mickey and Minnie. I’m sure the checkout man thought I was a little Disney crazy as I had one of everything.
Table of Contents
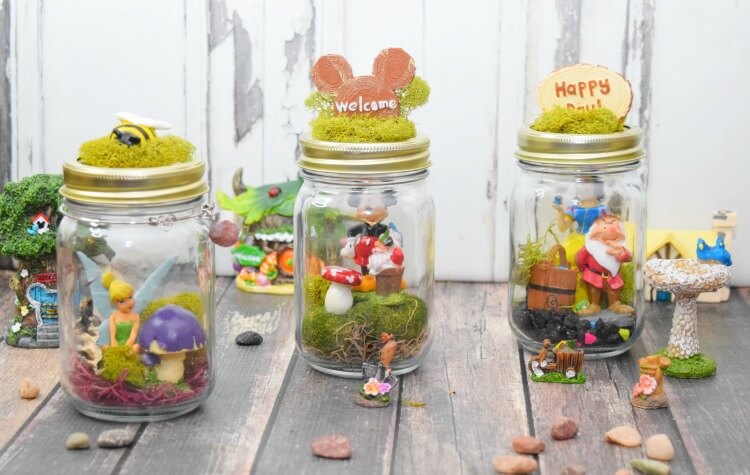
DIY Light Up DISNEY Mason Jars
Supplies:
- 3 pint mason jars
- flickering submersible LED lights
- bag of moss variations
- moss covered rocks
- glue gun
- glue sticks
- wire cutters
Directions:
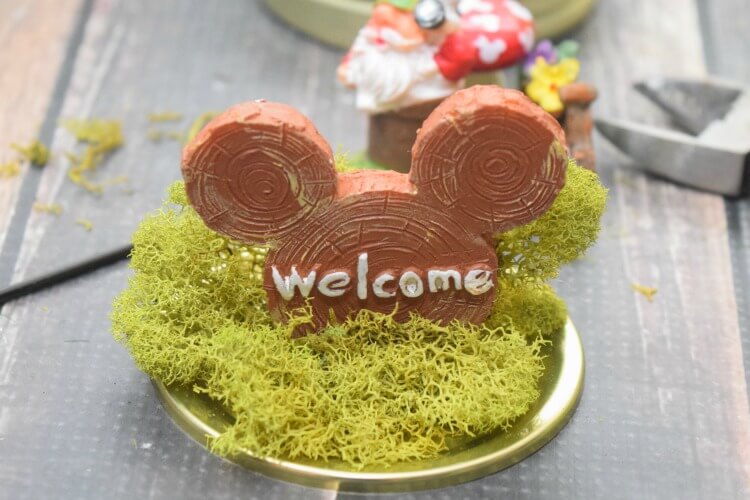
Each of the Disney kits came with a wire pick like a bumblebee or a cute Mickey Ears sign. I cut the wire completely off and used each of these as a lid topper.

Making the Lid Topper
I squirted a hefty amount of glue and held the piece in place as it cooled off. Then, I added some moss around the front and back with a little dab of hot glue here and there to hide the hot glue holding the big piece on top.
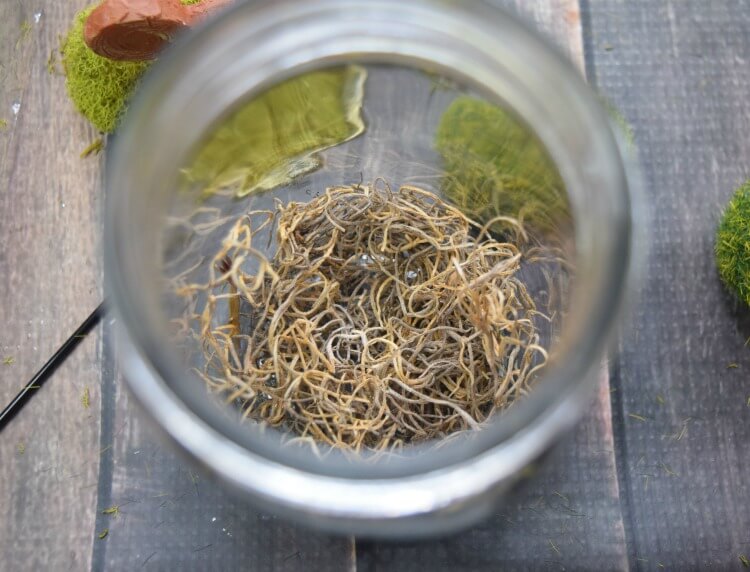
Next, I flipped the lid upside down and hot glued the light in place. These lights are easy to turn off and on by just screwing it tight or loose, so you can hot glue the bottom and still turn it off and on easily.
Creating the Mason Jar Garden Scene
Creating your scenes is totally up to you. For some, I started with a base of Spanish moss. For Snow White and Grumpy I decided to use black aquarium rocks that had little bits of neon rocks to signify the mines with the jewels in them.
Then, I just played around with positioning the characters. For some I hot glued the characters to moss rocks. For others, I just hot glued them to the moss.

Once I was happy with the positioning, I added bits of different types of moss around things. Then, it was time to turn the lights on, close the lids and set them on display.
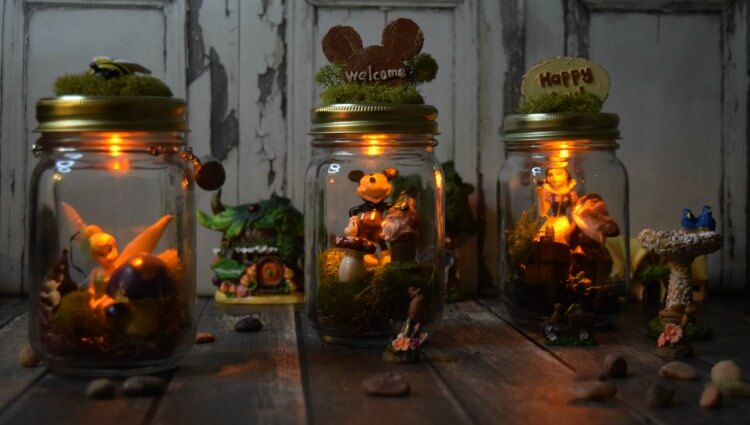
I’m so happy with how these came out. They’re the perfect nightlight for any Disney fan!
More Light Up Mason Jars
- DIY Light Up Gnome Mason Jars
- Light Up Mason Jar Aquariums
- DIY Mercury Mason Jar Votives
- Make a Mason Jar Snow Globe
- Mini Mason Jar Christmas Ornament