
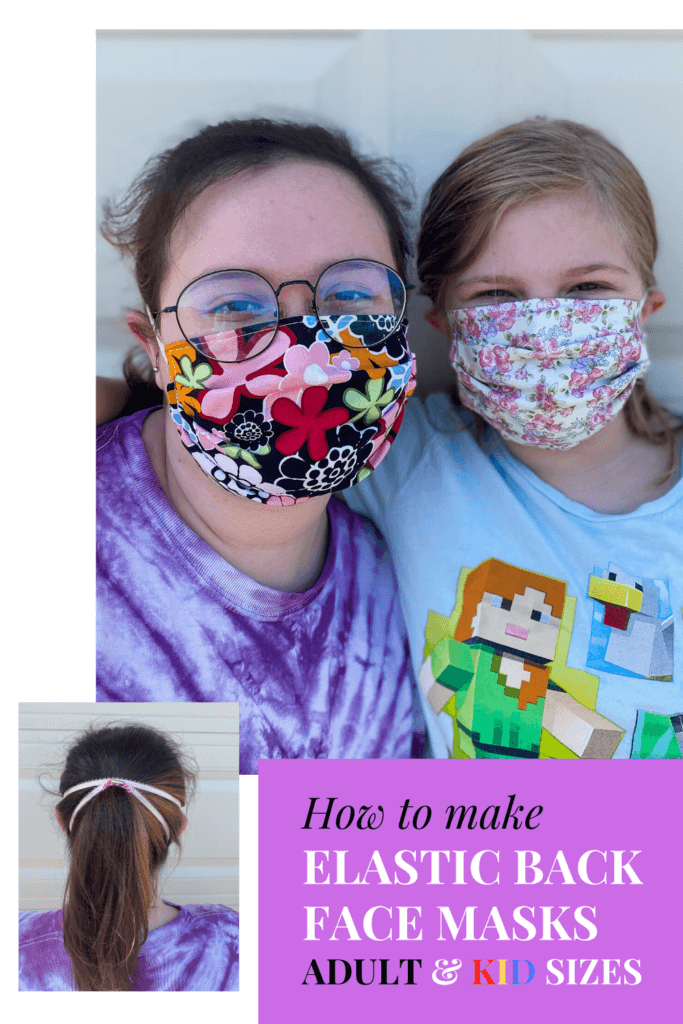
A few weeks ago we gave you a pocket face mask for both kids and adults that has become very popular. (Thank You for that!) It can be made with ties or elastics. But, I’ve seen people complain that ties are hard to do and ear elastic can hurt, so I’ve come up with a second face mask with elastic that goes around the back of the head – Elastic Back Face Masks. This post does contain affiliate links.
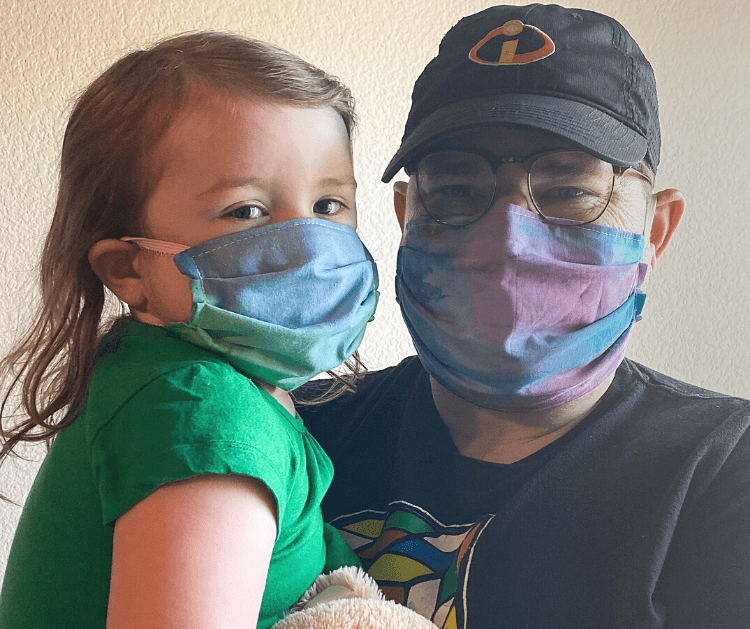
My husband is the one who goes and picks things up for us. He used to wear one of my tie-on face masks, but I switched him to this elastic-back face mask. It makes it so much easier for him. He can wear it wrapped around at his neck and just pull it up for when he needs to be covered instead of spending time retying the mask multiple times.
Table of Contents
How hard is it to make an Elastic Back Face Mask?
This one is very quick to put together. It doesn’t require you to get up back and forth from the sewing machine. You can get everything ready, then sew all the parts and have it done.
It has elastic that goes all the way around the back of the head. I find it easier to keep this one on a child, especially a young child. If you have long hair or if you have a daughter, a ponytail is perfect to add a little extra hold to the elastic at the back.
How to make a Face Mask Fitted Nose Piece
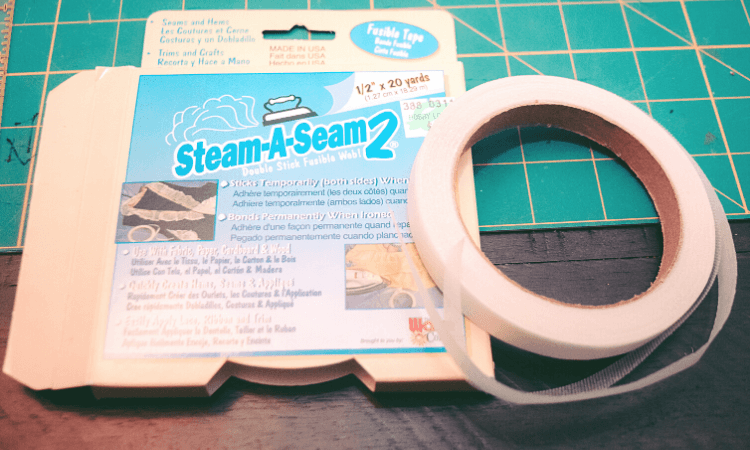
This tutorial will show you an easy way to make a moldable nose piece using jewelry wire and fusable webbing (Steam A Seam). I use a roll of 1/2 inch Steam a Seam 2. I use the regular and not the “lite” because you want a good hold on the wire piece you’re creating.
You can also completely leave the moldable wire nose piece out. It won’t be as fitted at your nose, but it will work just fine.
What kind of fabric do you use for a face mask?
Quilters say batik fabrics are the best because they are the most tightly woven, then quilting cottons are next best. Try to avoid “cheap” quilting cotton like what is sold at Walmart as those are typically greige good, which are the first run through of a print of fabric and are a lower quality fabric. I would also recommend bamboo fabric or cotton flannel.
What kind of elastic do you use for this elastic-based face mask?
I like 1/4 inch, 3/8 inch, or 1/8 inch elastic. Thinner elastic like a thin cording elastic, as it will be very hard to attach it securely and zigzag the back of it closed.
Don’t use clear elastic. It seems to tear so easily, and I don’t think it will hold up to washing very well. I also would not recommend something thicker like 1/2 inch elastic. The wider the elastic, the stiffer it is and the less stretch it has.
I like to use picot-edged elastic best. This is like lingerie elastic, like what you see on the edge of panties. It’s about 3/8 to 1/4 inch wide. It’s a bit softer than typical braided elastic, which is why I like it. Plus, it comes in pretty colors. You can see it in a pale pink down in the tutorial on two of the photographed masks.
Download the Cutting Guides
This cutting guide has multiple sizes. There are two sizes for adults and two sizes for kids. I’d recommend the regular adult size for most people, the petite adult for someone with a small face or a young teen. I’d recommend the regular child size for tweens and the small child size for toddlers.

Back Elastic 2-Layer Face Mask for Kids & Adults
Materials
Tools
- Sewing Machine
- Iron
- Scissors
- Wire Cutters
Instructions
Use the cutting guide based on the size you are making.
Cut 2 squares of fabric.
Cut 2 strips of fabric.
Cut 2 elastic pieces.
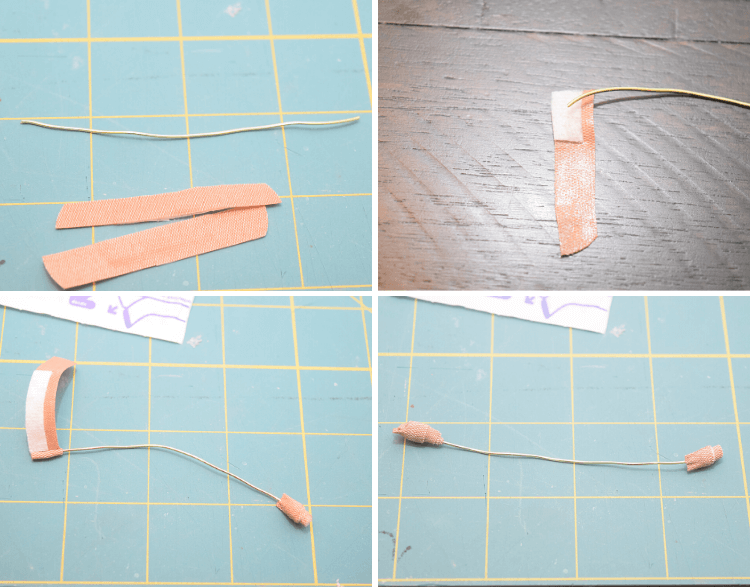
Cut 1 piece of wire and straighten it with your fingers as much as possible.
Take one Band-Aid and cut it into half lengthwise. Then, cut it in half again on the width, so that the Band-Aid is in four pieces.
Take one of those four pieces, wrap one end of the wire with the bandage padding above the end of the wire, like the photo, and wrap it to hide the edge of the wire.
Do the same for the other side of the wire.
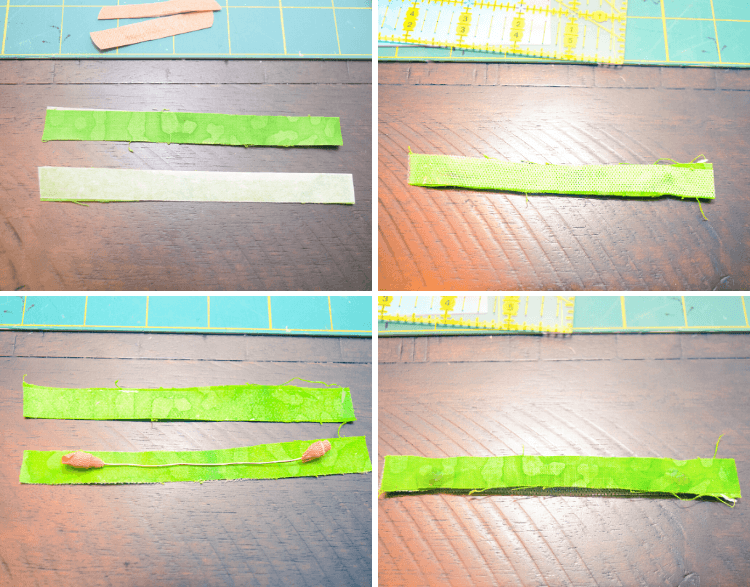
Lay the two 1/2-inch strips of fabric with right sides up.
Measure out 3 pieces of Steam a Seam 2 the same length of the strips. One for each piece and a third for attaching to the face mask.
Fuse a piece of Steam a Seam 2 to the right side of both strips with the iron.
Take one strip with fusible side facing up and lay the Band-Aid wrapped wire in the middle of it.
Lay the second strip with fusible side down on top and line them up.
Iron them together to fuse the pieces as one nose piece.
Take the third Steam a Seam 2 piece and lay it on top of the nose piece and press so it sticks.
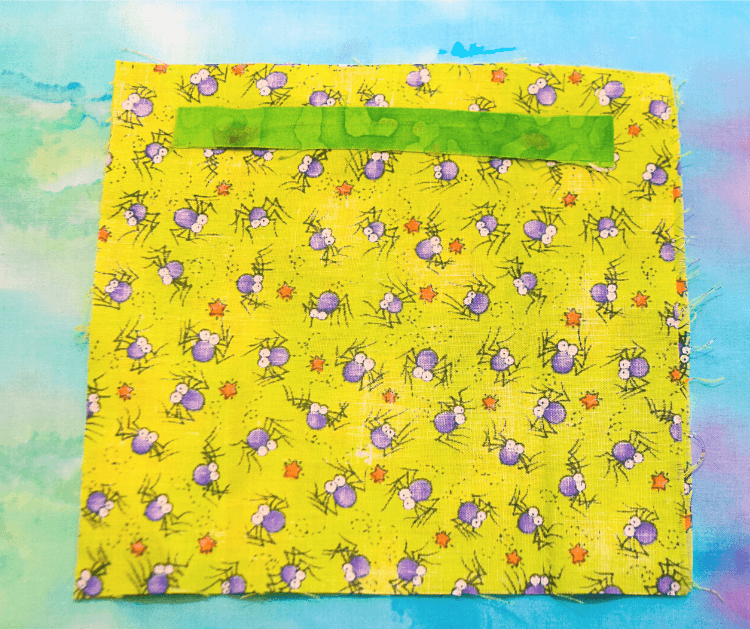
Take the face mask square for the outside piece and lay it wrong side up.
Measure down about 3/4 inch from the top edge, centered, and lay the nose piece with the fusible side down and iron to fuse together.
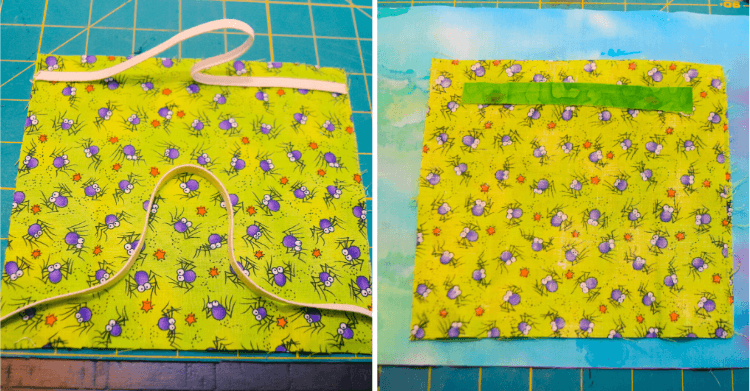
FOR ALL MASKS BUT TODDLERS: Lay one piece elastic at the side edge, just 1/2 inch down from the top edge on both sides. Make sure it's not twisted.
Do the same for the second piece of elastic, just 1/2 inch above the bottom edge on both sides. Make sure the elastic is not twisted.
FOR TODDLERS ONLY: Lay one piece elastic at the top edge, just 1/2 inch from the side edge, on either side. Make sure it's not twisted.
Do the same for the second piece of elastic on the bottom, just 1/2 inch from either side on the bottom edge. Make sure the elastic is not twisted.
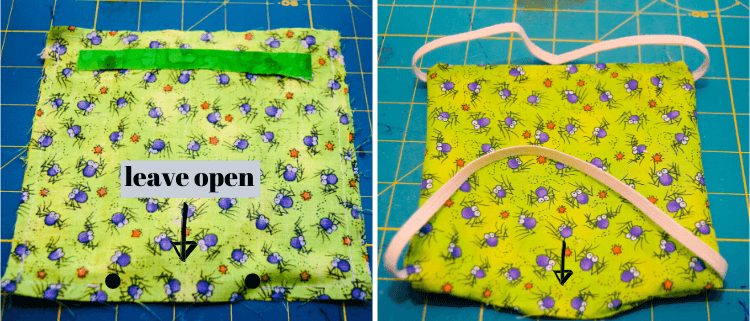
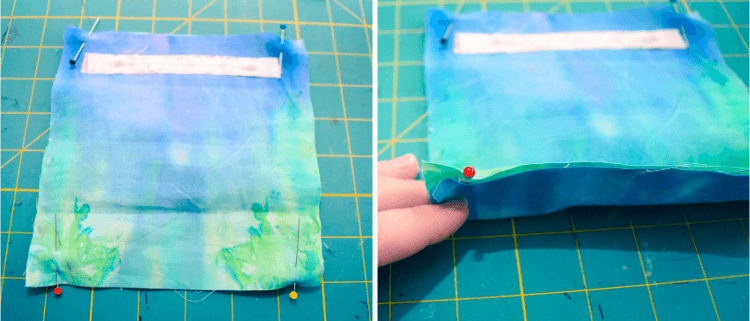
Gently lay the second square on top of this and pin the elastic in place at each four spots.
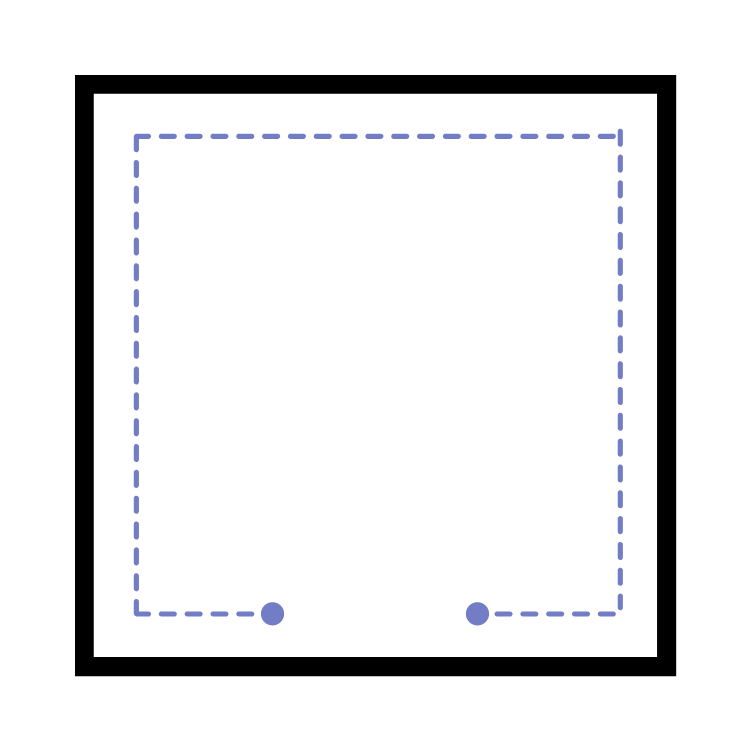
Begin sewing at the dot shown on the cutting guide, go all the way around, and finish at the second dot.
As you sew, back sew over each elastic before continuing on to make it secure.
Use the small hole to flip right side out and push out corners.
Press the mask flat.
Fold mask in half and press.
Fold the top to the center and fold the bottom to the center and press.
Use those creases to create three pleats at each side on the front of the mask. Pin the pleats in place.
Make sure to keep the elastic out of the way.
Start sewing at the lower right corner of the mask, making sure to catch the opening. Then, continuing sewing and topstitch all the way around.
As you topstitch, back sew over each pleat to make it secure.

Orient the elastic so it's at the back of the mask.
Find the center of each elastic piece, and pin them together.
Sew a small zigzag stitch at the point in the middle where they are pinned, for about 1/2 an inch.
Download this Sewing Pattern with Cutting Guides & Instructions FREE
Other Sewing Patterns
- Make a warming Rice Bag
- Sew an Origami Bag
- Sew a warning Corn Bag
- Make a Lovey for Baby
- Make a Large Dog Bed