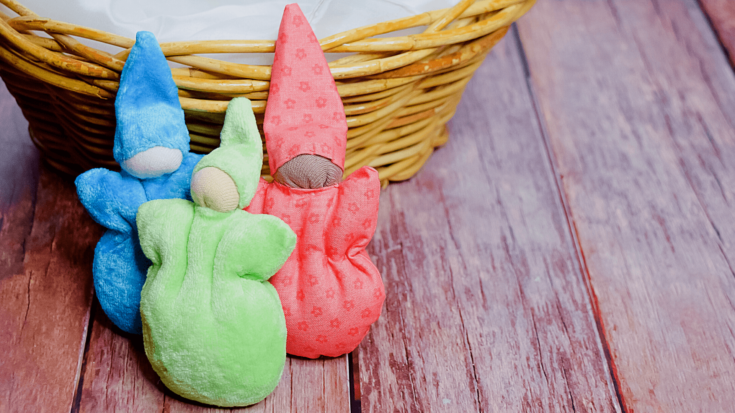
Do you children love tiny toys? Each of mine have always gravitated to small toys to keep in a pocket. My girls especially love tiny cloth pocket dolls.
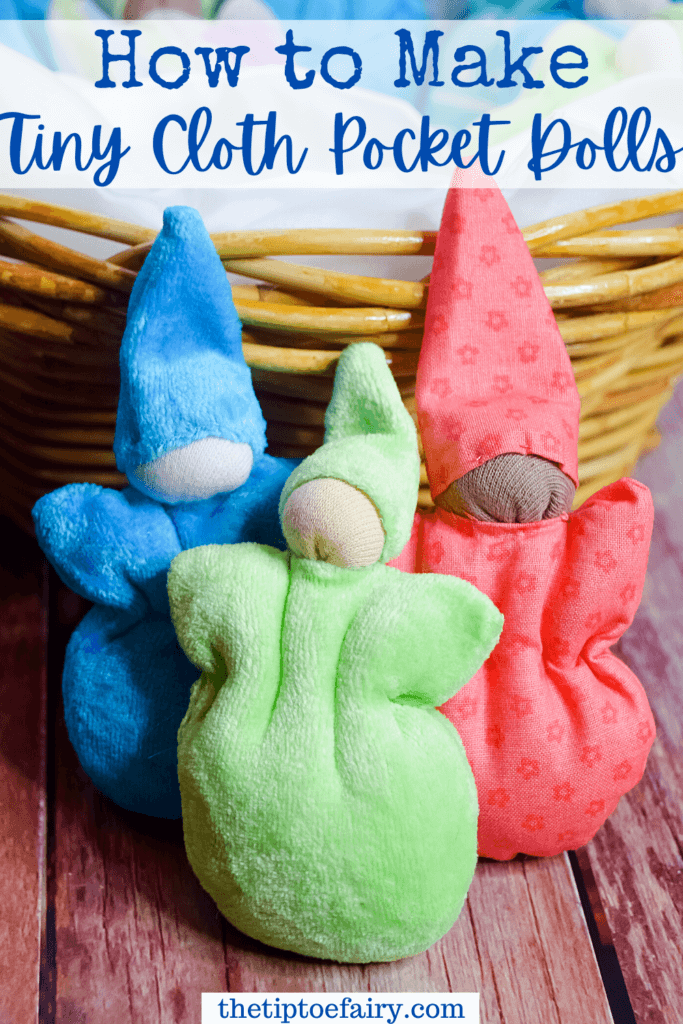
These are soft cloth babies I make in a Waldorf style. You can easily turn them into gnomes or fairies by adding a little pair of felt wings to the back or adding a little beard like this Wee Santa doll ornament.
Table of Contents
What do you need to make these Tiny Little Pocket Dolls?
One of the things I love about these dolls is that they take just fabric scraps to make. They can be made out of most fabrics. I make them from quilting cottons, soft flannels, as well as cotton velours, and sometimes even minky or flurr fabrics.
You’ll need the pattern, which you can download below. You’ll also need some stuffing and some string or thread to tie the heads closed. You can use polyfil or wool stuffing or even wool roving. I prefer wool as it holds the body temperature of your child after it’s been in their pocket.
I like to sew the body and hat using a sewing machine, but they can also easily be hand sewn with a needle and thread.
That’s all you need! You don’t need to even make faces on the dolls, which is one of the things about Waldorf dolls. This way your child can just imagine all the facial expressions for their little doll as they play.
Get the Sewing Pattern
How do you make these tiny cloth pocket dolls?
I usually do this assembly line style and make 3-5 dolls at the same time. So, I’ll cut out 3-5 doll bodies, hats, and heads all at once. Usually when we give these as gifts or I’ve sold them at craft fairs, I make a batch of 3 and put them together in a drawstring bag.
First, cut out the pattern pieces and then cut them out of fabric.
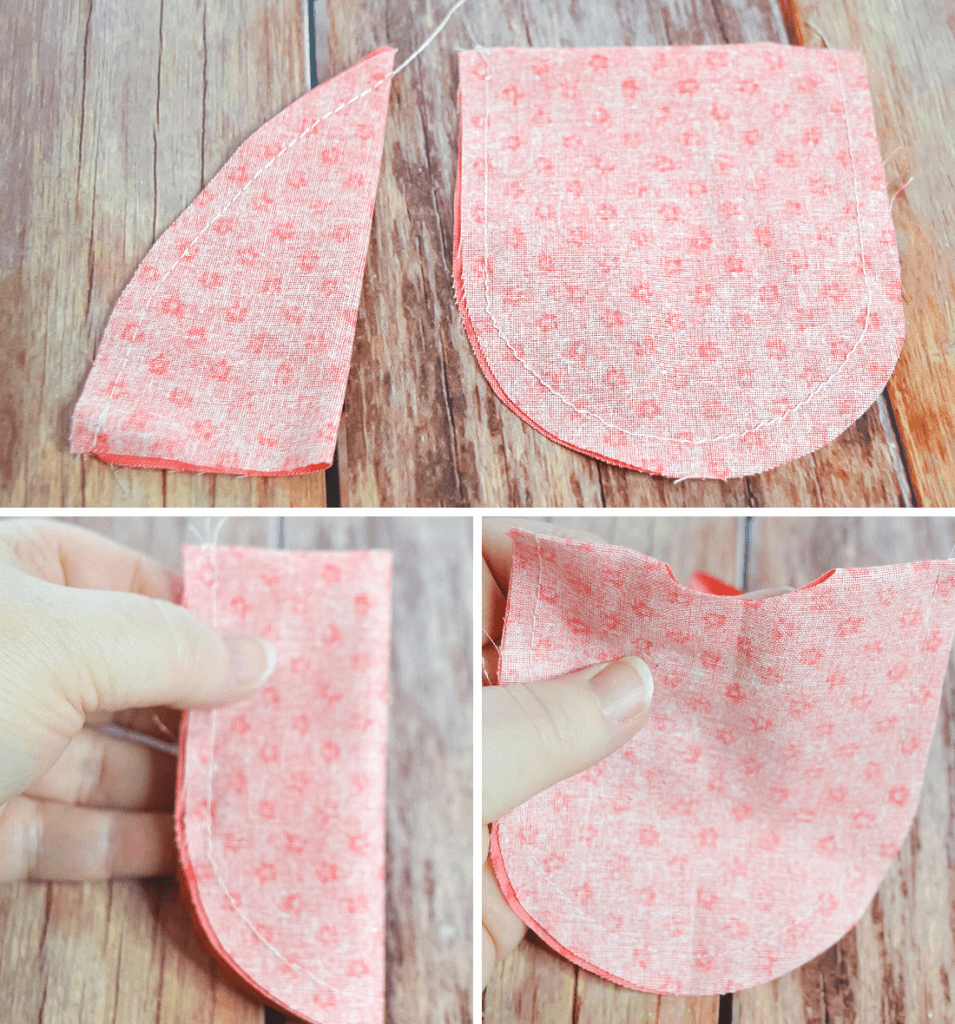
Next, fold the body with right sides together and sew along the entire rounded edge. Then, fold the hat with right sides together and sew the hat closed.
Using the little dotted lines on the body pattern piece, cut a small hole in the center of the top of the body. Use that hole to flip the body right sides out.
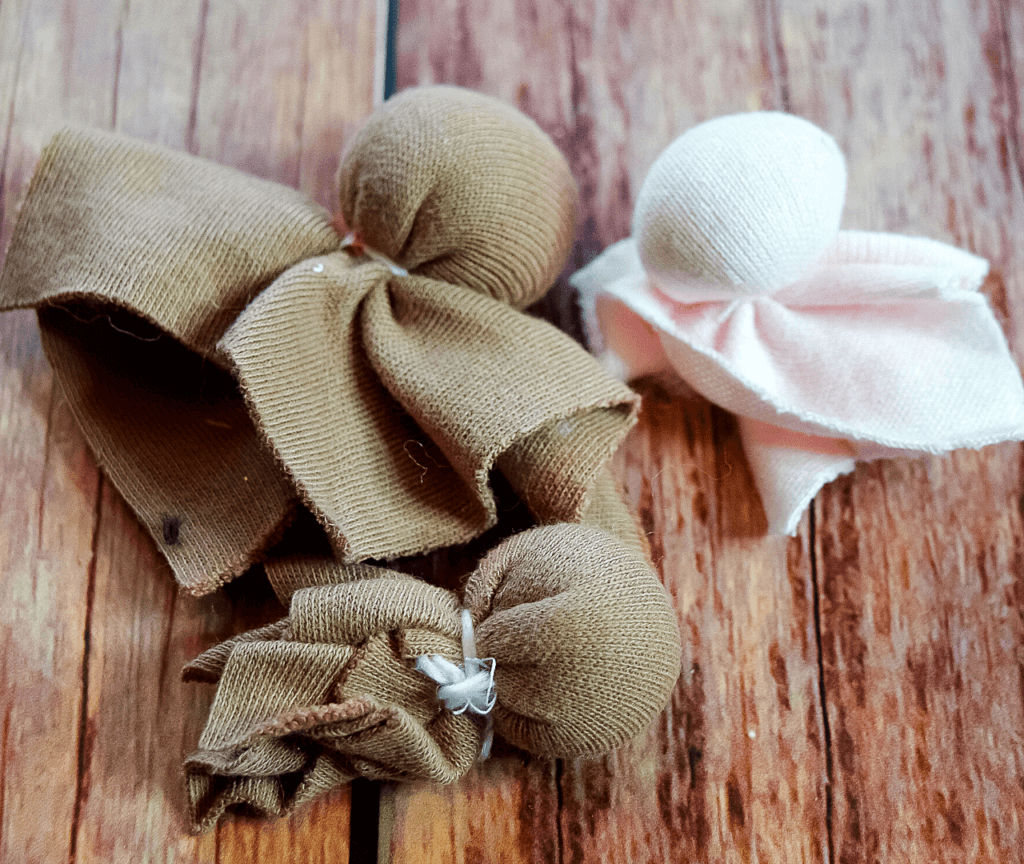
Now it’s time to make the heads. I take a big pinch of stuffing, place it in the direct center of the skin tone knit, and then gather up the edges and wrap string around the head and tie it closed.

Then, if there is a lot of bulky from the raw edges, I’ll cut those down a bit like the photo.
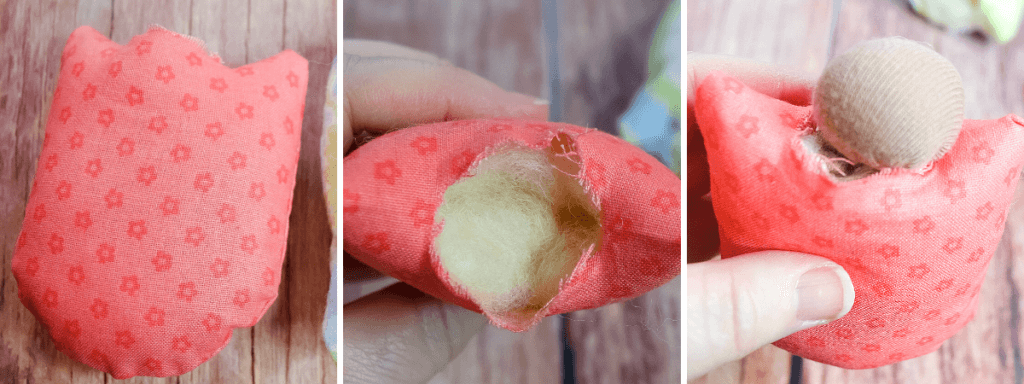
Stuff the body with stuffing so that’s medium firm – not too squishy and not too firm. You want to leave a little room at the top for the raw edges of the head to fit in comfortably.
Now insert the head into the top of the body.
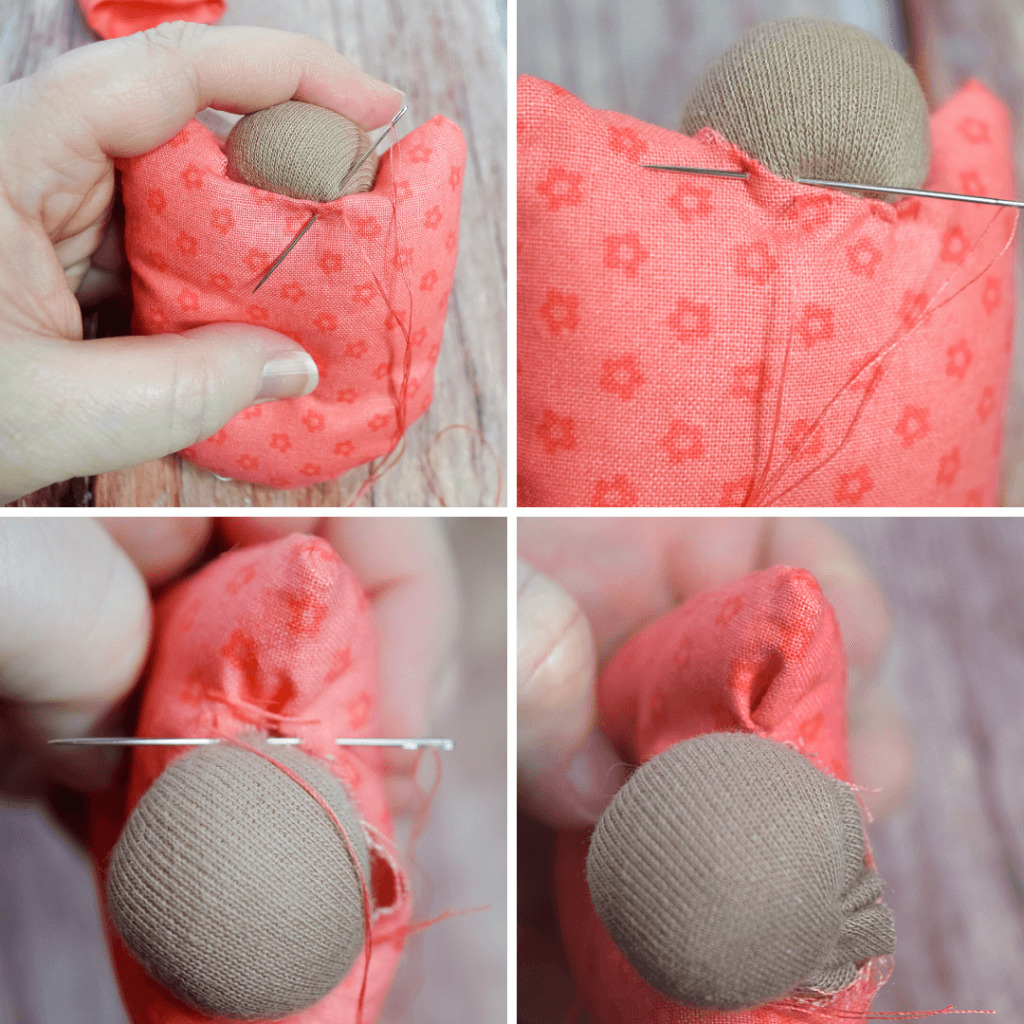
Insert the needle at the bottom of the head. Fold the raw edge of the neckline inward and push the needle out that folded edge of the neckline of the body. Sew a whipstitch around the neck, as you fold the raw edge of the neck of the body down under the head each time you’re inserting the needle into the bottom of the edge and out the neckline.
At the side seam, while sewing the neck, add a couple gathering stitches to the shoulders and pull it tight. Then, finish the back side of the head.
Do the same for the second shoulder before tying off the thread.
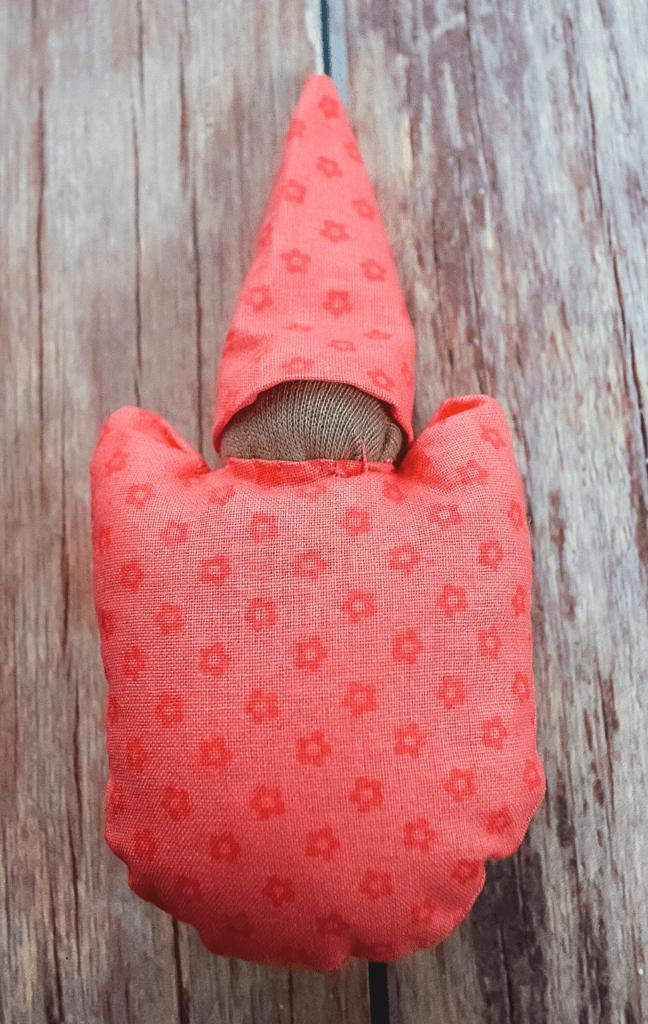
Next, it’s time to attach the hat. Fold the raw edge of the hat inward until the hat fits snuggly on the head.
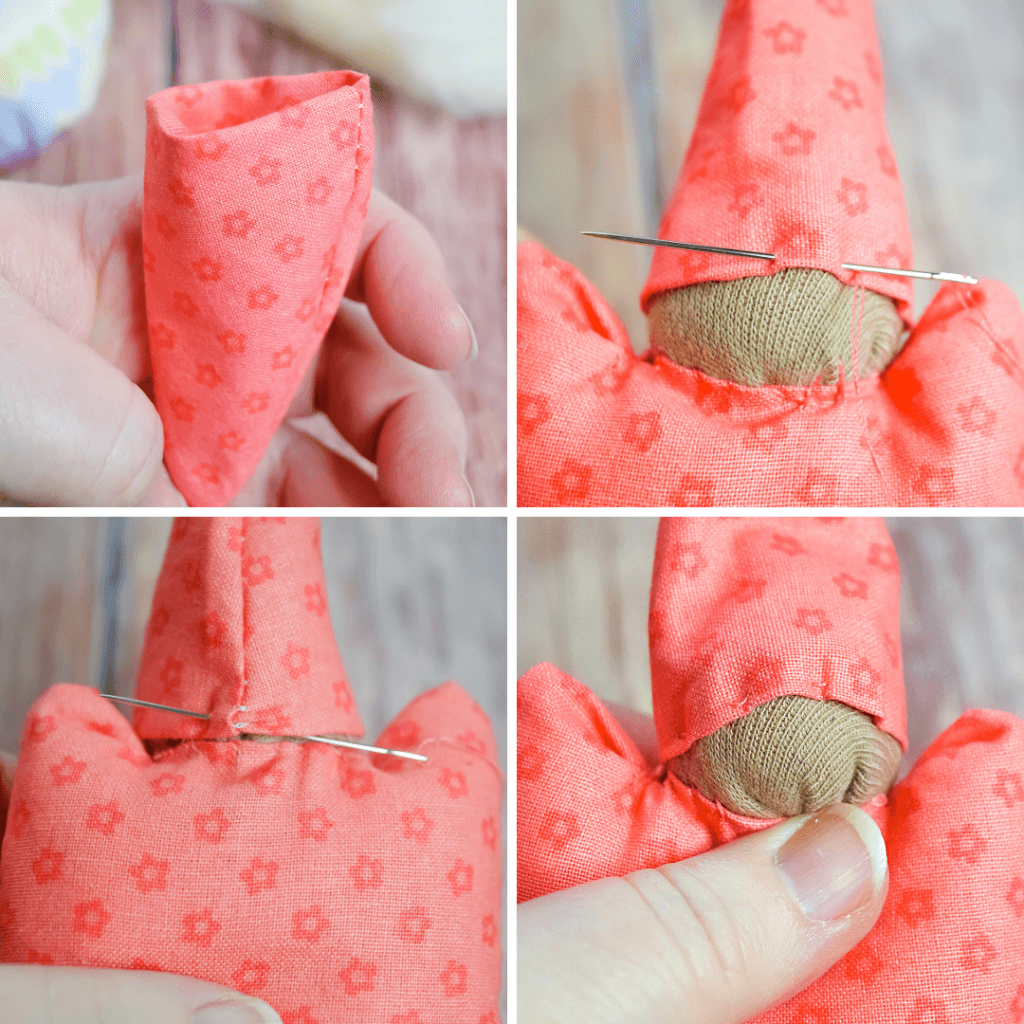
Then, sew a straight stitch around the whole hat and tie off the thread.
Lastly, add a gathering stitch around the middle of the doll’s body. Start at one of the side seams.
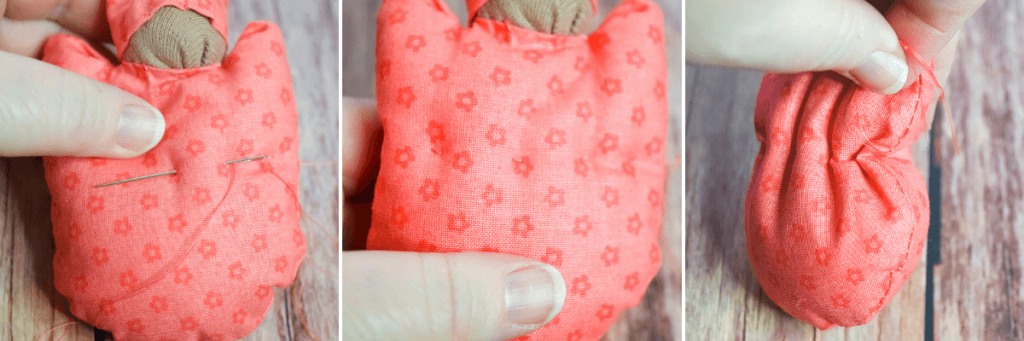
These will be long stitches, where you’ll grab a little stuffing under the needle as you sew, so that when it’s time to pull the threads tight and knot, it gives a nice little waist for the doll. Trim the threads.
Now you’re done!
Buy the Pattern + Instructions in one Download
More Sewing Projects
- Sew a Snuggle Bunny Lovey Doll
- Swaddle Baby Dolls
- Sew a Lovey Doll
- Make an Origami Bag
- DIY Wipe Off Baby Changing Pad
- Tiny Santa Christmas Ornaments
Tiny Cloth Pocket Dolls
Materials
- 4 x 4 inch scrap of skin tone knit
- 10 x 10 inch piece of fabric - quilting cottons, flannel, velour, baby fabrics
- neutral thread (or thread to match fabric)
- stuffing (polyfil or wool)
- string
Tools
- sewing needle
- scissors
- sewing machine
Instructions
- Cut out the pattern pieces and then cut them out of fabric.
- Fold the body with right sides together and sew along the entire rounded edge.
- Fold the hat with right sides together and sew the hat closed.
- Using the little dotted lines on the body pattern piece as a guide, cut a small hole in the center of the top of the body. Use that hole to flip the body right sides out.
- Take a big pinch of stuffing, place it in the direct center of the skin tone knit, and then gather up the edges and wrap string around the head and tie it closed.
- If there is a lot of bulky from the raw edges, cut those down a bit like the photo.
- Stuff the body with stuffing so that's medium firm - not too squishy and not too firm. Leave a little room at the top for the raw edges of the head to fit in comfortably.
- Insert the head into the top of the body. You're going to sew a whipstitch around the neck, as you fold the raw edge of the neck of the body down under the head.
- Sew a whipstitch around the neck as you fold the raw edge of the neck of the body down under the head.
- At the side seam, while sewing the neck, add a couple gathering stitches to the shoulders and pull in tight. Then, finish the back side of the head. Do the same for the second shoulder before tying off the thread.
- Fold the raw edge of the hat inward until the hat fits snuggly on the head.
- Sew a straight stitch around the whole hat and tie off the thread.
- Add a gathering stitch around the middle of the doll's body.
- Start at one side seam. These will be long stitches, where you'll grab a little stuffing under the needle as you sew, so that when it's time to pull the threads tight, it gives a nice little waist for the doll.
- Now you're done!