
This is a very easy shopping cart cover / highchair cover that you can make it without a pattern. And, that’s the kind of sewing I like — no patterns! This post contains affiliate links.
A word about hardware for the shopping cart cover. I get my hardware and webbing at Strapworks. They have great prices and fast shipping.
Table of Contents
What do you need to make this Shopping Cart Cover?
- 1 1/4 yd polar fleece
- 1 1/2 yd of any other fabric – (I used stretch twill for the one shown – you can use knit, wovens, whatever should work just fine. If you use a stretch fabric, make sure you lay it out to stretch the same way as the under layer of polar fleece.)
- 1 1/3 yd of 3/4 inch webbing – Strapworks.com – great selection and fast shipping
- 3-way safety buckle – also purchased at Strapworks.com
- 2 yds of 3/4 inch of 1 inch non-roll elastic
- 1 yd of plush foldover elastic OR 1 pkg of extra wide double fold bias tape
Download the Files
How do you make the Shopping Cart Cover?
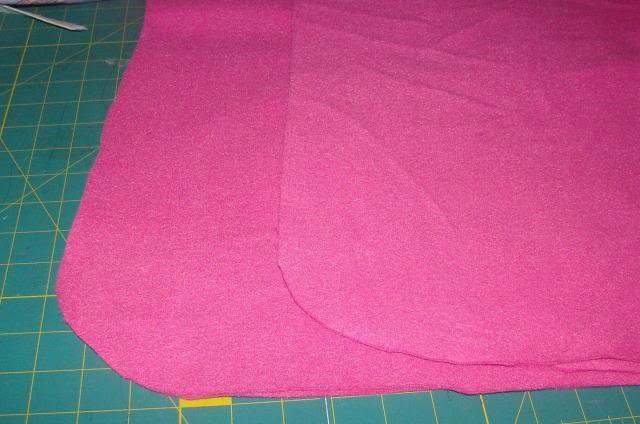
Cut both pieces of fabric approximately 42 x 42 inches in size and round the edges as shown.
Create a leg opening template about 5 x 5 inches in size and round the edges.
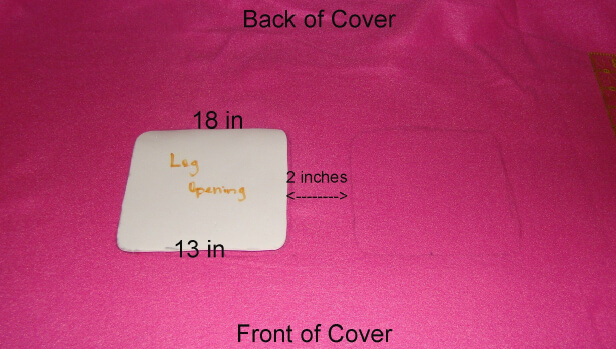
Find the center of the fabric from the top front of the cover on the fleece and measure about 12-14 inches below the front of the fleece piece.
Space the leg openings 1 inch spaced on either side of this, so that there will be a 2 inch space between the leg openings as shown.
At these two spots, put the top edge of the leg template and trace as shown.
I used a measurement of 13 inches as shown. Therefore, from the front of the cover, the top of the leg opening will be 13 inches from it and the end will be 18 inches from the top.
**The front of the cover means the part that will be up near you on the shopping cart.
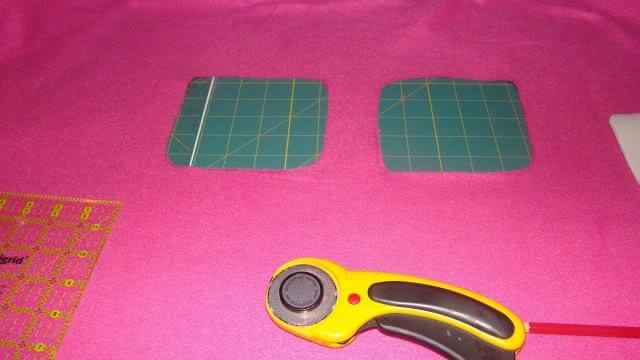
Cut out both leg openings.
With right sides together, layer the woven fabric and fleece fabric. With the fleece layer on top, use it as a pattern to round the edges of the woven fabric and cut off any excess to make them exactly the same.
Now, use the fleece leg openings as a template, pin together, and cut them out of the top layer fabric.
Keeping right sides together, sew around the entire cart cover, leaving a space about 3-4 inches in size in the middle of the top of the front to flip it right side out. I used a serger to do it quickly. If you don’t have a serger, use a straight stitch length of 4.
Turn the cover with right sides out and sew a casing around the entire outer edge, approximately 1 inch if using 3/4 inch wide elastic. (If using 1 inch wide elastic, sew it approximately 1 1/4 inches.)

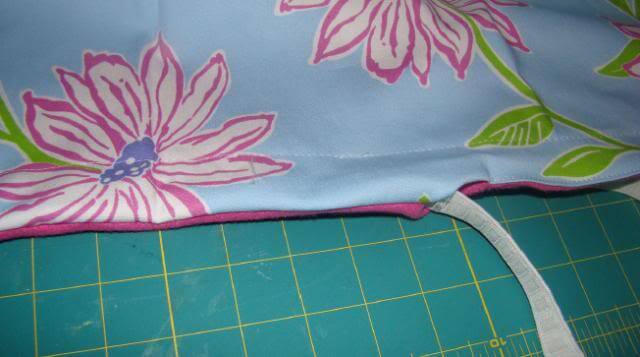
Pin the foldover elastic all around the edges, making sure both fabrics are pinned inside.
This is the most efficient way to put the legs together, plus it allows for you to stretch the elastic and the holes as you sew, which I find easier than using just a bias tape.

If you don’t have foldover elastic, you have a couple of options:
- Fold the edges of each leg inside on both layers, pin, and then topstitch all the way around.
- Use extra wide double fold bias tape in place of the foldover elastic. This is not put on the same as foldover elastic. With bias tape, you will sew it to one side, then fold it over and sew all around the catch everything together.
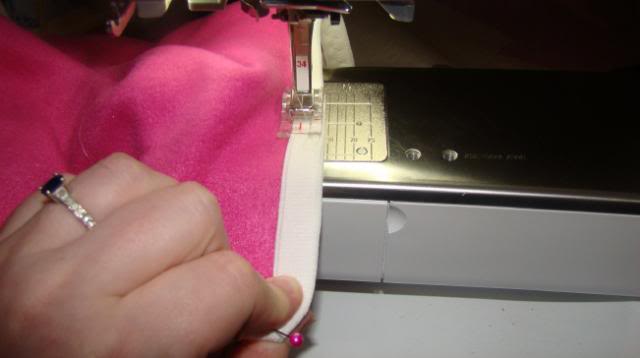
Sew a large zigzag stitch while slightly stretching the elastic.
Insert elastic through the hole left and thread through the entire casing. Make sure not to lose the back end when inserting. Bring out both ends, making sure they aren’t twisted and zigzag together. Reinsert back into hole and topstitch nicely closed.
12. Not pictured -Create buttonholes for straps. Make sure you know the front from back. Then, measure and mark approximately 12 inches directly center behind each leg hole. This will be where you place the button holes for straps. Make them approximately 1 inch in length to accommodate for the 3/4 inch wide webbing.
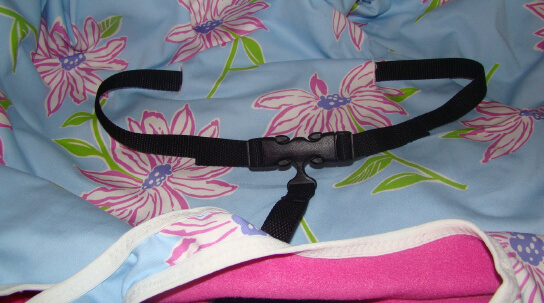
Attaching the 3 point buckle. Cut a piece of webbing roughly 10 inches in length. Insert the strap into the bottom of the 3 point buckle and fold over approximately 1.5 inches and tack it very tightly with a “X” and box stitch around the “X”. You want that sucker secured.

Position the end of the webbing approximately 2.5 inches centered from the back of the leg openings (if that doesn’t make sense, look at the picture below with the buckle fastened. If that is confusing, simply measure a total of 20.5 inches from the top front of the cover directly centered back from the leg openings. Tack it down by sewing an X and then a box around it.

For the side buckles, I used approximately 1 yd of webbing and just threaded it through the buttonholes and the fastening pieces for either side of the 3-point harness, and it fit tightly with the fold over threaded back through.
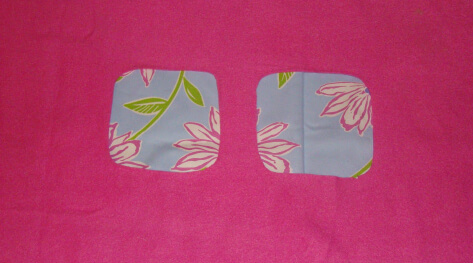
16. Add embellishments to your cover. I added a toy strap and a double pocket. You can do variations on these with leftovers. Pictured here is the toy strap pinned to the cover. I cut a piece of fabric roughly 2.5 inches in width x 12 inches long. I ironed it into a double fold self bias strip and sewed it shut along the edge, adding hook and loop tape (Velcro) to the end so that you can attach a toy, fold it over to the hook and loop and it stays securely attached. Then sew it to the cover up above the leg straps near the front edge.
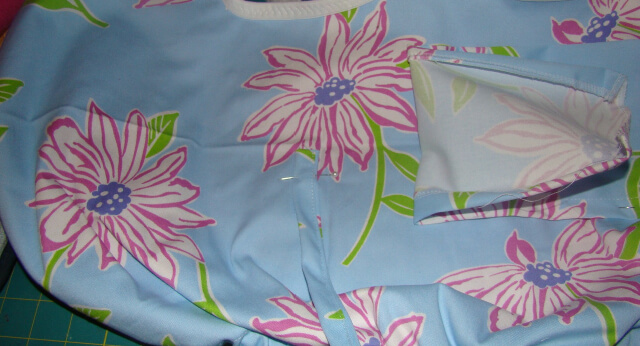
17. Add a pocket, hiding the sewn down portion of the toy strap. Cut a piece of fabric roughly 12 x 5 inches in size. Hem the top of the pocket. Then, center the pocket with the leg holes and sew it approximately 2 inches above the leg holes. Fold in the bottom and sides of the pocket and pin down, then sew around it. Next, sew a line down the middle of it to make 2 pockets. One for toys, one for mama’s keys and cell phone.

And you’re done!
How to use the shopping cart cover in a High Chair

This is a highchair view of my 6 month old. It fits great on any highchair I’ve used in a restaurant, even high back ones.
I just pull one strap end out of the buttonhole, insert it around a back hole or part of the high chair to secure it, and rethread it back through the button hole and fasten her into the cover.
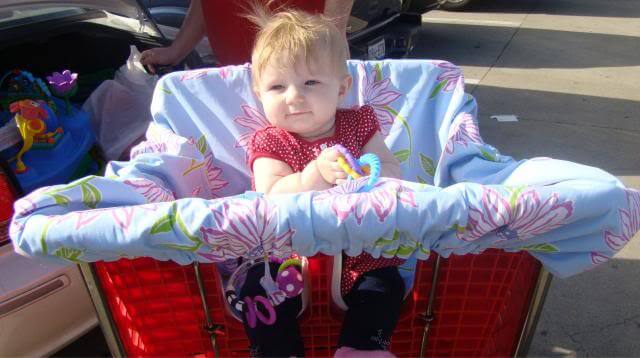
This is a shopping cart view at Target. They seem to have the deepest cart seats over the grocery stores and Walmart, and it fits great. With the strap, I pull it out of one buttonhole, thread it through a few of the metal bars in the seat and rethread it back through the buttonhole before I securely fasten her in.
Also in this picture, you can see a toy hanging off the toy strap. You can also see her pulling her linking rings out of the pocket.
I’m sure you noticed that I do not use batting in my cart covers. I have seen other patterns that do, and I just find it unnecessary, especially when you can use something soft and thick like polar fleece. Plus, I think it’s very important to not put your baby in a shopping cart seat until they can sit up on their own safely.
More Baby Projects to Make
- Make a Baby Bath Towel Apron
- DIY Baby Wipes Diaper Pouch
- DIY Baby Changing Pad
- Simple Lovey for Baby
- How to Sew a Swaddle Baby Doll
Come Join Us!
Liked this article and want more? Follow along on Instagram, Facebook, Twitter, Pinterest, TikTok, and YouTube!
Come over and join us on Facebook in the group Recipes, Crafts, and more with TipToe Fairy or Sewing and Crafting with The TipToe Fairy!
23 comments
You’ve got a nice talent, this is really fantastic. Thank you for sharing it!
I’m visiting today from Thursday’s Favorite Things.
Your tut is way better than the professional pattern I bought! I like the idea of using fleece too. Coming over from Freedom Fridays:)
I always wanted one of these when my girls were babies. I have one child that gets sick just looking at the shopping cart handle! Great Tutorial! I saw this on Love and Laundry. I posted a sewing project too. I’d love for you to visit me. 🙂
~Gina
http://ginascraftcorner.blogspot.com
This is a great tutorial! I wish I had these when my kids were little. Thanks for sharing at Mix it up Monday 🙂
Great tutorial! I saw this of Homemaker on a Dime. I love the pocket for toys. I pinned so I could find again. Thanks.
Great tutorial and idea! Thanks for sharing! I’d love for you to check out our Pattern Party starts the 1st of each month.
Get Your Crap Together
Very nice project with great instructions!
Thanks for sharing!
Stacey
Great tutorial! I love those! Thanks for sharing it at Monday Funday!
Cute project! I really like that it has a pocket, great idea!
Heidi @ handmadefrenzy.blogspot.com
These are one of the best baby tools, aren’t they? Love this! Thanks for sharing at Pinworthy Projects.
I just pinned this tutorial! I wish I would have had this when my kids were still little. Fabulous job darlin’! Thanks so much for linking up with me 🙂 Krista @ A Handful of Everything
Thanks so much for sharing with Adorned From Above’s Blog Hop. We are so happy that you joined us last week. We can’t wait to see what you have for us at this week’s party.
Debi and Charly
I think I have to try this. Thank you for sharing. Love it!
Awesome tutorial thanks for sharing! Will definitely have to have a go at making one of these. At the moment I use disinfecting wipes before I put my son in a trolley lol Yes not very practical whilst struggling with a bub 🙂 Cheers, Jasmine
do you sell this kind of cover? and if yes how much? I’m so desperate for one.
I’m very excited to try this for a baby shower gift but there is one part I’m confused about! The instructions say to start with a 42″ x 42″ square, but when measuring for placement of the leg holes it only accounts for 36″ front to back (13″ from front to opening, 5″ hole, 18″ from opening to back.) What am I missing? Thank you so much in advance!
I’m sorry this is confusing. By the 18 inch opening, I meant from the back of the cut out for the leg opening to the front of the whole thing. So the top of the leg hole is 13 inches from the top of the front, then the leg opening is 5 inches in length, so that means the back edge of the leg opening will be 18 inches from the top of the front as well. It has nothing to do with the back of the whole thing. I’ll try to reword it so it’s clearer. Sorry for any confusion!!
Got it! Thank you so, so much for your prompt reply. Can’t wait to get started! 🙂
I just read your instructions on how to make a shopping cart cover. I am making one for my grandchild. The pattern I bought. didn’t come with everything I needed to know. I find it every hard to understand. So I guess as I go. People with disability have a very hard time to understand. I just wanted to thank you from the bottom of my heart.
Kimberly
I am unable to download the pdf. Would you please email it to me?
Stephanie, your site says you can print the pattern by selecting the PDF below. I don’t see that option. I did print it but there’s so much advertising it covers up a lot of the instructions.
I meant to click the image of the PDF instructions. I will update for better clarification. It will take you to this link: https://drive.google.com/file/d/0BzHLznxNU-lMQktQWHVPaEgtOGM/view – you can print from this link.