This Inside Out Tote Bag is so easy to make. It is literally squares sewn together to form a bag in a clever shape. Not only is the Inside Out Bag a tote bag, but it’s completely reversible! This post contains affiliate links.

This bag gets even better! You can make it with just 9 fat quarters and you can easily size is up or down just by the size of the squares you cut! How cool is that?
Table of Contents
More Sewing Projects
What do you need to make The Inside Out Tote Bag?
- 9 fat quarters or 2 yds of fabric
- Rotary Cutter & Mat
- Quilting Ruler
- Iron
Recommended Fabrics for The Inside Out Tote Bag
This bag pattern is perfect for woven fabrics with no stretch. I would not recommend using stretch or knit fabrics.
I have made a lot of these bags, and these are the fabrics I have used many times:
- 100% cotton woven
- home dec prints
- chenille
- batiks
- calicos
- denim
- corduroy

Cutting Guide for The Inside Out Tote Bag
The yardage suggested is making a bag with 8-9 inch squares which will make the perfect sized tote bag for taking to the beach, going to the library, and it’s great for gift giving too.
This pattern can easily be sized to just about any size square as well as sized down.
Squares cut 5-6 inches in size make a great size bag for a child.
For the example photos I used 8-inch squares.
Of the 9 fat quarters, you’ll need to make some choices:
- Choose 1 fat quarter for the straps of the bag.
- 2 fat quarters will be cut into triangles to make the very top edge of the inside of the bag and the outside of the bag.
- 6 fat quarters will be cut into squares for the body
- 3 of these fat quarters will make the inside of the bag.
- 3 of these fat quarters will make the outside of the bag.
Once you’ve chosen the pattern to make with the fat quarters, take 6 fat quarters for the body and cut four 8-inch squares out of each fat quarter.
Take the 2 fat quarters for the top edges and cut two 8 inch squares out of each, and then cut each of those squares in half diagonally so that you end up with four triangles out of both fat quarters.
With the last fat quarter, for the straps, cut two pieces each 22 x 5 inches wide.
How do you make The Inside Out Tote Bag?
This is a very easy and quick to sew bag and it’s reversible too! It will feel confusing the first time you sew it, but once you put one together, you’ll get it.
Then, once you’ve made one, you can sew up a few bags in a couple of hours.
NOTE: This is a reversible bag, but throughout the instructions I will refer to the “outside” of the bag and the “inside” of the bag to avoid any confusion. You will sew both the outside and the inside of the bag the exact same way.
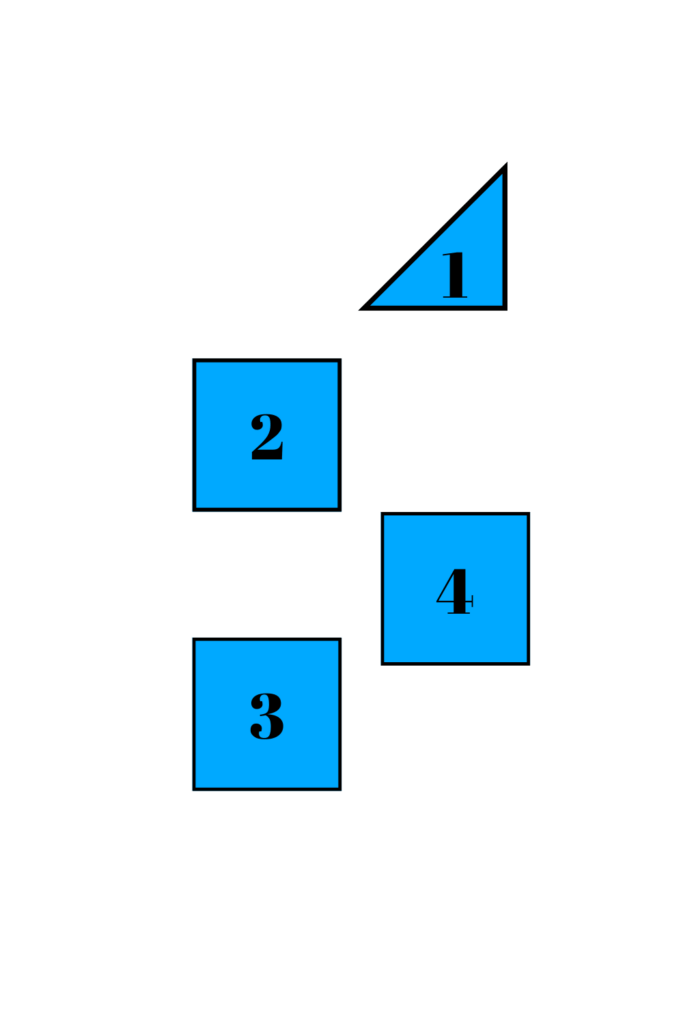
As shown in the illustration below, the pieces are numbered #1 through #4 with the triangles as # 1 and the squares are #2, #3, and #4. These will the order they are sewn together.

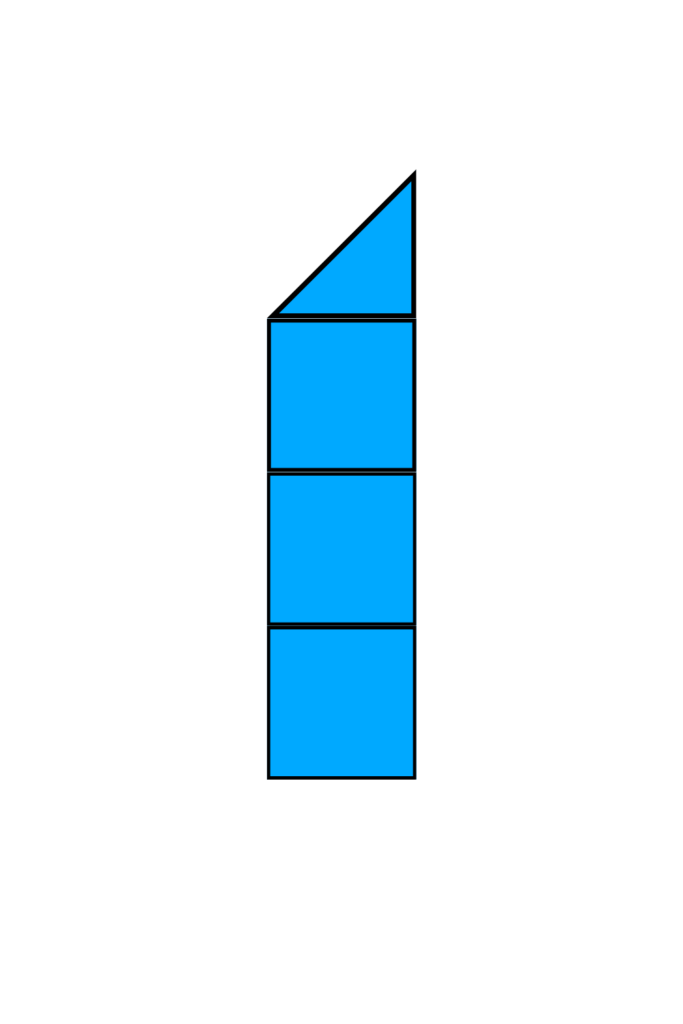
Following the illustration below, sew the squares in order #1-4 in a row. You will create four rows for each the outside of the bag, and then another 4 rows for the inside of the bag.

Once the squares are sewn into long strips, then sew the strips together as shown in the diagram below.
Do the same for the inside bag as well.

This is the tricky part that will not make sense until its sewn together. In the illustration below there are squares that are lettered “A B C”. Fold over the patchwork you have created with right sides together so that both “As” both “Bs” and both “Cs” will line up together and sewn a seam down that row.
Do this for the inside bag as well.

Once you flatten the bag it will now look like the illustration below. Now looking at the “A B C” you can see where the seam falls on the bag.
Do the same for the inside of the bag.

Now we will begin creating the bottom of the bag. Keeping right sides together, sew the outer edge of the bottom squares as indicated with the bold lines on the bottom squares on each side in the next illustration.
Do the same for the inside of the bag.

The bolded lines of the two bottom squares, in the next illustration, will be pulled down flat (as indicated by the arrows) to create a straight edge. Line it up together, pin if necessary, and sew a seam to finish the bottom of the bag.
Do the same for the inside of the bag.

Sew the straps. To make thick, sturdy straps, fold WRONG sides together and sew along the raw edge with a ¼ inch seam allowance.
Press the raw seam allowance inward, and fold over the strap again and press the opposite side of the strap to hide the seam allowance.
Sew down the entire length of each strap. This gives each strap a four layer thickness that is very sturdy when carrying heavy things like library books.

Flip the outside of the bag so that it’s right side out. The inside of the bag will remain inside out.
Insert the inside of the bag into the outside of the bag and line up the triangles.
Fold the raw edges of the bag inward and pin around the entire top of the bag.
Insert one strap in the middle of each triangle on one side of the bag – do the same for the second strap on the other side of the bag.
Sew 1/8 of an inch from the edge of the bag all the way around. Backstitch at each strap as you sew around the bag.

And the Inside Out Tote Bag is finished!!

Buy the Cutting Guide + Instruction Sheets All Together
Check Out More Sewing Patterns
Come Join Us!
Liked this article and want more? Follow along on Instagram, Facebook, Twitter, Pinterest, TikTok, and YouTube!
Come over and join us on Facebook in the group Recipes, Crafts, and more with TipToe Fairy or Sewing and Crafting with The TipToe Fairy!


