
This shop has been compensated by Collective Bias, Inc. and its advertiser. All opinions are mine alone.

Back to School always means new school supplies, and often that’s the perfect time for a new computer as well. My oldest daughter is a senior in high school this year. She’s had my old laptop for a couple years, but it just didn’t have the speed or memory for much of anything. She needed an affordable laptop that could get her through college and let her to be as creative as she wanted.
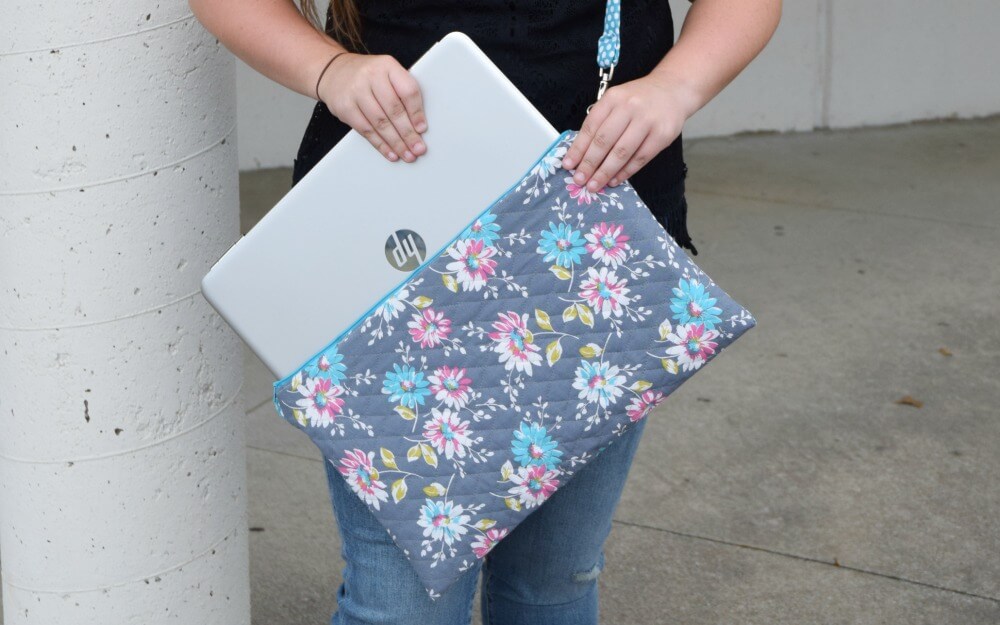
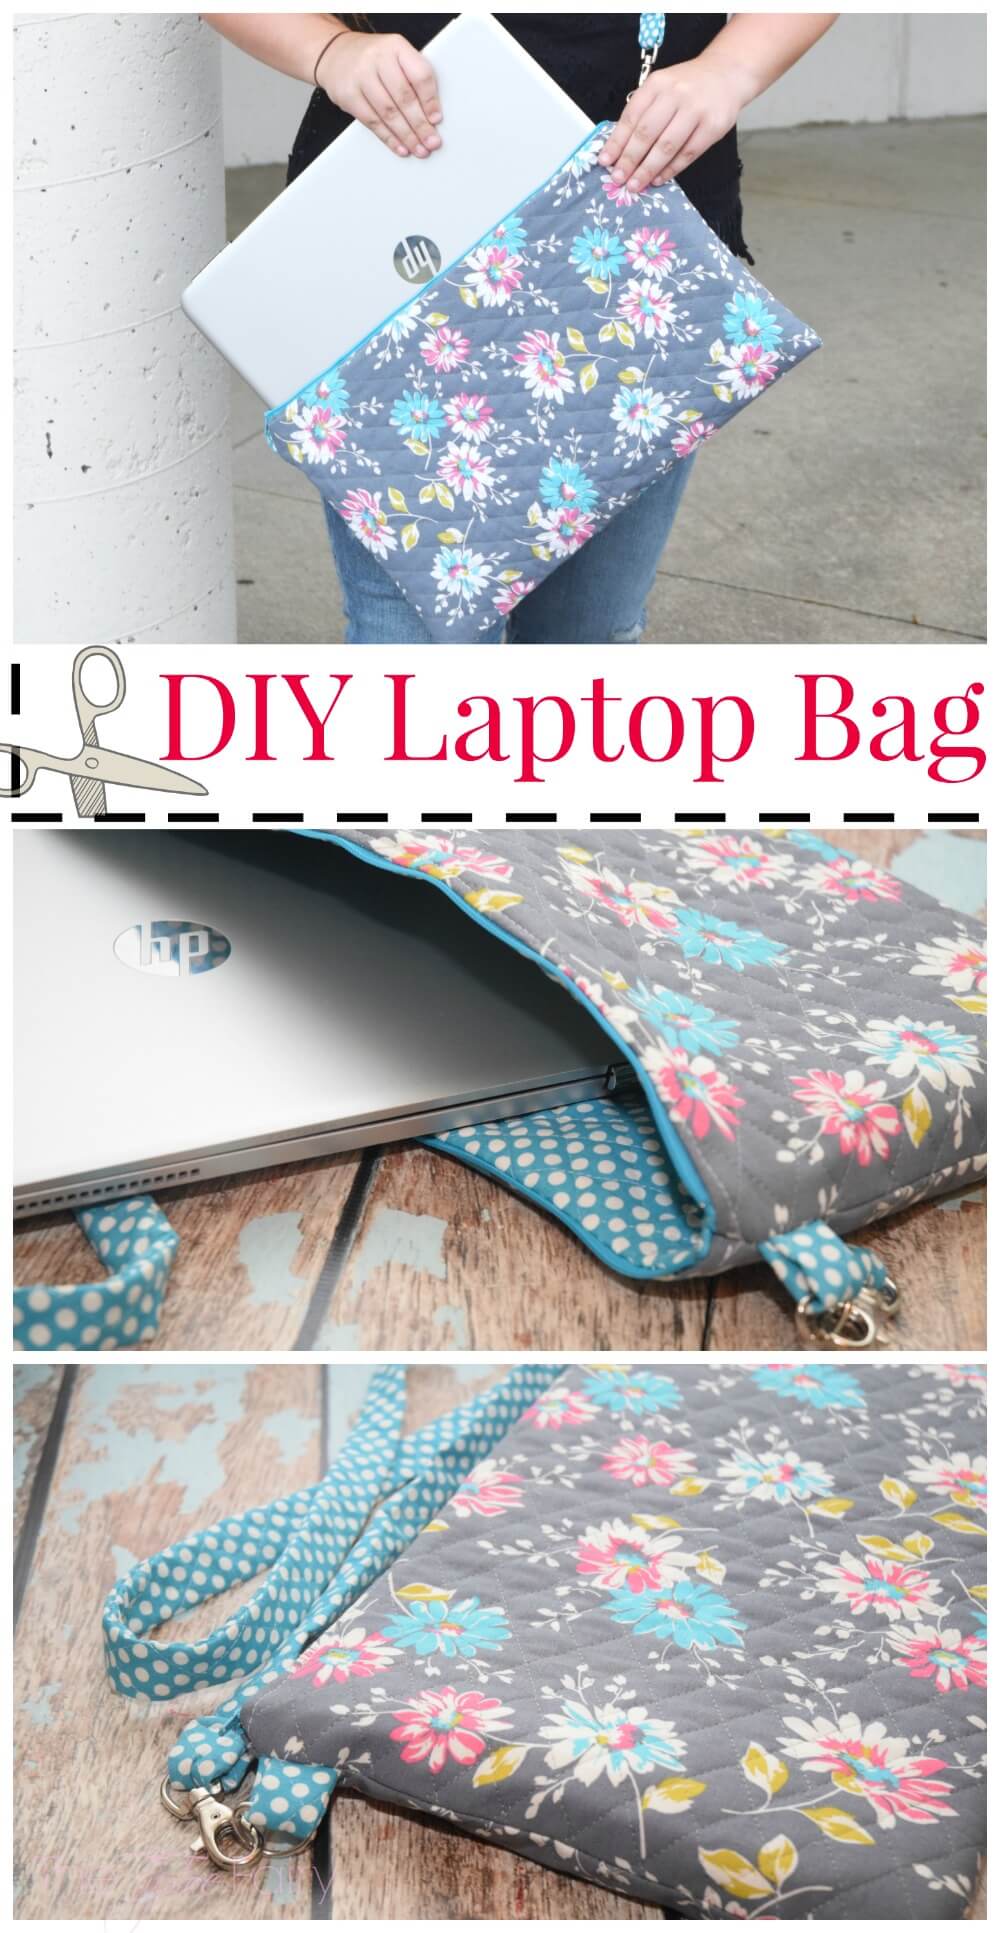
She’ll be taking her laptop to school this year for her college classes, and she and I both wanted a case that she could use as a bag and as a sleeve, too. We just couldn’t find a cute one, so I made one! She picked the fabric, and I drafted a pattern. It features a zipper closure and swivel hooks so that you can wear it as a crossbody bag style or take the strap off and use it as a laptop sleeve in a backpack.
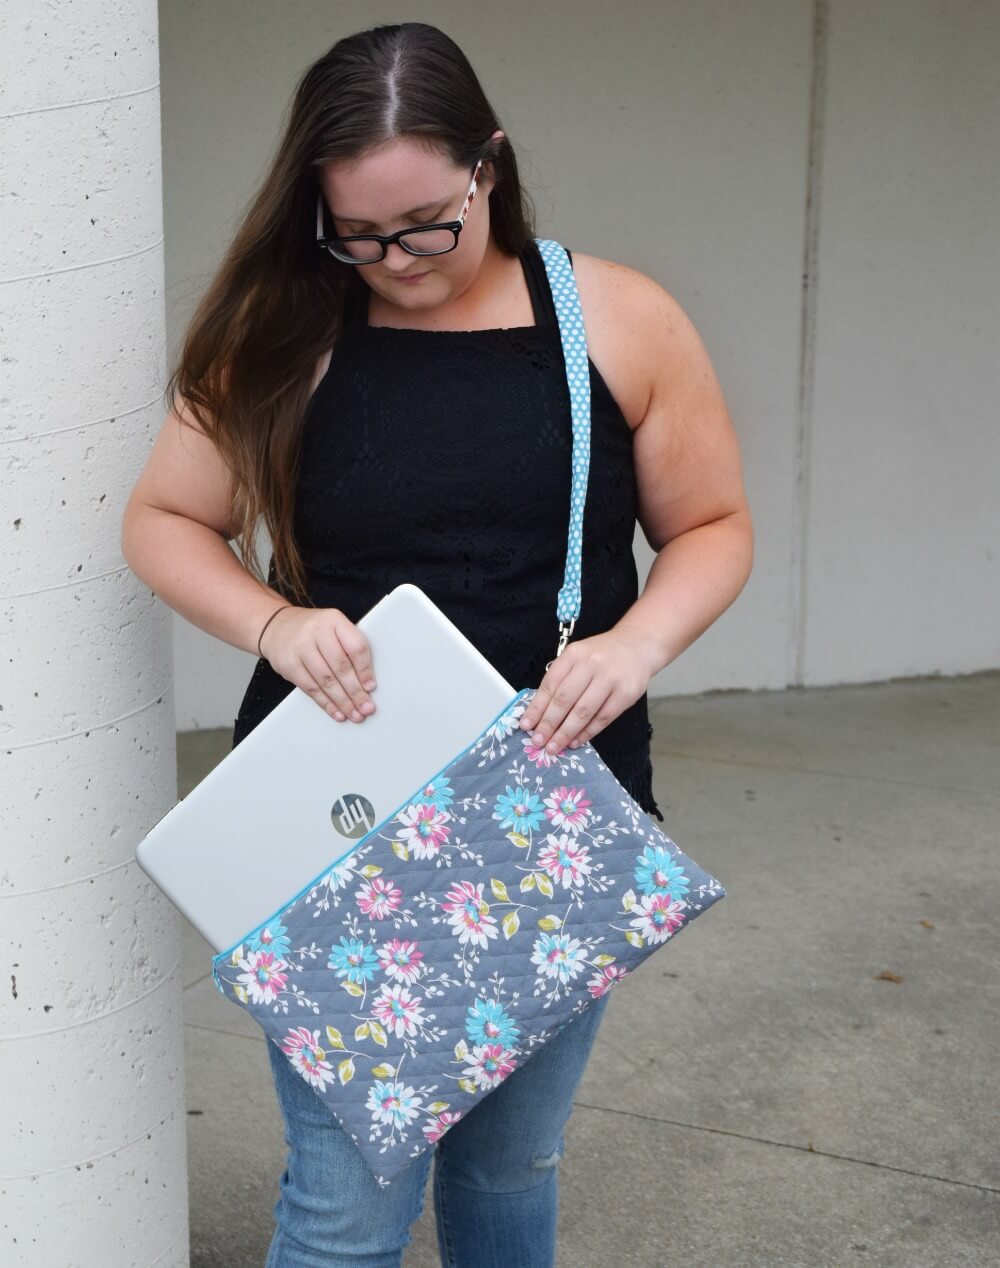
For this tutorial, my measurements are based on this 15.6-inch HP Pavilion laptop. It is about 9.5 inches in length and a little more than 15 inches in width. I drafted pieces to fit 11 x 17 to account for seam allowance and the depth of the laptop at just under 1 inch. If your laptop has different dimensions then add about 1.5 to 2 inches to the measurements of the length and width of the laptop to account for seam allowance and depth.

Table of Contents
Supplies:
- 1 1/2 yards of pre-quilted fabric
- thread to match
- 2 swivel hooks
- 2 D rings
- 18 to 20-inch zipper in coordinating color
Pattern Pieces:
- Cut 1 piece 22 x 17 inches – for outer body
- Cut 2 pieces 11 x 17 inches – for lining
- Cut 1 piece 2.75 inches x 54 inches – for strap
- Cut 2 pieces 2.5 inches x 4 inches – for rings
This bag uses pre-quilted fabric. You can find this at most fabric stores. It’s a double layer with batting already quilted between. I love these fabrics because they’re usually two different prints put together, so one can be the outer fabric and one can be the inner fabric. In this design, I have you use a double layer of the pre-quilted fabric for extra cushion for your laptop.
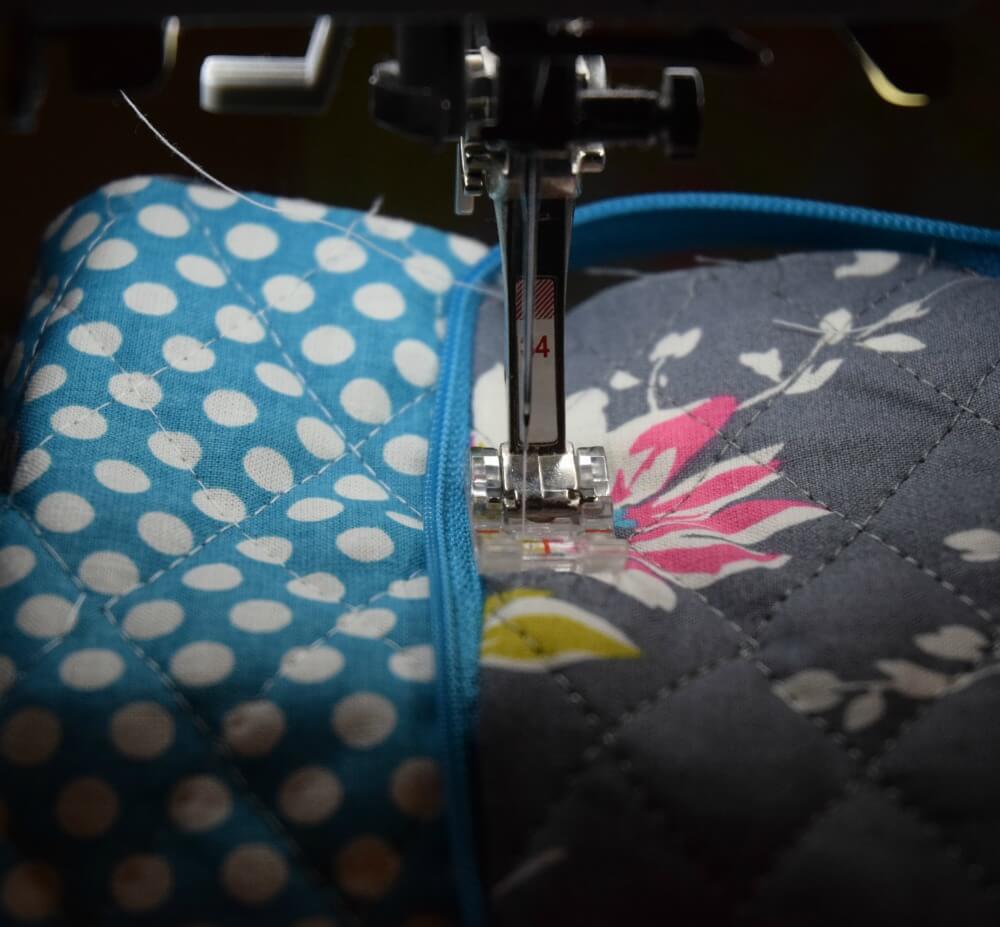
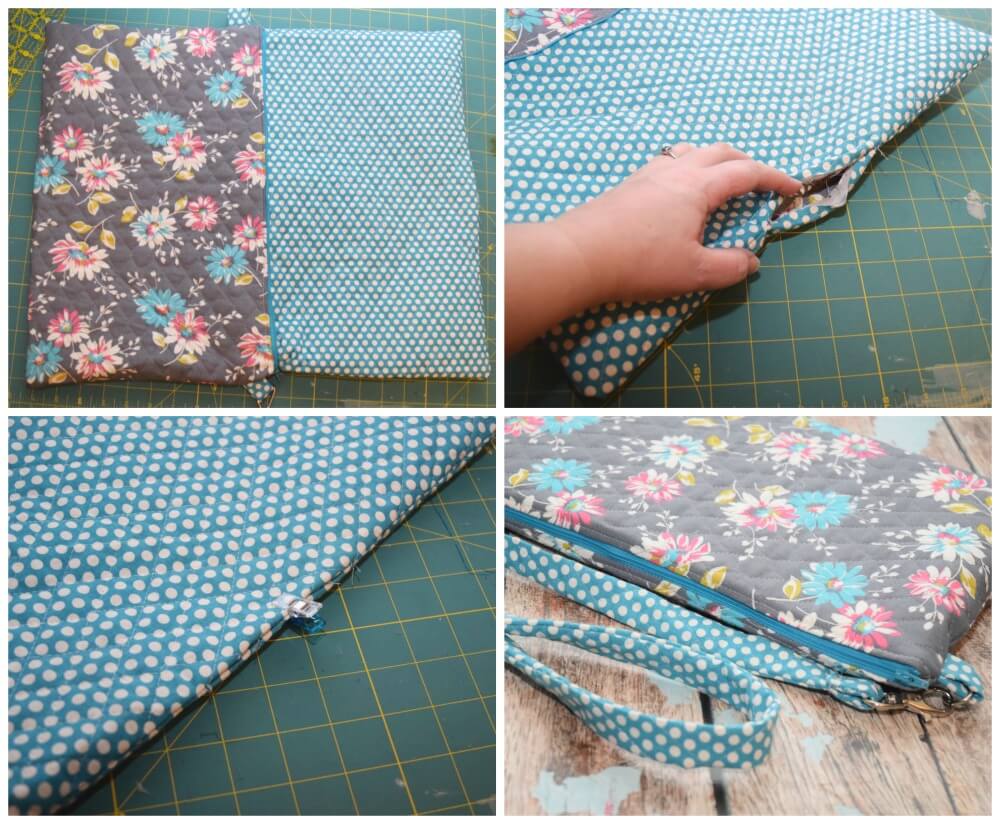
1. Lay one lining piece with right side up and put the zipper also with the right side up just along the top edge (17-inch edge).
2. With right side down, line up the outer body piece along the zipper and pin together.
3. Use a zipper foot to sew along the stitch line.
4. After sewing, you can flip open the outer body and you should see a nice clean edge at the zipper.
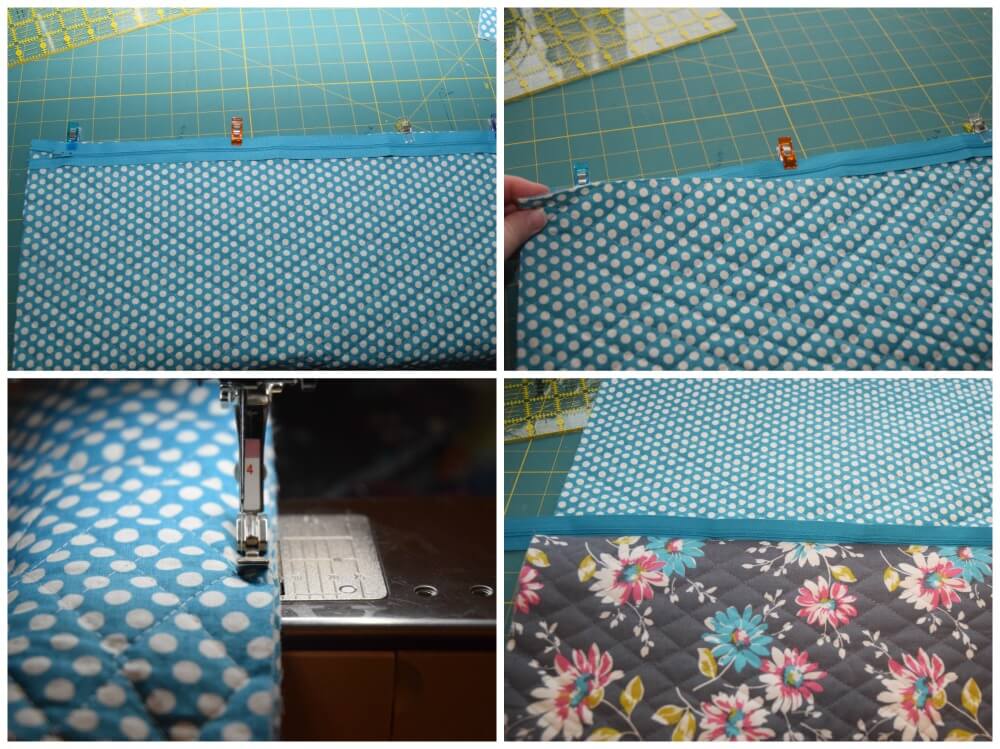
5. Do the same on the other zipper raw edge.
6. Line up the edge of the second lining piece underneath the zipper edge so that both should be right sides up.
7. Now, here’s the tricky party. Fold the outer body piece over to the the zipper edge and pin to zipper edge and lining. If you did it correctly, the outer body will now be folded in half with right sides together. (See pictures below.)
8. Sew along the zipper edge.
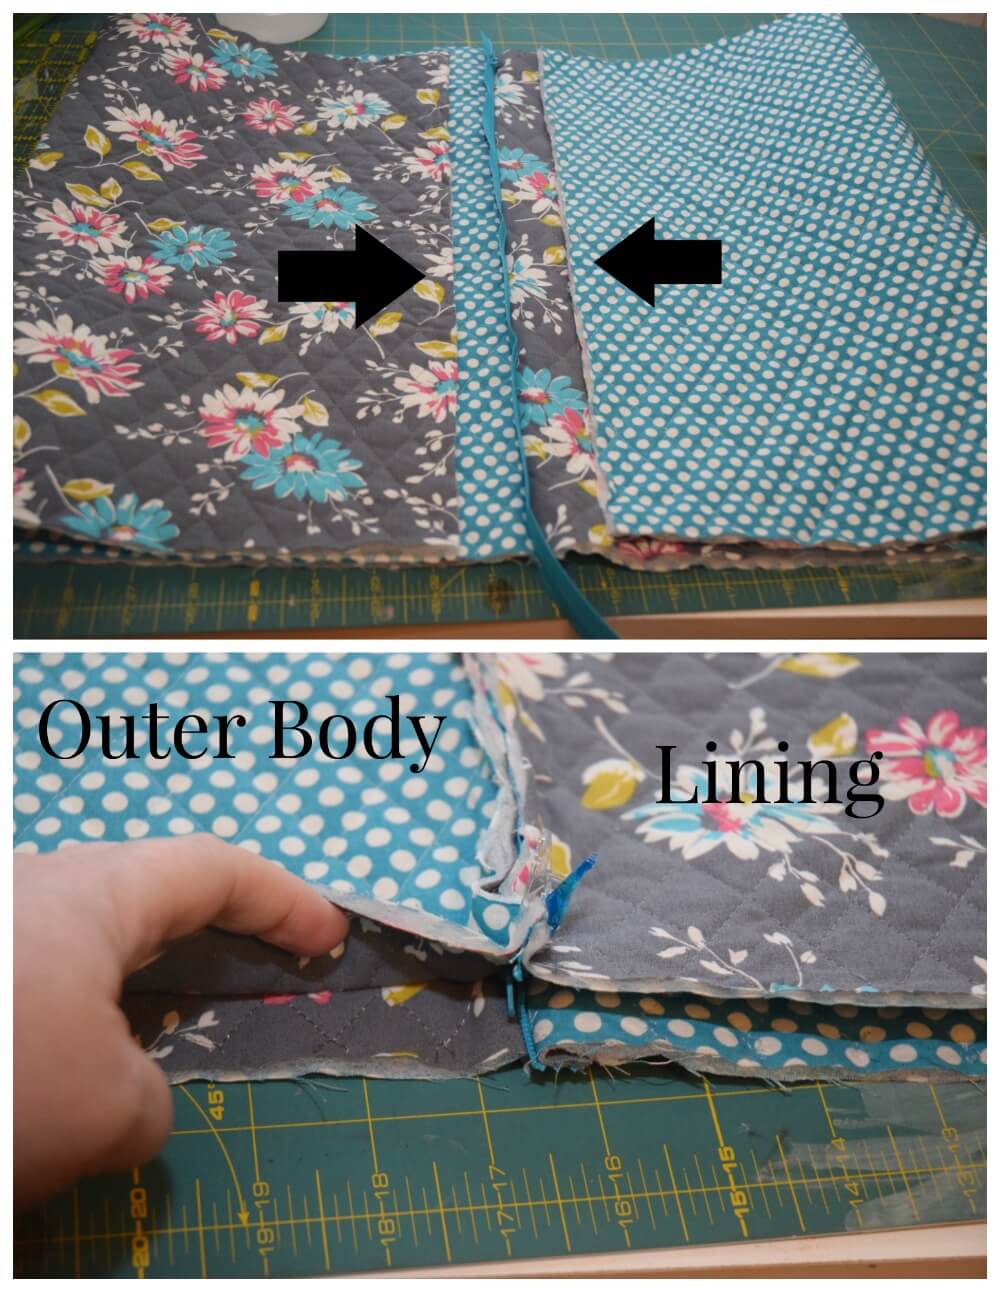
9. Once the second side of the zipper is sewn, open the zipper and you should have one big outer body piece and two lining pieces on either side.
10. Top stitch just near the zipper on the top of each outer lining. This gives it a nice finished look.
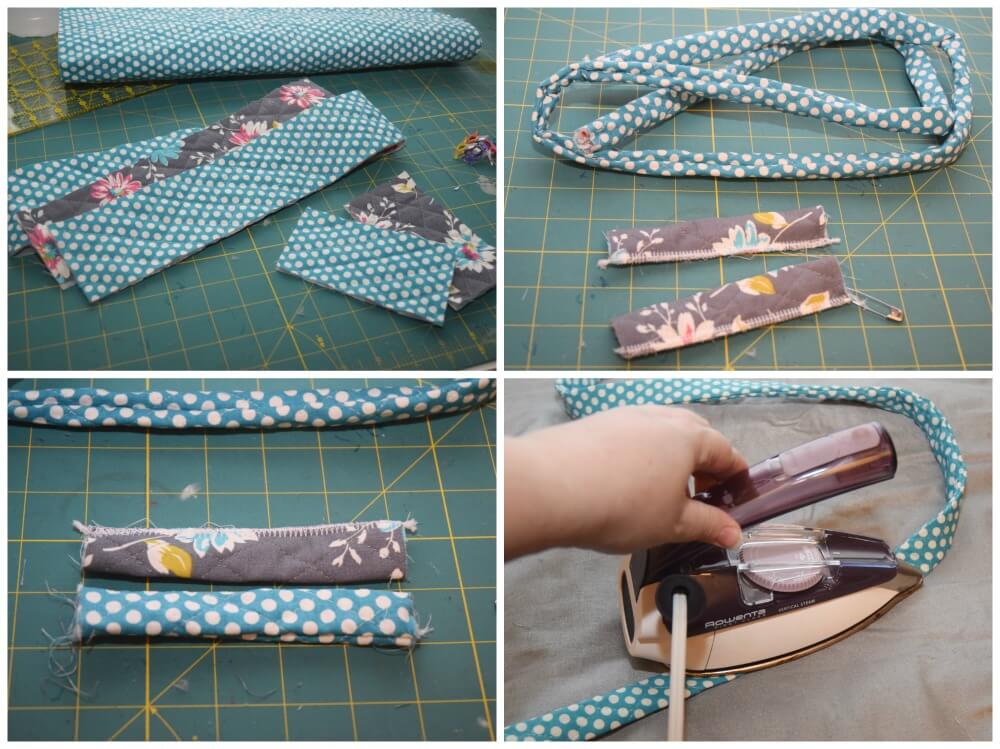
11. Take the strap and fold the right sides together and sew along the entire length.
12. Do the same with each 4-inch piece for the rings.
13. Pin a safety pin to one end of the strap and push it inwards slowly pulling and pushing to turn the strap and ring pieces right side out.
14. Then, press them with an iron for a nice professional look.
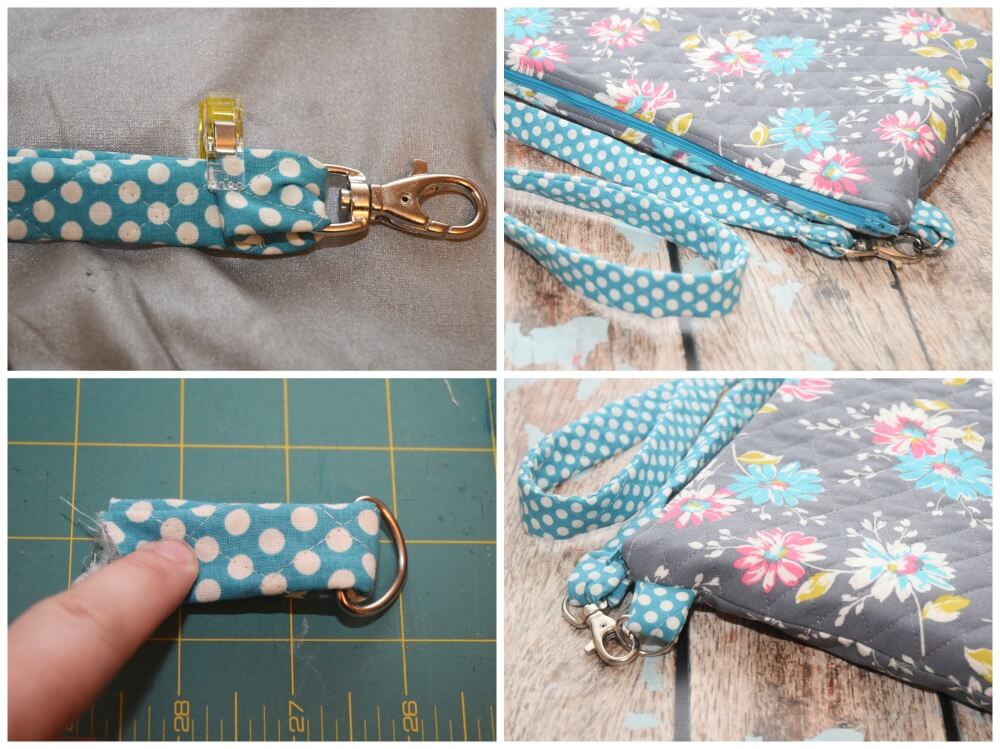
15. Insert the strap into a swivel hook. Fold the strap inward 1/2 inch and then over another inch. Then, pin and tack it closed. Do the same for the other side of the strap.
16. Insert the D-rings onto the ring pieces and fold in half.
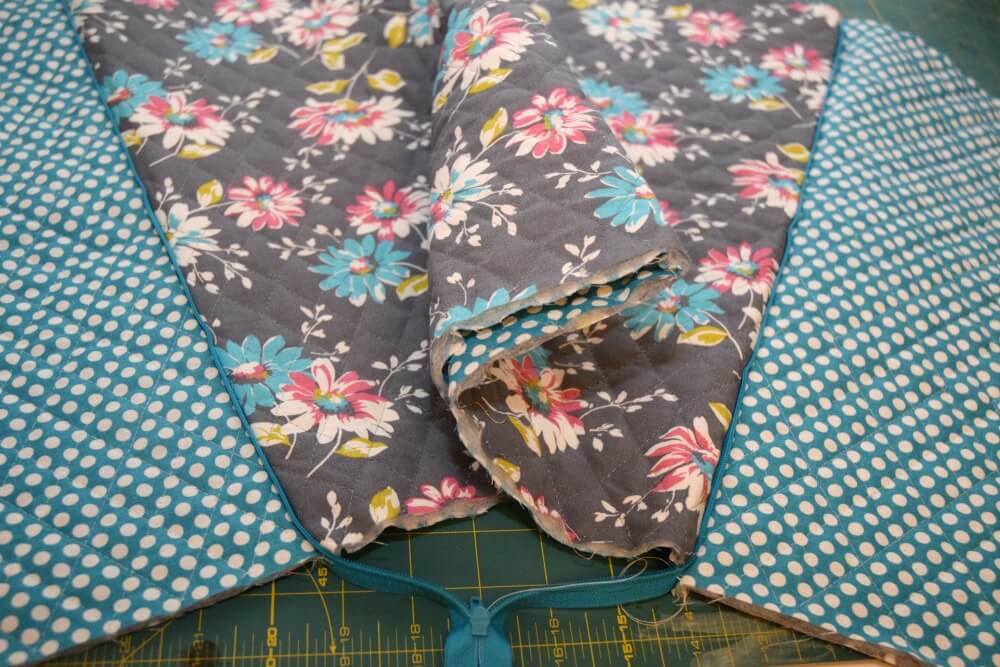
17. Unzip the zipper a few inches. Then, fold the fabric back together with the right sides together for the outer body and the wrong sides together for the two lining pieces and set aside for a moment. It’s like you’re making a big square with the zipper going down the middle.
18. Fold the seams at the zipper toward the lining side. Then, pin it all together at the zipper ends to hold it together. (If your zipper is too long, make sure to cut the excess off before pinning the seams together there.)
19. Right under the zipper on the side of the outer body that is folded together, insert a D-ring piece so that about an inch with the ring is inside and the raw edges are facing outward. Do this for both sides.
20. Pin all around the raw edges, making sure they line up nicely. On the lining side, leave an opening at the bottom about as wide as your hand. I marked this with an arrow.
21. Start sewing at the edge of the opening on one side, and sew all that side closed. Do the same on the other side.

22. Pull the outer body and the lining through that opening. Make sure to push through all the corners. As you pull it through, you’ll need to open the zipper completely.
23. Lay the bag out flat with the lining out. That small opening will naturally want to fold in a little. Fold it in, pin it, and then sew it closed.
24. Now push the lining down into the outer body and you’ll have a fully lined zipper bag.
Insert your computer, zip it up, and attach the strap. You’re ready to go!
Looking for more projects to sew? Check these out:

23 comments
This is wonderful! What a brilliant idea. I may once i’ve got the materials, use your base to make my kindle a swanky case so I can take it to work safer 😀
That’s such a cute bag! I have to make one of these for my laptop. I love that it protects and also looks totes adorbs!
This is a crafty post. I can’t sew or cut straight for anything. It’s cute and I’d love to have one. – Yolonda
What a great craft idea. This would allow you to make sure that the laptop bag fit your laptop perfectly. I always worry when there is too much room. I might have to get a sewing machine to make this.
Wow, what a lovely laptop bag of yours. you are so creative and I really love the design!
This is an awesome DIY laptop bag for back to school or for anyone for sure. I have to admit that I am using old school bag for my laptop bag and I will have to try making a laptop like this which will save money. Things like this I love making so thanks for sharing the instructions along with the idea.
I have this same laptop so I totally have to make this. Thanks, bookmarked!
This is a cute laptop bag. I use a sleeve on mine when i am on the go. It isnt the best option but it works.
This is a fantastic project to do with my Daughter this weekend. She just got a new laptop and needs a bag to keep it in.
This laptop back is so chic! Perfect for any back to school laptops, and probably cheaper than the ones at the store 😉
xo,
Sandy
Sandy a la Mode
Oh my goodness, this is such a beautiful and fun bag. You are so talented!
That came out so cute! If I tried to make that it would look like a hot mess, but I would buy it.
What a great bag! It turned out fantastic! I am shopping for a new laptop, I am certainly going to give HP a good look!
i love a good diy so that you can customize the material. this is such a fun tutorial. the swivel hooks are brilliant because i only buy crossbody bags and purses since im always toting around two kids!
This is cool, we did a very similar bag for our child’s school issued tablets. Great job.
This is SUPER cute! I’d love to experiment with different fabrics and patterns. Thanks for the tutorial!
Cute laptop bag – it turned out great. Cute fabric, too. I made a crocheted one last year that works well.
That’s a great laptop bag! I’ve got a Craft Gossip post scheduled for tomorrow afternoon that features your tutorial:
http://sewing.craftgossip.com/?p=89479 –Anne
I love this laptop bag. I have a ton of fabric I hadn’t had plans for.
This laptop back is so chic! Perfect for any back to school laptops, and probably cheaper than the ones at the store
Hazel
Hi Stephanie. What a cool project! Would also make a perfect gift for the holidays. Thank you for sharing this project to us. We included it on our round-up post here, http://sewuber.com/make/for-kids/school-sewing-projects-for-kids/
Please feel free to contact us if you want to add something.
Cheers,
Sandra
This looks awesome! I wish I could make things like this!!
So simple and so cute! Love the floral fabric pattern you chose too 🙂