I’ve got a treat for you today! This is an easy afternoon project even a novice sewist can make. It’s for a pretend play dinosaur tail for your preschooler or toddler!
My daughter wears her dino tail nearly every day. She accessorizes it with a tutu or sometimes she’s a dragon with wings and a tail, or sometimes she’s a Lambie with a dino tail.
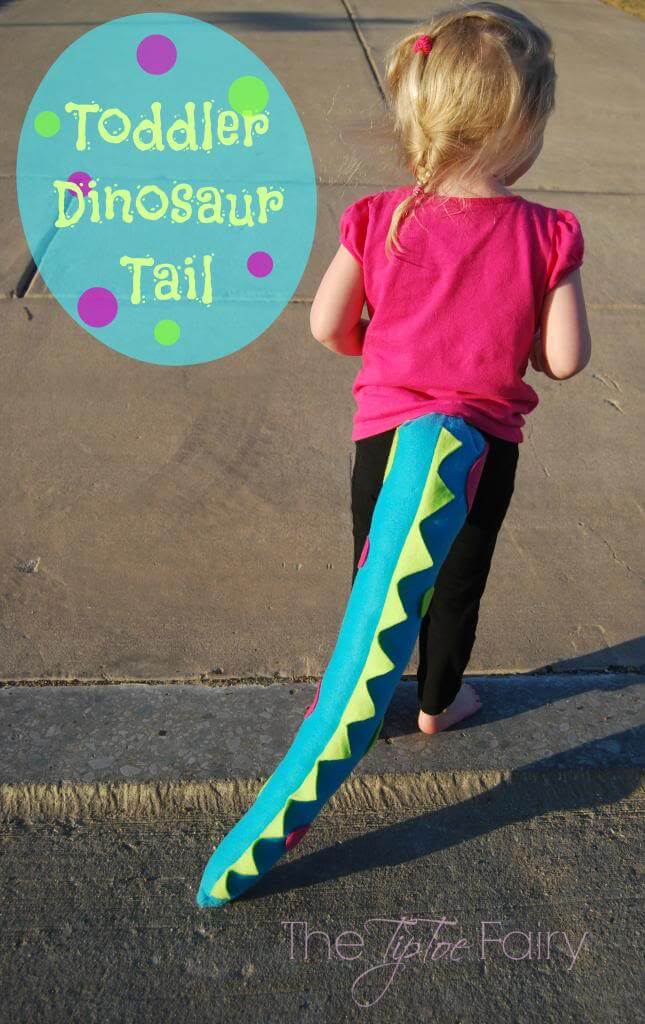
Your kids will love this tail. I think Molly’s favorite thing is to twirl around and around and watch the tail swish back and forth.
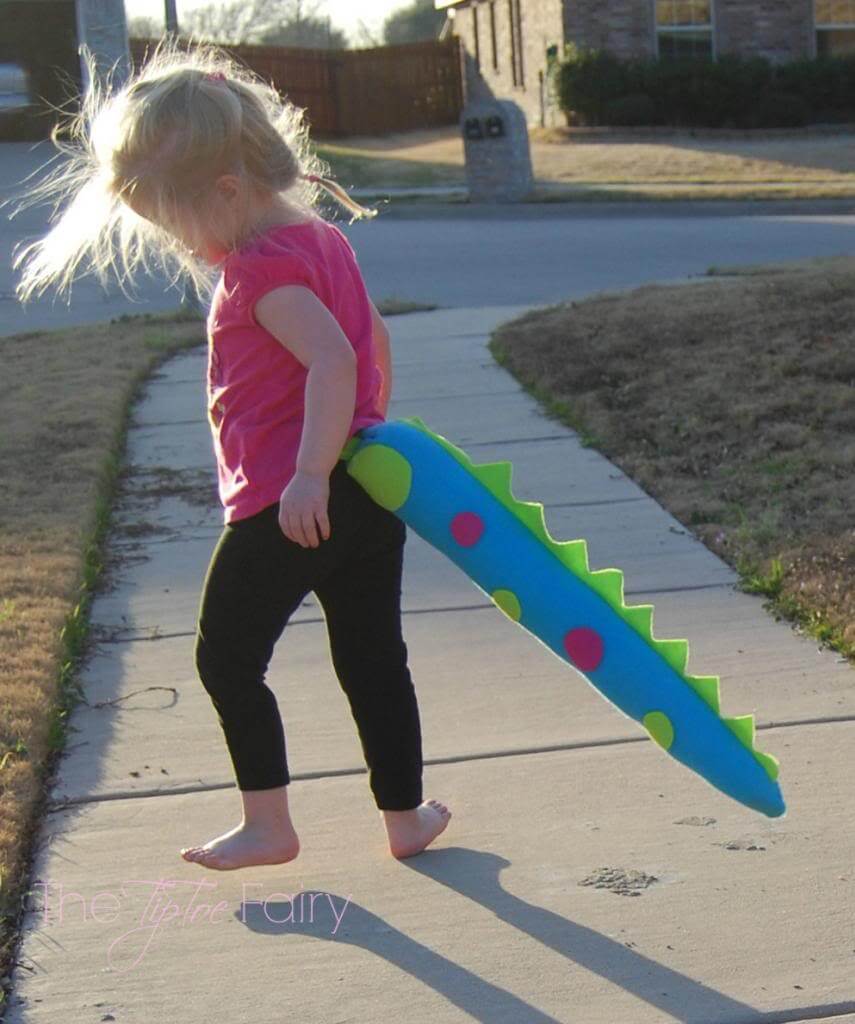
Table of Contents
Dinosaur Tail Tutorial
Supplies
- 1/4 yd of polar fleece for tail
- 1/4 yd of polar fleece for spikes and belt
- 2 large scraps of polar fleece for polka dots
- thread to match
- Heat N Bond Ultra
- Polyfil stuffing
- 1/2 yd of 1-inch non-roll elastic
- Sew on Velcro
- long needle
Get the Cutting Guide
Instructions
1. Follow the cutting guide to cut out the dinosaur tail.
- Cut out TWO (2) dinosaur tails
- 1 row of spikes
- 1 belt
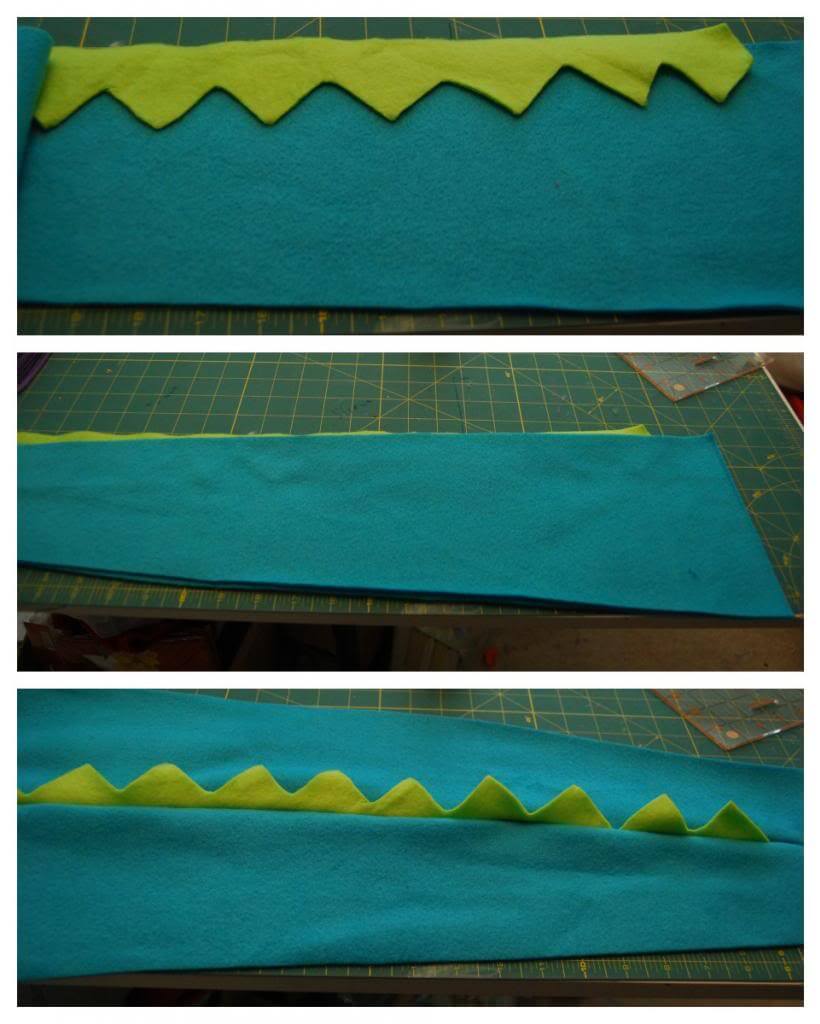
2. Line up the spikes to be in the middle of the tail, which will make it about 1 inch away from either end of the tail.
3. With right side up, lay one piece of the tail down, then lay the spikes with raw edge lined up with raw edge of tail. Then, lay second tail piece down with right side down to match. Sew along the seam with the spikes.

4. Follow the directions for the Heat N Bond Ultra. Iron it to the backside of the scrap fabrics for the dots.
5. Then, cut the dots out and remove the paper backing.
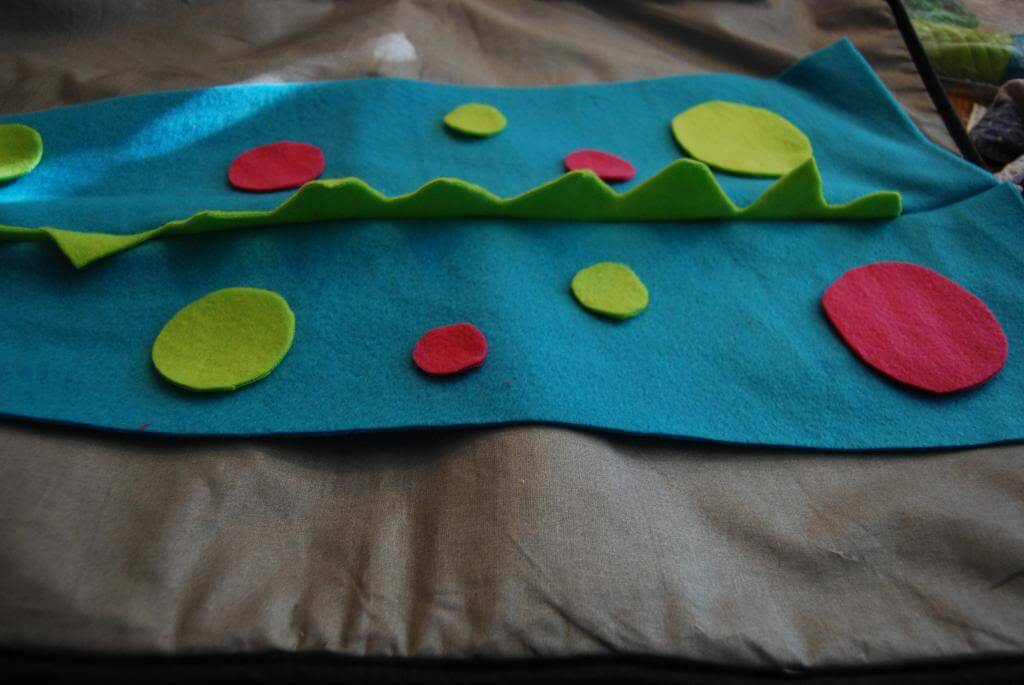
6. Place the dots all around the tail, however you would like. Then iron them down securely. This might take awhile because the fabric is so thick.
7. After attaching the dots, with right sides together, line up the other side of the tail and sew it closed. When you sew it closed, curve the end of the seam around to meet up with the other side seam to sew the bottom of the tail closed. Then, snip off any additional seam allowance.
8. Flip the tail right side out.

9. Stuff the tail firmly so that it won’t just hang on your child limply. Make sure to leave about 1 inch from the raw edges to be able to fold inward to sew closed. I use a chop stick and slowly work my way up. I will warn you now, the stuffing part will drive you nuts. You think it will never ever be done.
10. Once the tail firmness is to your liking, fold the raw edges inward and sew closed.

11. Take the belt piece and fold it together lengthwise and sew along that edge to form a tube.
12. Next, flip the tube right side.
13. Measure your child’s waist, subtract 2 inches and cut the elastic to that size. Insert the elastic into the tube.
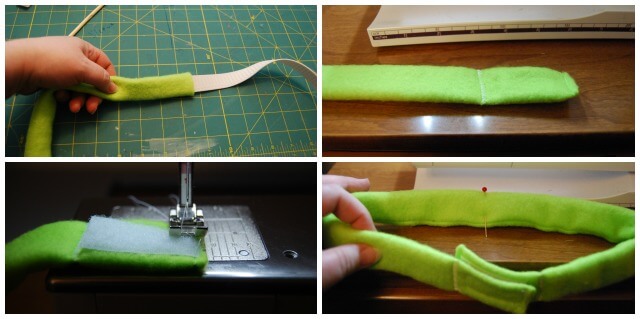
14. At about 2 inches before the end of the tube, pin the elastic and zigzag it down at that spot. Do this on both sides.
15. Fold the raw edges of each side of the tube and sew them closed.
16. Attach a 2-3 inch piece of velcro on each side of the tube. Make sure the scratchy “hook” side of the velcro is sewn facing outward so it doesn’t scratch your child. Also, make sure the velcro pieces line up before sewing them. (I chose a large piece of 2 to 3 inches for growing room)
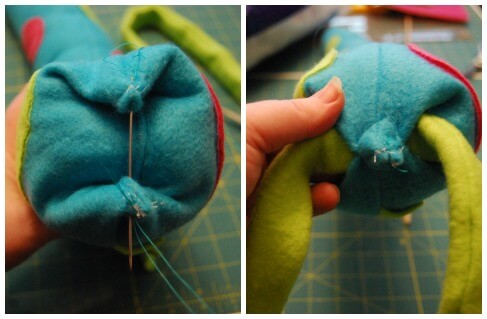
17. Take the two corner pieces and a large needle and thread and overlap the corners to form a loop to insert the belt into. Take several stitches and pull them tight so that the corners do not come loose.
**I tried several methods for attaching a belt and this was the most secure and best way to keep the tail staying up in a comfortable manner on my little one.
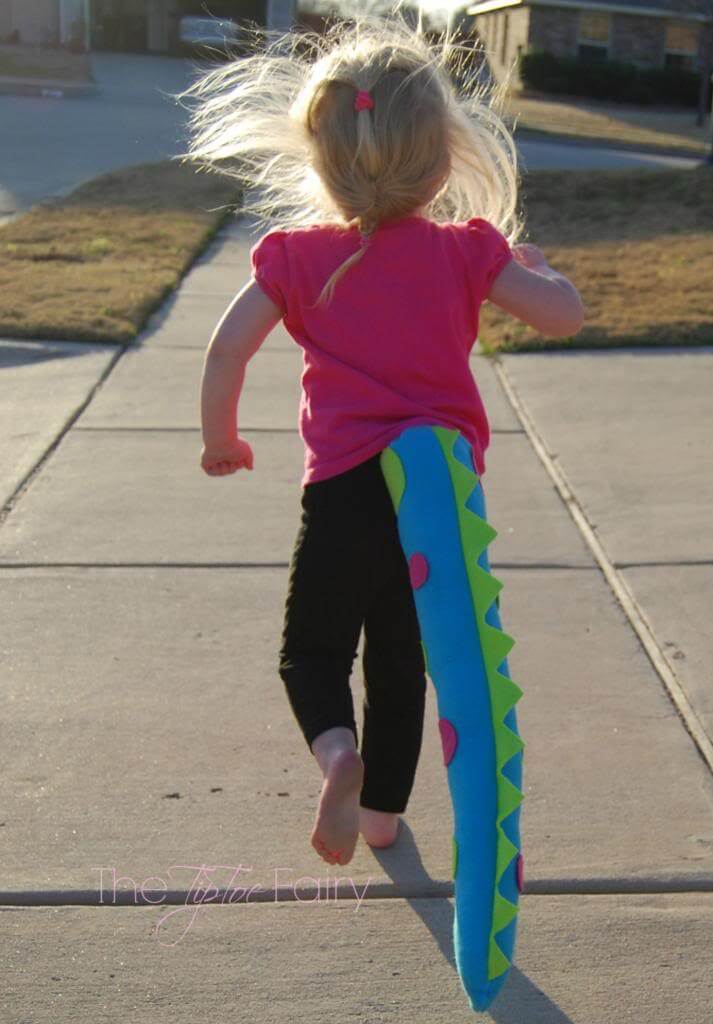
Put that tail on your child and watch them run and dance around the room!
More Pretend Play for Kids
- Sew a Kids Fleece Crown
- Sew an American Girl Mermaid Outfit
- How to Sew Tiny Cloth Pocket Dolls
- How to make a Pirate Hook
- Free Preschool Grocery Store Printable Game
Come Join Us!
Liked this article and want more? Follow along on Instagram, Facebook, Twitter, Pinterest, TikTok, and YouTube!
Come over and join us on Facebook in the group Recipes, Crafts, and more with TipToe Fairy or Sewing and Crafting with The TipToe Fairy!

17 comments
This is so cute. What toddler would not love this. Pinning!
Oh my cute! This reminds me of when my mom made a Flinstone’s Dino costume for my brothers years ago!
This so much cuter than the toilet paper tail my grand made…
This is adorable!! My 3 year old would love this!!
Seriously, this is like the cutest idea ever! I can’t get over it! Thanks so much for such a fun tutorial. Your photos are just sooo adorable too!
This is so cute! I could just see my son running around with this on. Now to learn how to sew!
This is SO stinking cute! I wish I knew someone to make it for!!
I love this! And the tutorial is great, thanks for sharing.
I have three little boys who would LOVE this!! Thanks for the inspiration!!
So so cute!
How cute and so much fun for the kids! I need to make one of these!
Great idea! I love how something so simple can capture kids’ imagination and keep them busy for hours! 🙂
I want one of these for me! LOVE this (how far away is halloween!?)
xx Kait
Who needs Halloween? Wear it to Walmart! No one will bat an eye. LOL
Thanks so much for posting this great tutorial! I made my 5 year old a dragon costume for Halloween, and used your dragon tail pattern as the basis for his tail. I omitted the spots, did separated spikes, and added a barb to the end. Voila, PERFECT dragon tail.
I also appreciate that you mentioned the amount of patience required for stuffing it firmly enough to hold its shape… it helped knowing that going into the process.
That’s wonderful! I’m so glad it helped. Yeah I wanted to throw it across the room when I was stuffing it, lol.
Thank you for this great pattern and idea. I have a question. My spots did not stay on. Did I not iron it long enough? The directions said 8-10 seconds. Should it be longer? Would hot glue work?
Another question could I use plastic bags in addition to the polyfil to stuff the tail? It uses so much polyfi and I have several tails to make.
Lastly, a suggestion . I used a thin bamboo back scratch-er to push down the polyfil. Worked great.
Please advise me about the dots.