
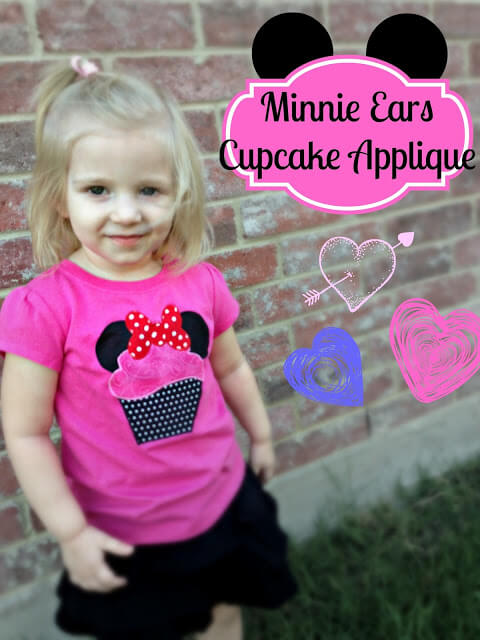
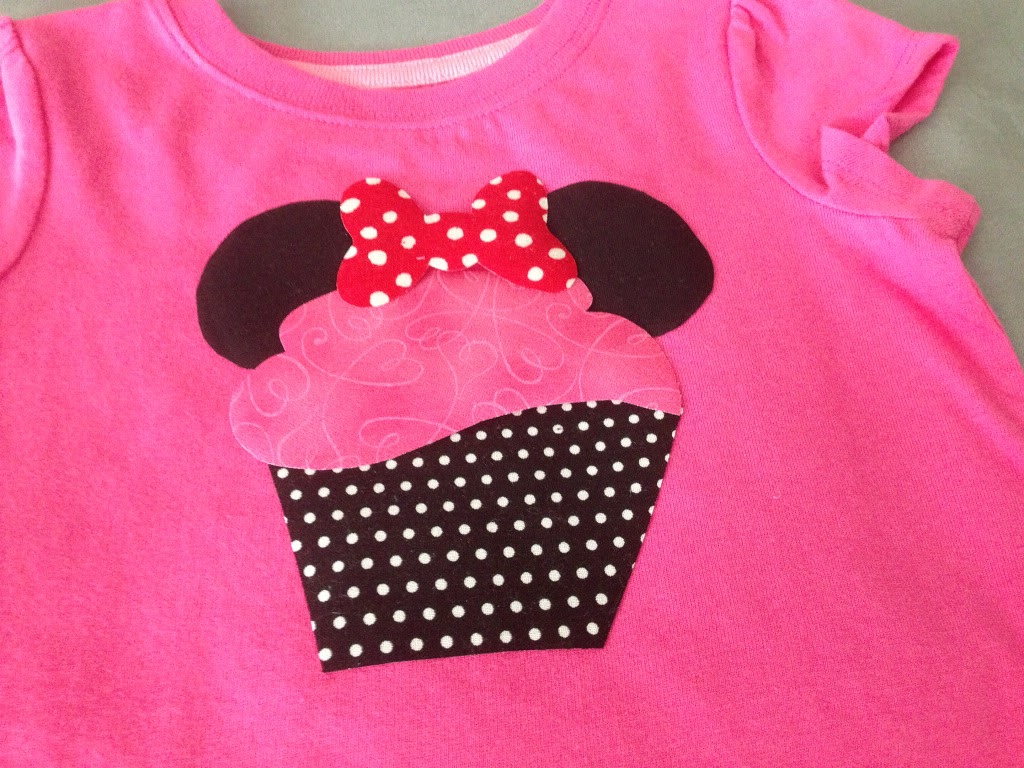
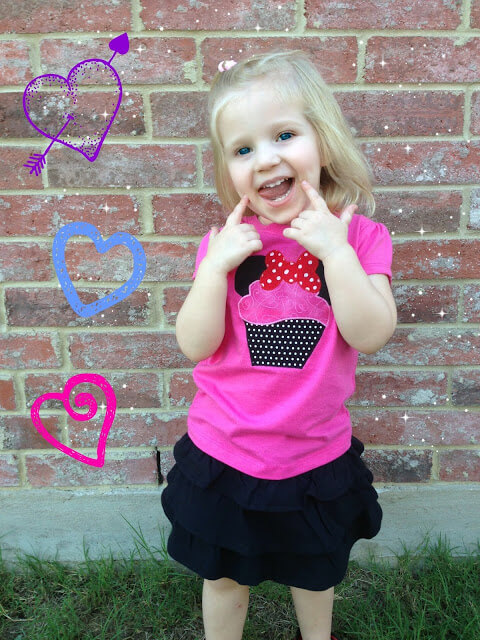
One of my favorite sewing projects is machine applique. It is such a satisfying process. I’ve created an adorable applique perfect for your trip to Disney. It’s a Minnie Mouse cupcake! Don’t you love it when something comes out exactly the way you designed it in your head? This came out just the way I planned.
This tutorial will teach you to easily machine applique and give you easy tips to make your appliques look as good as the professionals.

Table of Contents
Minnie Mouse Cupcake Applique Tutorial
- Materials
- Scraps of fabric – 3 different fabrics plus black fabric for Minnie ears
- Heat n Bond Lite – Lite will not gum up your needle.
- Microtex Sharp sewing machine needles – Schmetz – 80/12 or 70/10
- Thread to match as closely to fabrics
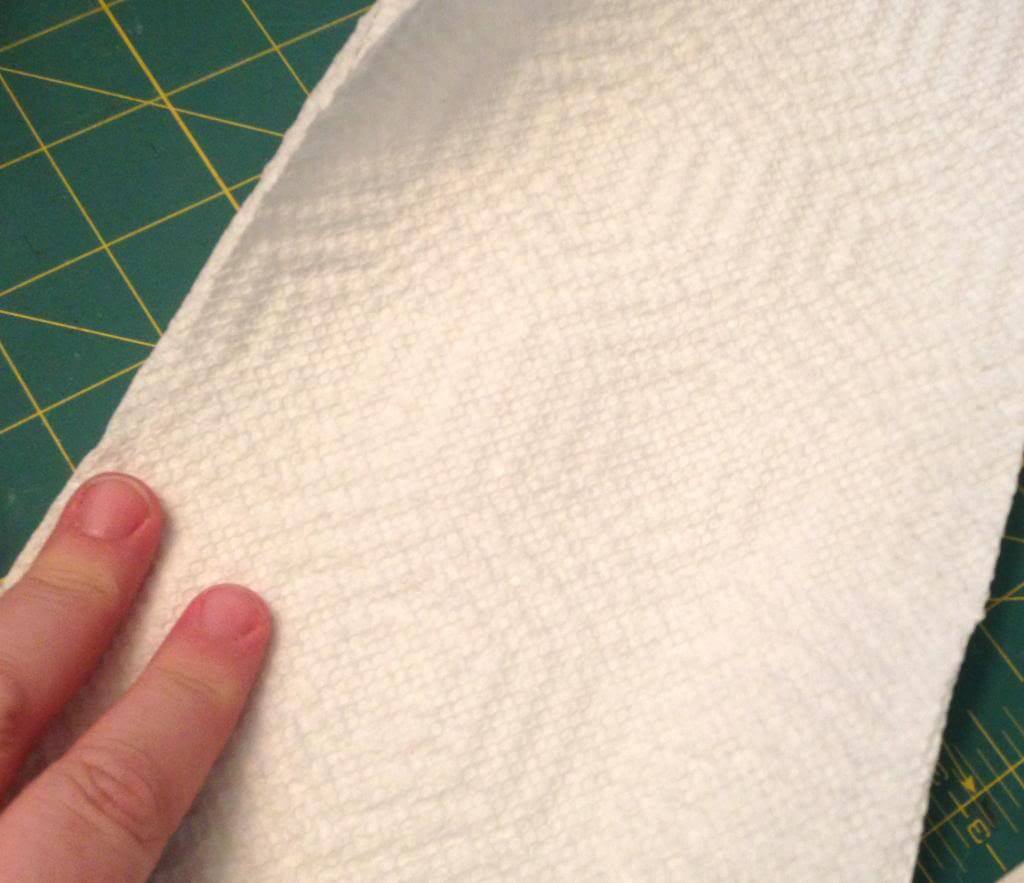
- Stabilizer – I like the perforated ones, but there is tearaway (or even paper towels).
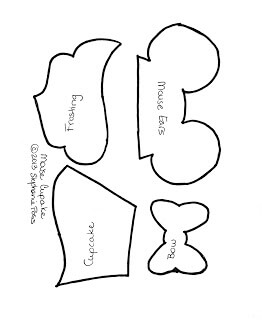
Click the pattern below to open the full size pattern, save it, and print.
Tips for Beautiful Machine Applique
1. Stabilizer, stabilizer, stabilizer. This will make or break your applique. If you attempt to applique without a stabilizer you will be extremely frustrated with the puckers and the sewing. Paper towels are the easiest thing you can use, and they work great. I was out of my stabilizer when I made this, so I used paper towels. I usually use 2-3 layers of paper towels.
2. Try to match your thread as closely as possible. Sometimes you can go a shade darker because it actually looks lighter once the thread is in the applique. If you use a completely different color thread, it is more likely to show flaws and look home sewn.
3. Microtex Sharps needles. These can be found at Joann’s and Hancocks. I use them for all my appliques. I’ve found the 70/10 work best if I’m appliqueing onto a light woven fabric, and 80/12 is good for knits or fleeces.

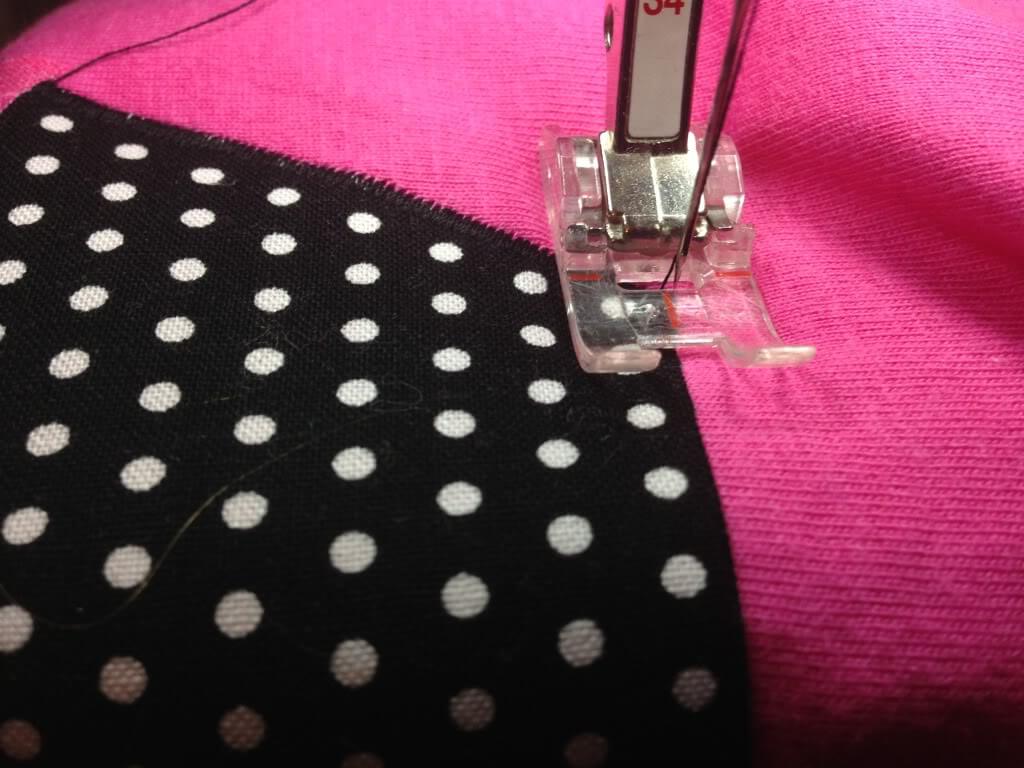
4. Machine settings – I set my machine to zigzag with a stitch width of 2 and a length of about 0.4. You want a nice thin zigzag. If you use a wide zigzag, it can show flaws and look wonky. I have a Bernina sewing machine, so you might need to tweak these settings just a tad for other brands of sewing machines.
5. Go fast around curves. This sounds completely counter intuitive, but it’s true. The faster you go around curves, the smoother and nicer they look.
Directions
1. Iron Heat n Bond Lite to the backs of your fabrics.
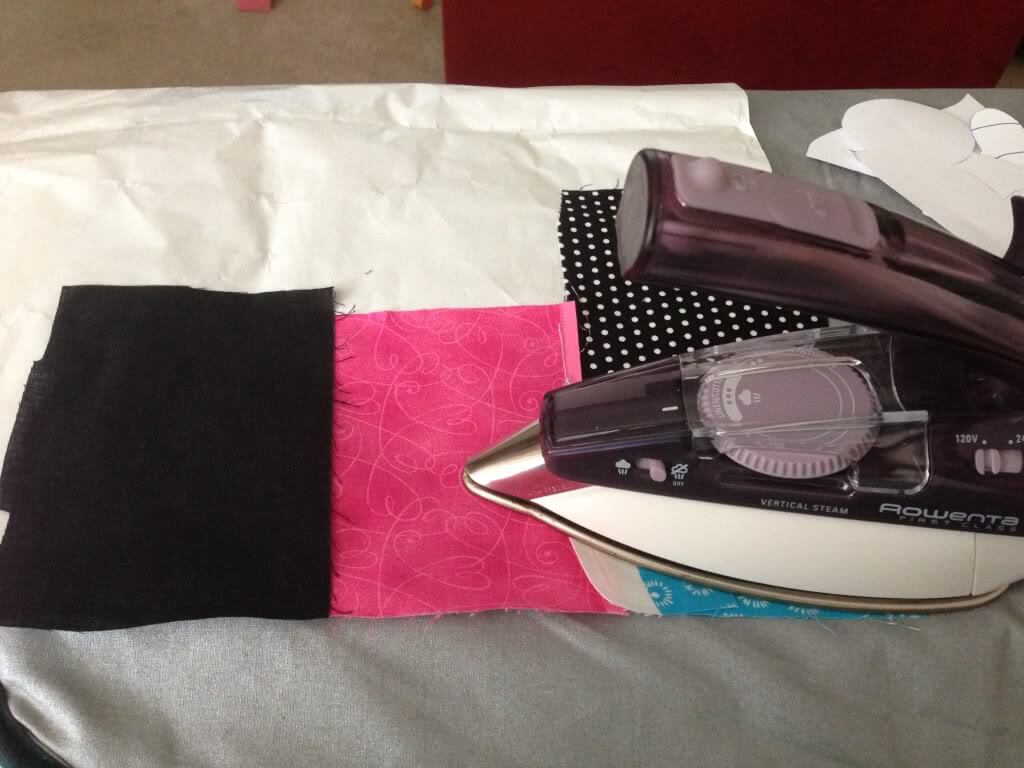
2. Keep the paper backing on the fabrics from the Heat n Bond, and then trace your designs on the backs of each fabric.
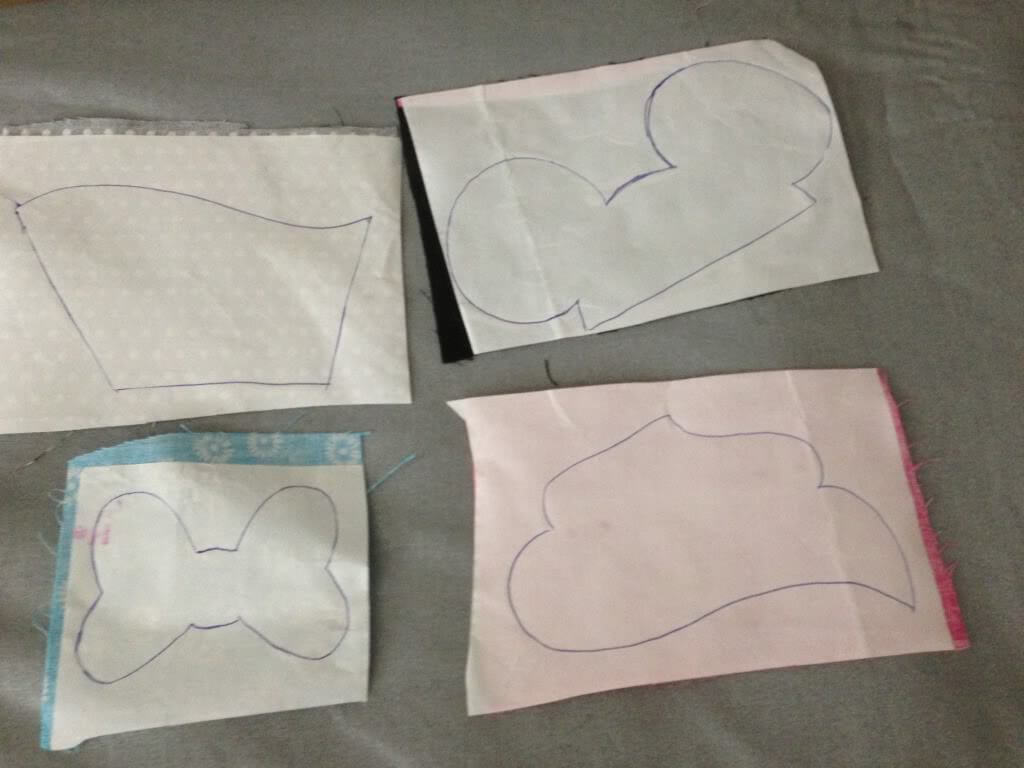
3. Cut out your designs, remove the paper backing and place them your clothing and lay them out to get your best placement. Make sure you have it the way you want it. (Yes, I traced the frosting backwards because I’m a moron. But, I fixed it.)
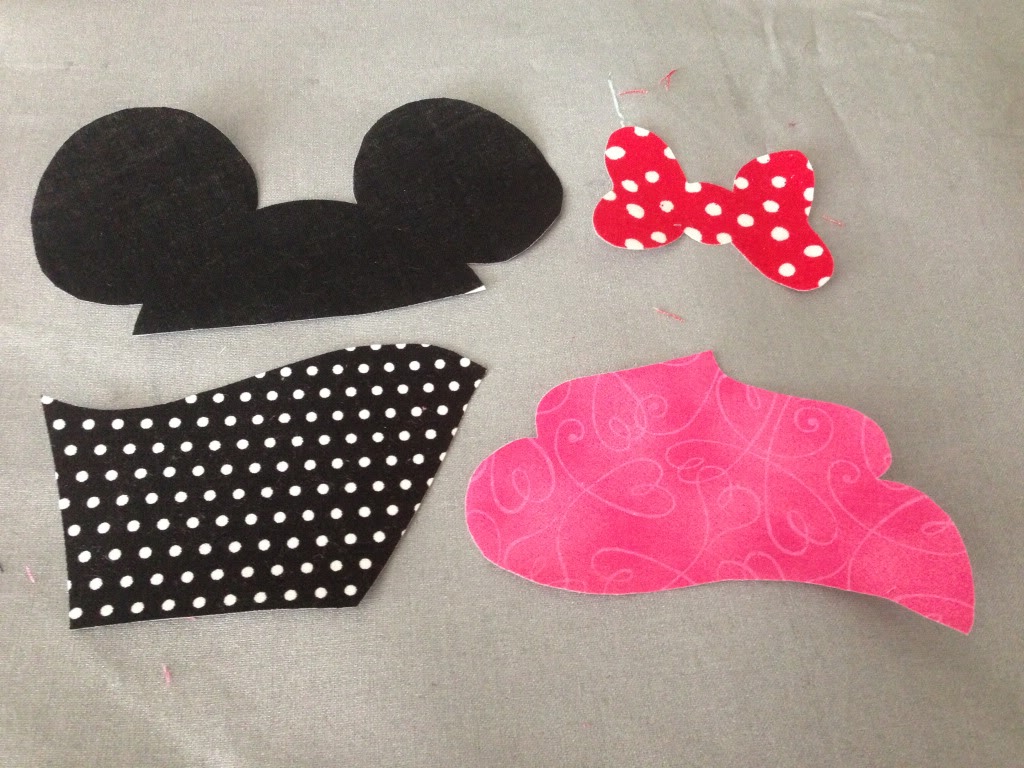
4. Place your appliques and make sure you like how they look before you iron. Then, Iron the appliques into place. Just set the iron on each section, do not move the iron as you applique or can move your designs. Also if your iron is dirty, use an iron clothing like a lightweight towel to cover the appliques so you don’t ruin them.
5. Place your stabilizer behind the applique and set your machine up to applique.
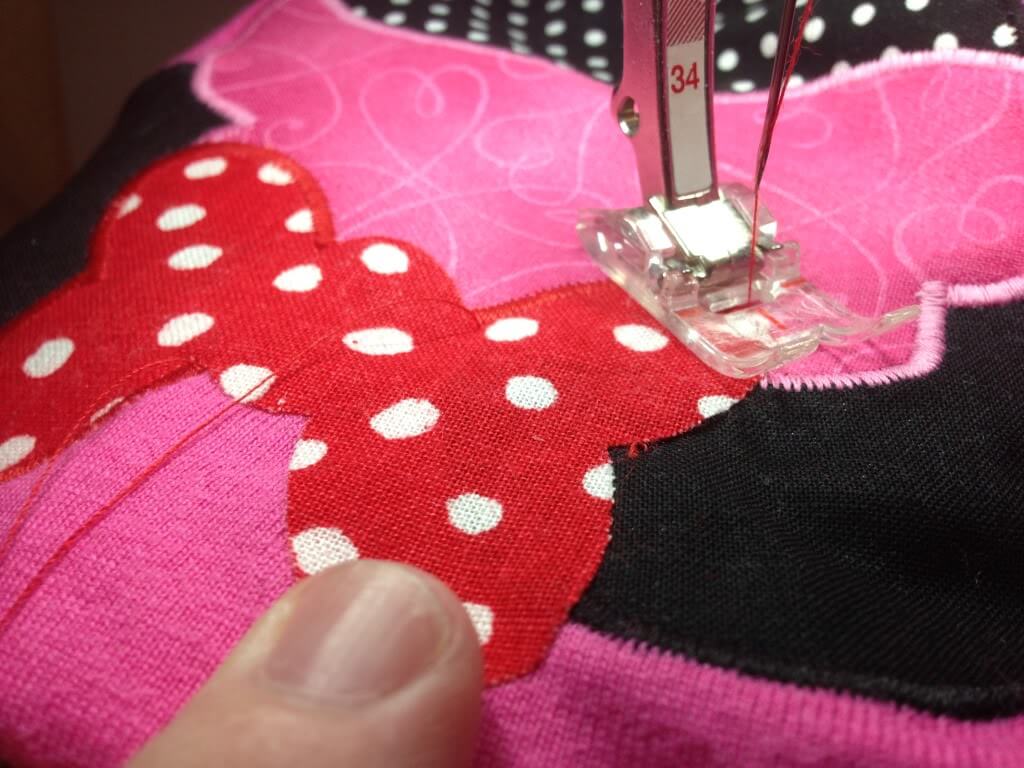
6. You will sew the appliques in a series of what will be covered by another zigzag stitch. For example, you will start first with the cupcake wrapper, then do the mouse ears, then the frosting, and last the bow. At the end of your very last applique stitch line (this would be on the bow), do 1 backstitch, no more is necessary.
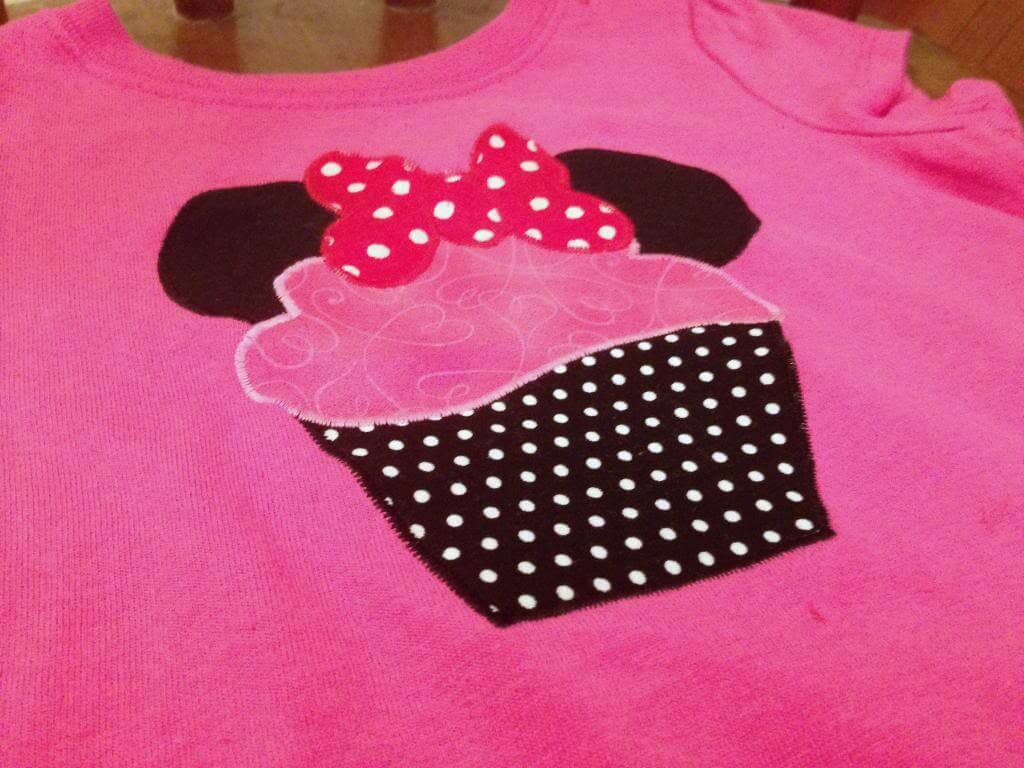
And that’s it! You’re done! Now you’re ready to head off to Disneyland or Disneyworld!
11 comments
Aww!! This is too cute! And I love love love that you make it look so easy! It looks like something that even a newbie sewer like myself would be able to do. So fun!
I would love for you to share this (and any other post!) at my Life of the Party link up if you get a chance. Im going to poke around your blog a little more!
http://thegrantlife.com/life-of-the-party-1/
Thanks! I’m headed over there now to link up.
Hi Stephanie! Thanks for the tutorial! I am new to appliqueing, just did my first one last night! I didn’t know to use a stabilizer, so on the next ones, I will do that! It turned out home-made looking as I had the setting different than you mentioned. I will set them to look like yours on the next project! Thanks again! Blessings from Bama!
This is just too cute! Wish I had granddaughters but maybe some day. Would you like to share this at a blog I’m co-hosting? I hope you stop by at My Favorite Posts Show off Weekend Party.
Michelle @ On A Wing And A Prayer
i love this pattern! i am going to make one for my 4 year old she loves Minnie.
Adorable!
This is so cute! Can’t wait to create one for my one-year-old, whose newest two-syllable word is “Minnie.” Stopping by from Hoyby Crafts http://hoybycrafts.blogspot.com
Absolutely adorable! I’d love to make these for my daughters and I next time we go to Disney. Thanks for sharing at Inspire Us Thursday on Organized 31.
We love the tutorial for the Minnie Mouse applique and your daughter looks soooo cute!
You’ve been FEATURED at BeBetsy on the BRAG ABOUT IT No. 20 http://bebetsy.com.
Our next party starts at midnight tonight so find something cool to BRAG ABOUT and link up. Oh, don’t forget to get a featured button for your site!
Sharon and Denise ?
Follow us:
Facebook ~ Twitter ~ Bloglovin ~ Pinterest
Thank you Stephanie, I am sending a message from the Gold Coast Australia, love all your instructions and am going to make this for my granddaughters.Have just made a cupcake from Felt,This was a little kit, various colours and used little beads on the top for icing and sprinkles, I stuffed it and sewed coloured buttons so my little grand daughter could undo and do it back up after stashing her M&M’s in it. Also embroidered” Brit’s Stash” on the outside of the cupcake, she seemed to love it ! From Sue Gold Coast Australia
This is adorable and your tutorial is great. Thank you ….