
My daughters and I have always loved American Girl dolls. Even when I was a little girl, I remember looking through the catalog loving all the little tiny things for dolls. But, I also love to sew and create. When my oldest daughter, who is now 14, got her first AG doll, I loved sewing and creating things for her dolls.
When she joined the basketball team at her school in the 3rd grade, I stayed up late into the night making an identical basketball uniform for her doll for her first game. I wish I had a picture to share.
Today we’re going to make a fun twirly skirt. This can be made completely on a sewing machine. I love my serger, but sometimes it’s easier to make tiny things on just the machine.
One tip — if you have a ruffler foot for your machine, this will greatly speed up this project.
Table of Contents
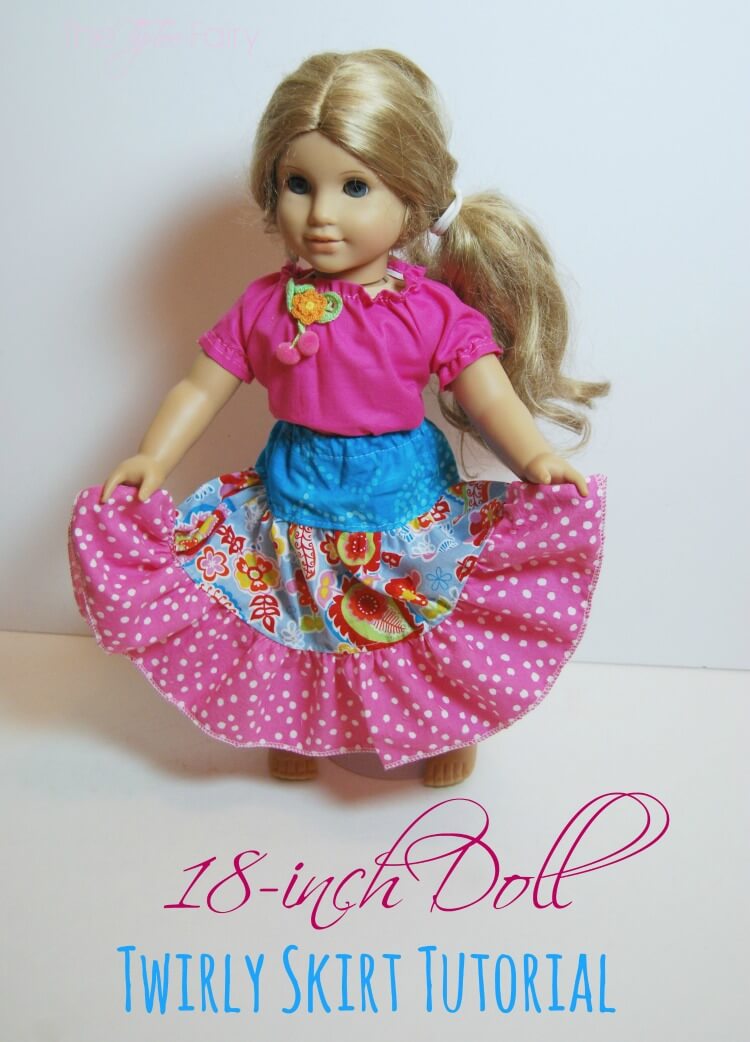
18-inch Doll Twirly Skirt Tutorial
Supplies
- 3 strips of fabric in full widths of fabric such as 3 inches x 45 inches wide.
- 1/3 yd of half-inch elastic
- measuring tape
Directions
Measure your doll at the waist and length from waist down to ankle. For a typical American Girl doll, the waist measurement is 11 inches and the waist-to-ankle measurement is 9 inches.
Determine the length wanted for the twirly skirt. For this example, I used the full length of about 9 inches.
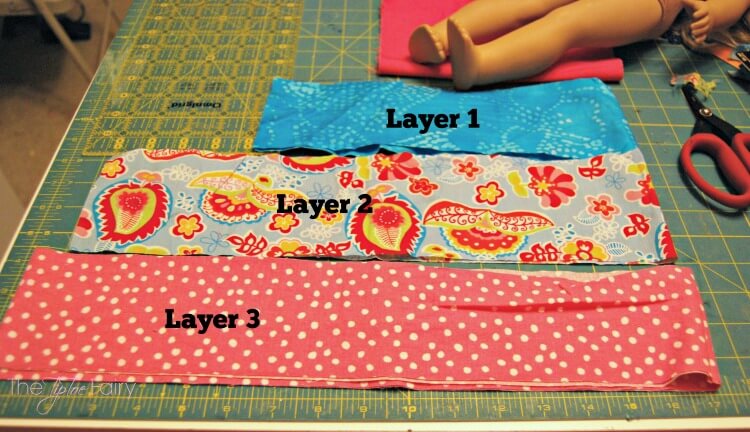
Since I wanted just a little shorter than the full length for the skirt, I cut 3 layers, each 3 inches in length. Here are my cutting measurements:
- Layer 1: 3 inches x 13 inches (added 2 inches for ease)
- Layer 2: 3 inches x 23 inches
- Layer 3: 3 inches x 45 inches
The reason for the really long measurements is because I like to use my ruffler to gather, and a ruffler usually takes a LOT of fabric to gather, so I wanted to have enough.
If you are using a ruffler foot, use the directions that came with your ruffler to gather each layer to the next layer.
**If you are NOT using a ruffler foot, use a long gathering stitch on each of layers #2 and #3. Then gather by hand, pin to the above layer,, and sew each layer together.
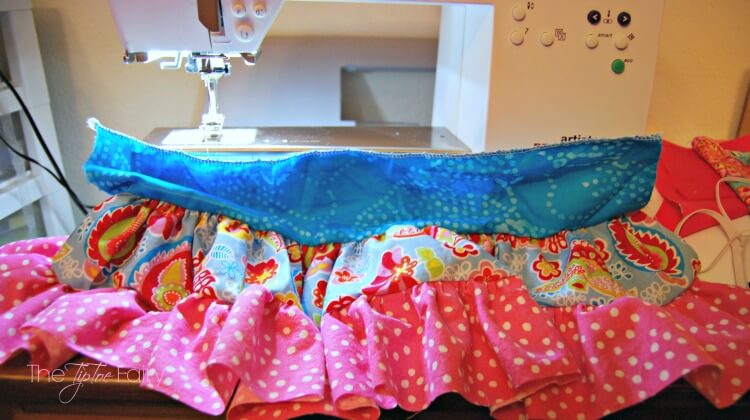
This is what it will look like once you have sewn each layer together.
Fold the top edge of the waist down about 5/8 inch and sew to create a casing to insert the elastic.
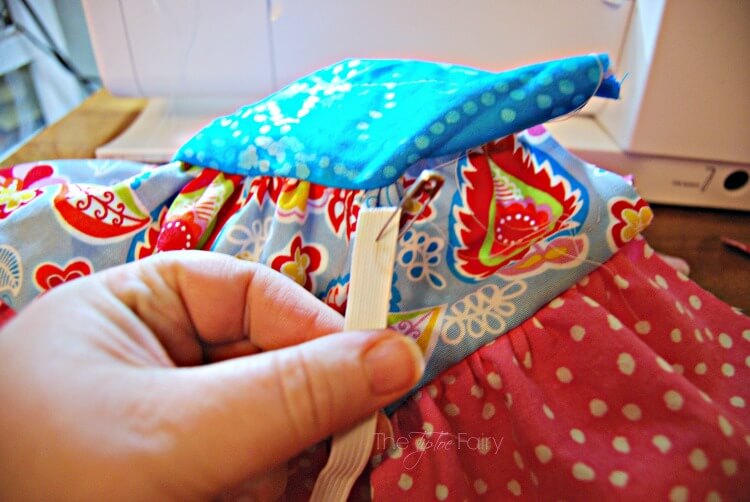
For an American Girl with an 11-inch waist, cut the elastic to 9 1/4 inches.
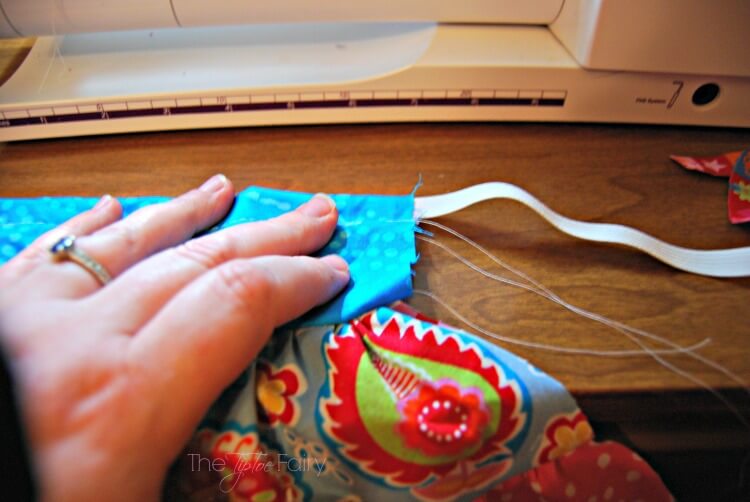
Using a safety pin at one end, insert the elastic and pull through, making sure to keep one the elastic edge from going all the way through.

Sew a backstitch at each raw edge to hold the elastic in place. Do this fairly close to the raw edge of the fabric so it will be caught in the seam of the skirt once it is sewn closed.
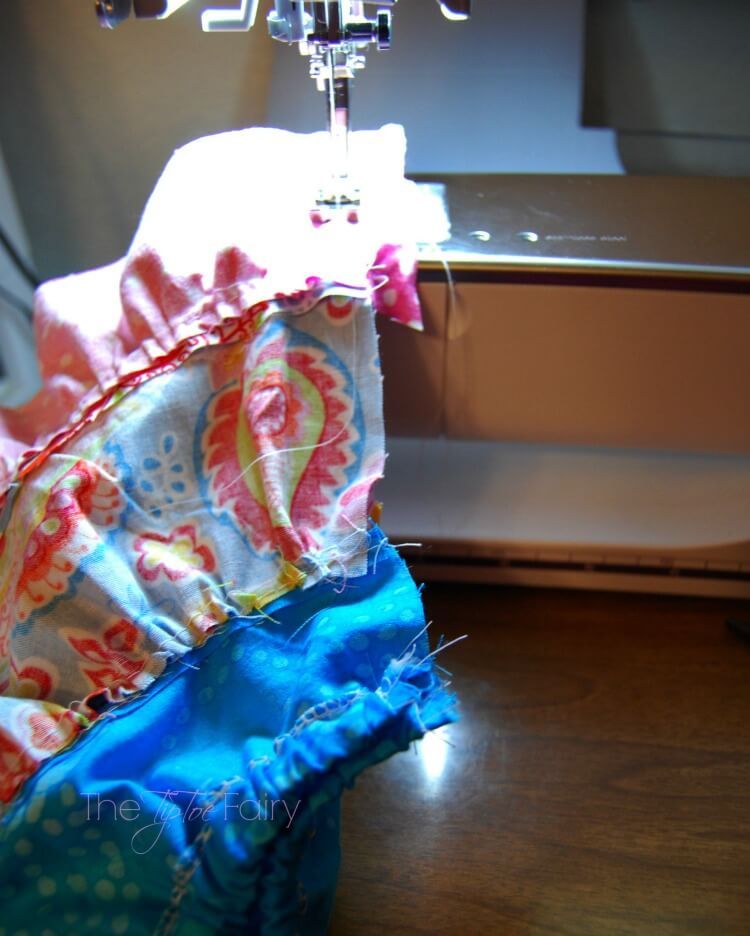
With RIGHT SIDES together and using a 3/8-inch inseam, line up the edges of the skirt. Start sewing it closed from the bottom hem first up to the waist band.
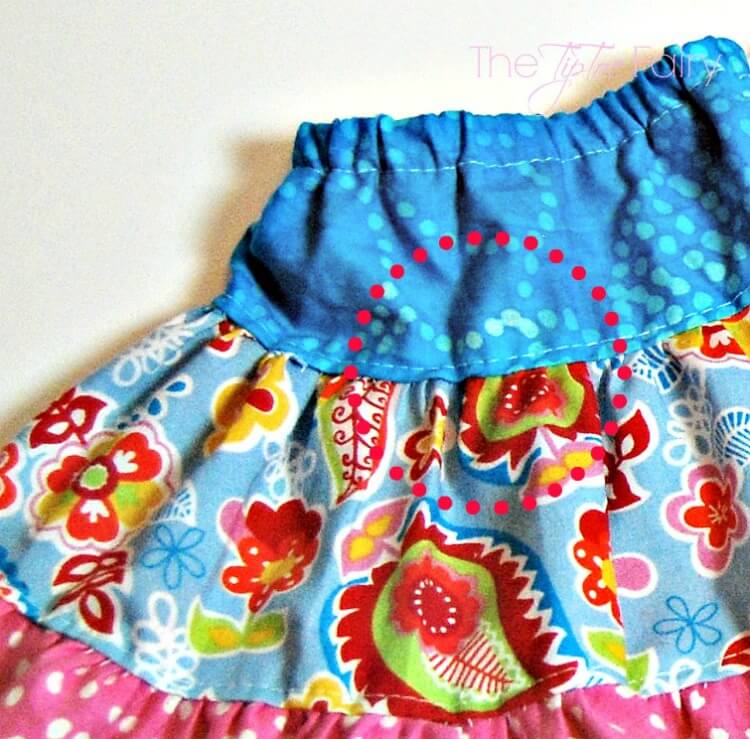
Optional: Sew a stay stitch around the ruffles as shown. This makes it a better made, quality garment and will make the gathers stronger and less likely to pop a stitch.
There are a couple of options for hemming. For this particular skirt, I took the lazy way and just serged around the edge of the hem with my serger. Lately, it’s a very popular method for finishing a garment, and it looks cute, too.
If you don’t have a serger, just press 1/4 inch inward and then press another 1/4 inch inward and sew a straight stitch around.
And Voila! You’re done!
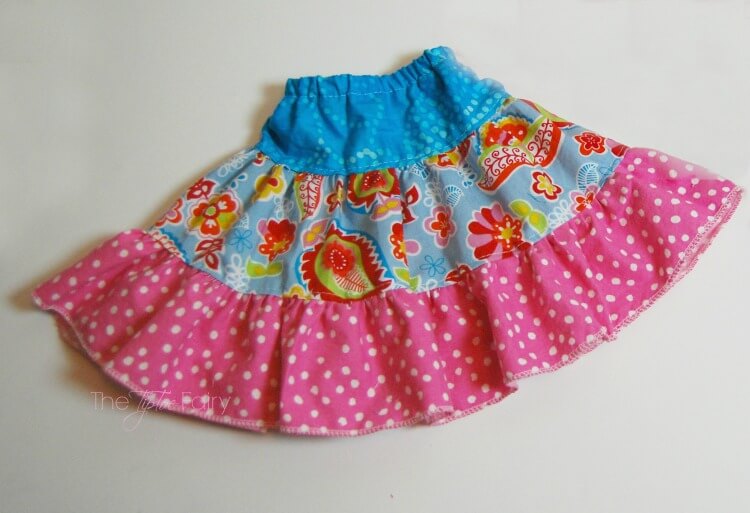
Twirly skirts are very easy, but I love making them. They are just so much fun both for dolls and little girls.
Looking for even more projects for your dolls? Check these out:
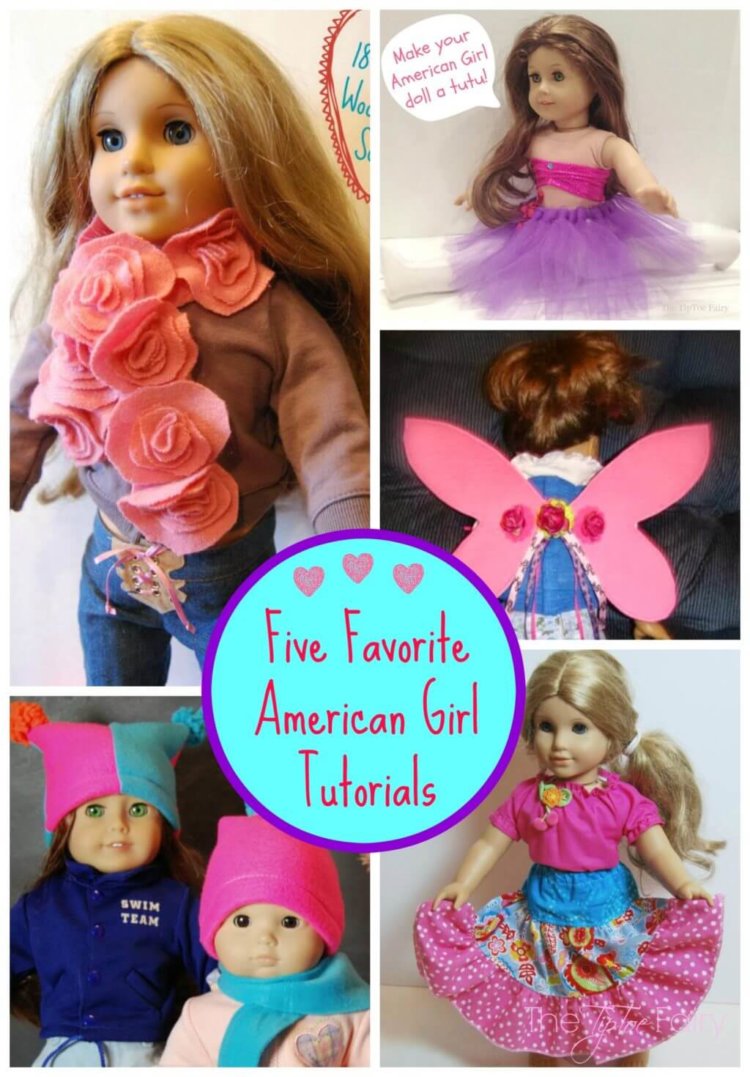
Five Favorite American Girl Tutorials
10 comments
Super cute skirt! You are so talented.
So cute! I love the bright colors and fun patterns you used.
oh fun!! I love this! pinned and stumbled!!
Adorable! I could totally see myself making stuff like this for my niece in a few years 🙂
This is such a pretty skirt!! My daughter is coming to the end of her AG years, and I’m sad at the thought of not making doll clothes any more. I’ve got a Craft Gossip post scheduled for later today that links to your tutorial:
http://sewing.craftgossip.com/tutorial-twirly-skirt-for-an-18-doll/2014/05/18/
–Anne
Thanks for the pattern and tutorial. I just started making doll clothes for my granddaughters and really enjoying it. I like the quick easy patterns best. thanks
I can’t wait to make this skirt-thanks for the tutorial.
Just finished making this. The tutorial does not allow for seam allowances so make sure you add those. Also, if you don’t have a serger ( I don’t) then you need to add extra for turning up the hemline.
Because I had cut mine to the tutorial measurements I had some adjusting to do. I added an extra piece for the waistband turn down and could only turn my hem up 1/4″. Tricky but I managed it. When it was finished it measured six inches, not the nine inches stated in the tutorial…..still very cute!
I made this skirt with my granddaughtertoday and she is so excited with the new skirt for her doll. Thank you for making a 6 year old over the moon happy
I’m so glad to hear! We also have a fun fairy wings pattern for American Girls that she might love making as well!