
Recently, I had the privilege of guest blogging over at Get Your Crap Together for 31 Days of Halloween! I created a fun DIY tutorial for Spooky Flying Ghosts. Just in case you missed it over there, I’ve posted it again here — just in time for Halloween. This is a super quick decoration you can whip out last minute.
I love, love, love to decorate for Halloween. It’s my absolute favorite holiday! Every year I try to make a new decoration that I can reuse year after year. Halloween decorations can be expensive, so I like to make my own. And, I try to make it as easy and cheap as possible.

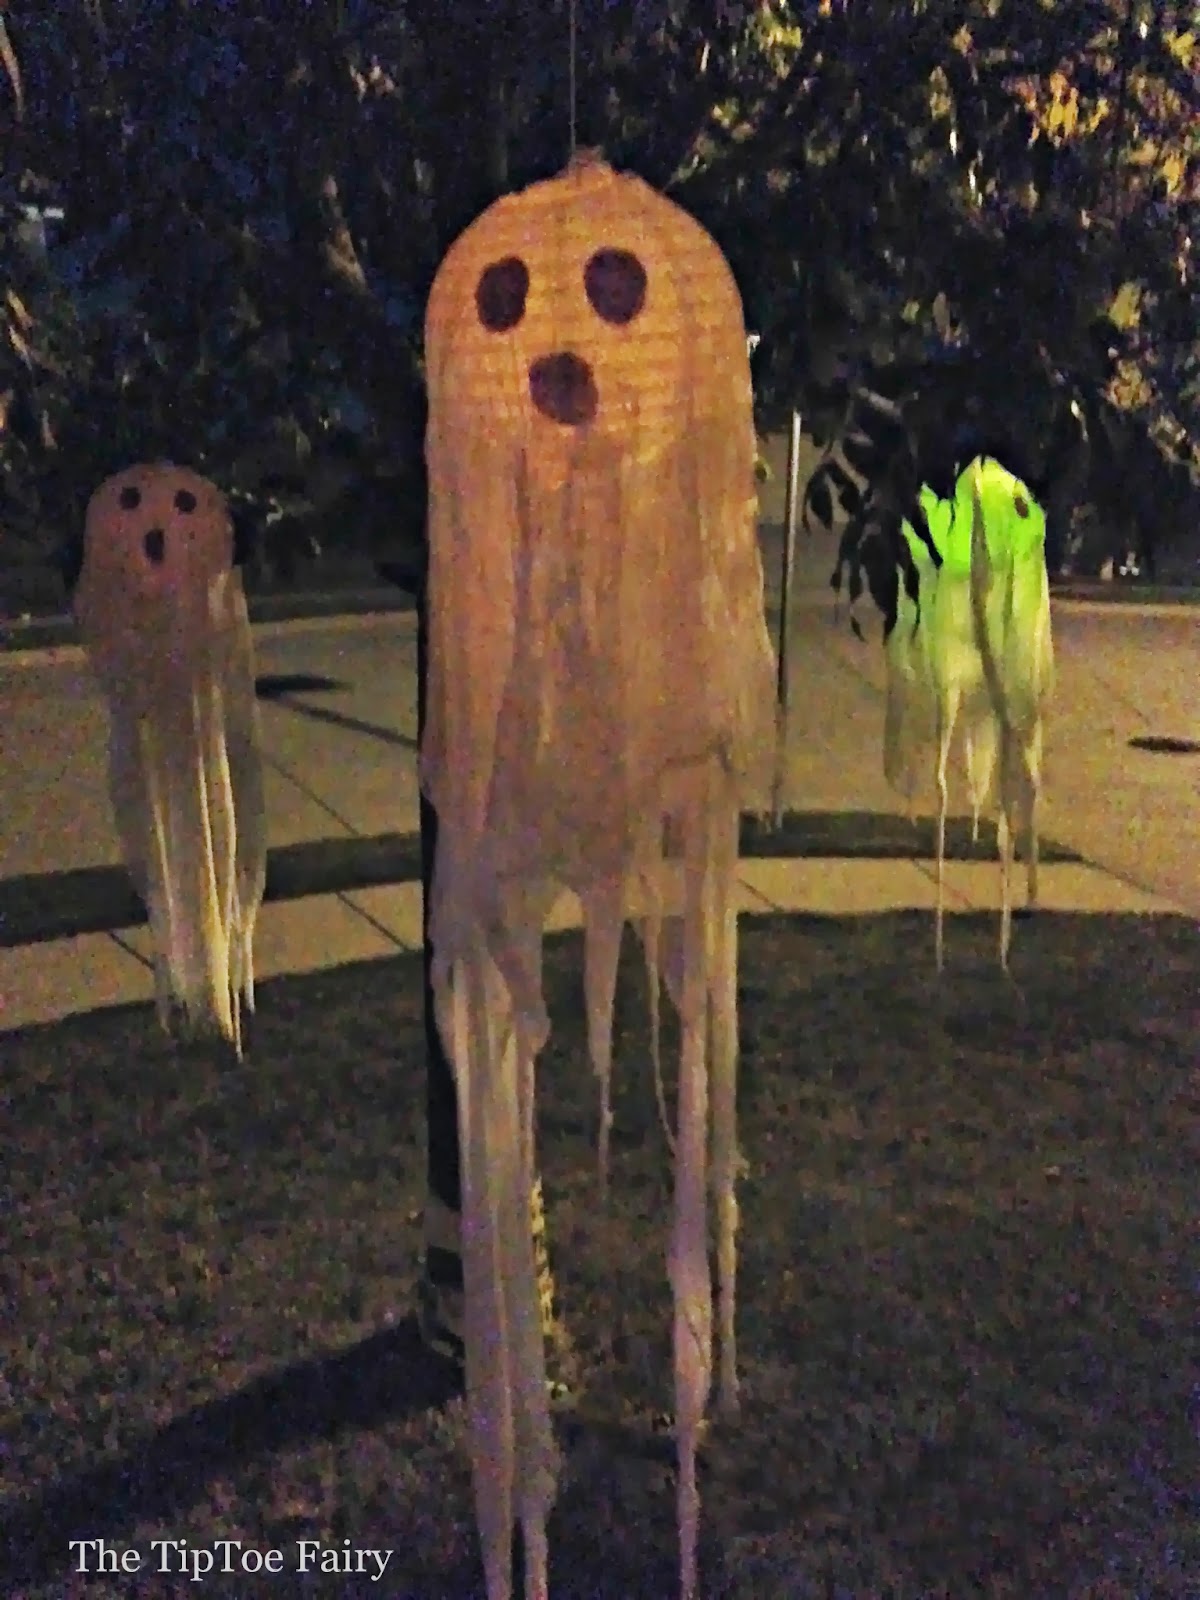
This tutorial will guide you in making flying ghosts. It is one of the easiest and quickest Halloween decorations I’ve made, but it looks great from the street. You can throw this together on Halloween Day in the afternoon in about 30 minutes. Bam! You are another spooky house on the block!
In the pictures, you’ll see I had a lovely 3 year old assisting me. Yep, so easy, your toddler can help you.
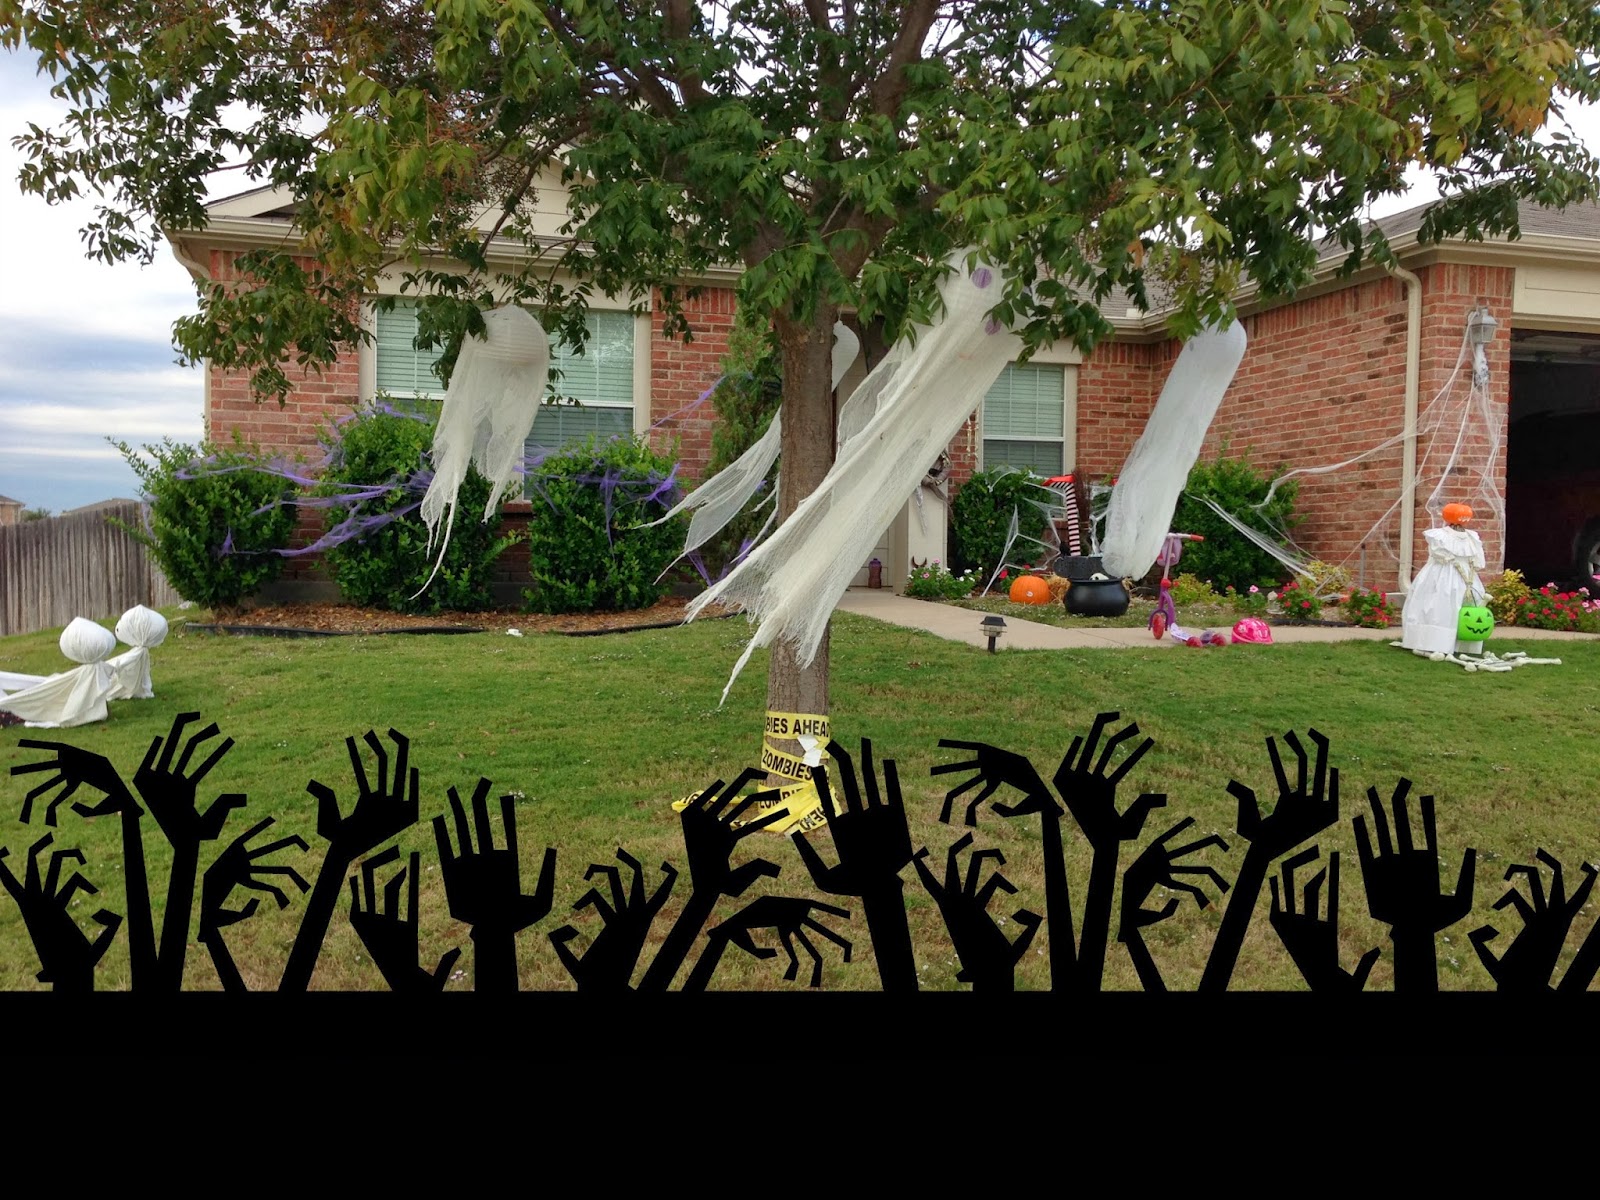
The only problematic requirement is needing something like a tree big enough that you can hang the ghosts from the branches or from the ceiling of a porch.
Flying Ghosts

Supplies
- 3 white paper lanterns
- 2 pkgs of 6 yd cheesecloth
- Scissors
- Dark colored duct tape such as black or purple
- Clear packaging tape
- Twine or yarn
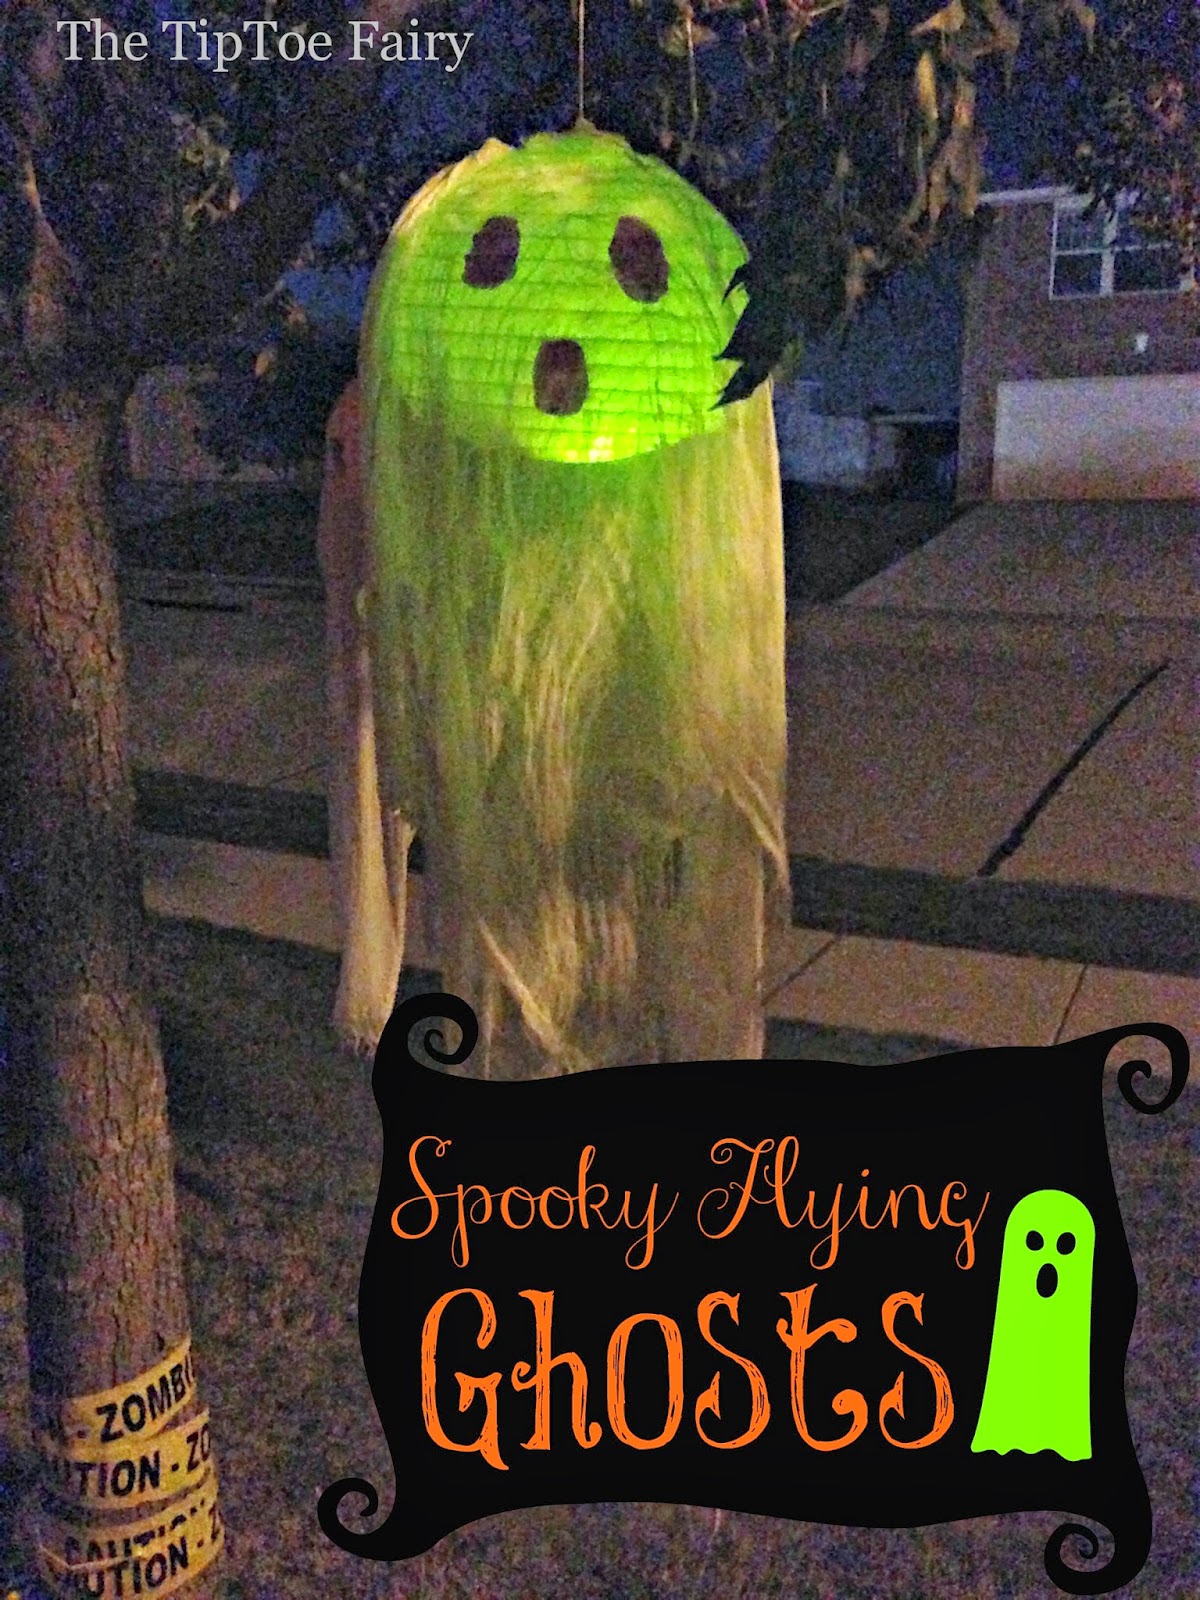
- Glow sticks OR battery operated pumpkin lights
Tips: Craft stores such as Hobby Lobby sell a 3 pack of paper lanterns usually in the party section. They come with 3 different sized lanterns so your ghosts will be sm, med, and lg. With a 40% coupon, they are about $3 for a pkg.

1. Open each paper lantern and put it together.
2. Most paper lanterns are open at the bottom. Use clear packing tape to gently cover the entire bottom, so that you can place a glow stick or pumpkin light inside.

3. Most paper lanterns do not have faces. The one in the example I found at Dollar Tree and it already had a face. To create your own face use the dark colored duct tape. I simply cut circles for eyes and a mouth from duct tape and applied them. Just be gentle when applying the tape, so you don’t bend the wires within the lantern.

4. For each lantern, cut TWO 2 yd sections of cheesecloth. Make sure to completely unfold the cheesecloth. One piece is not enough because the width of cheesecloth is very narrow.
**If you are using the 3 lantern package, then purchasing cheesecloth in 6 yd pkgs is most efficient. You will cut THREE 2 yd pieces of cheesecloth from each of the two packages. That will give you a total of SIX pieces each 2 yds in length, which will give you TWO pieces per ghost.

5. Find the middle of each 2 yd piece and using your fingers, work a hole large enough so that you can expose the metal or plastic top of the lantern.

6. Place one 2-yd piece of cheesecloth over the top of the lantern in one direction. Then, place the second 2-yd piece in the other way. This will completely cover your lantern with the ghostie fabric.

7. Cut an 8-10 inch piece of twine and tie it to the top metal or plastic hanging part of the lantern.

8. Then find a good branch on a tree and tie it. If you are using a porch ceiling, you will need to insert screw hooks into the ceiling to tie the twine to, or use an outdoor transparent tape and tape it to the ceiling.

>9. On Halloween night, add glow sticks to your lanterns, Or if you want to light them every night before Halloween, use battery operated pumpkin lights. Cut a small slit in the tape at the bottom of each paper lantern that will allow you to slip the pumpkin light in and out so that it can be turned on and off each night.
10. Step back, admire your handy work, and watch your ghosts fly around on windy nights!
Enjoy! I hope you have as much fun making your flying ghosts as I did.
2 comments
These are great and very scary, love them 🙂
Thanks for linking up last week, featuring and pinning this week at the hop 🙂