
This shop has been compensated by Collective Bias, Inc. and its advertiser. All opinions are mine alone. #BestMomsDayEver #CollectiveBias
This year my mom stayed with my kids for 4 days while Nate and I went on our first trip away from them – ever. It was kinda scary for all of us on that first day, but my mom was a trooper. She and the kids had a great time, and they were so well behaved. I was so proud of them for giving Grandma an easy time while we were gone. Plus, she took them to do all kinds of fun stuff like swimming and ice skating.
For Mother’s Day I want her to know how much she’s appreciated. I’ve made her a gorgeous Origami Bag, which you can find the tutorial below. Plus, I’m including all these as well:
- gift certificate for a pedicure
- cards from the kids and me
- Starbucks gift card
- the bag I’ve been promising
- new pictures of the kids
- Grandma coffee cup
I hope it’s the Best Mom’s Day Ever for her!
Here’s how you can make an Origami Bag for your mom:
Table of Contents
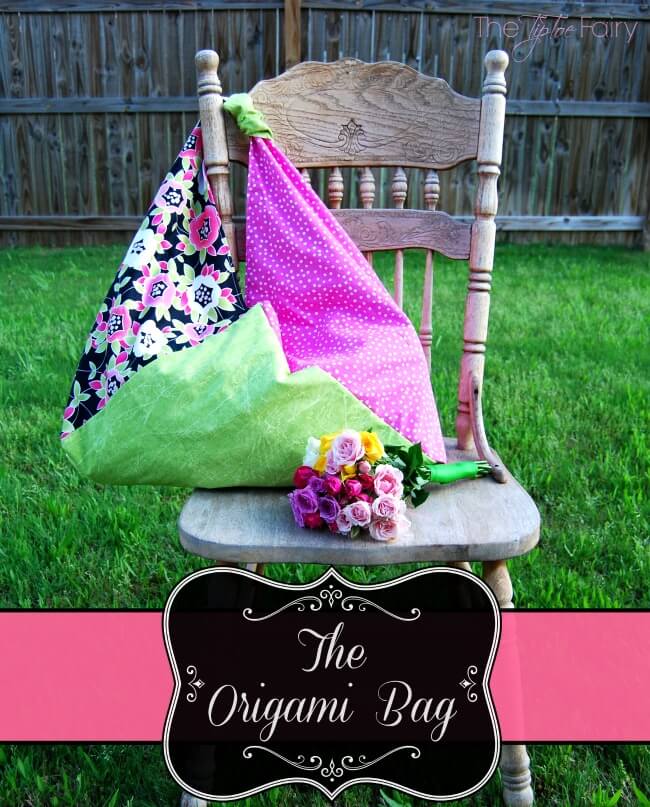
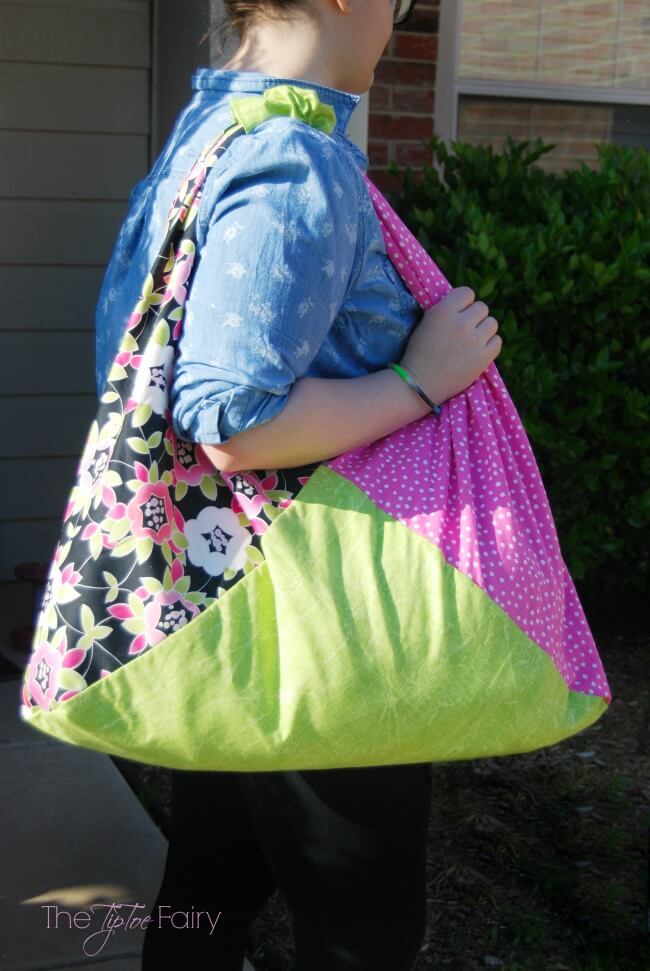
The Origami Bag
I saw these triangle bags on a high fashion site. They reminded me of origami, so that’s where the name comes from. They are so ingenious yet easy to make.
Materials:
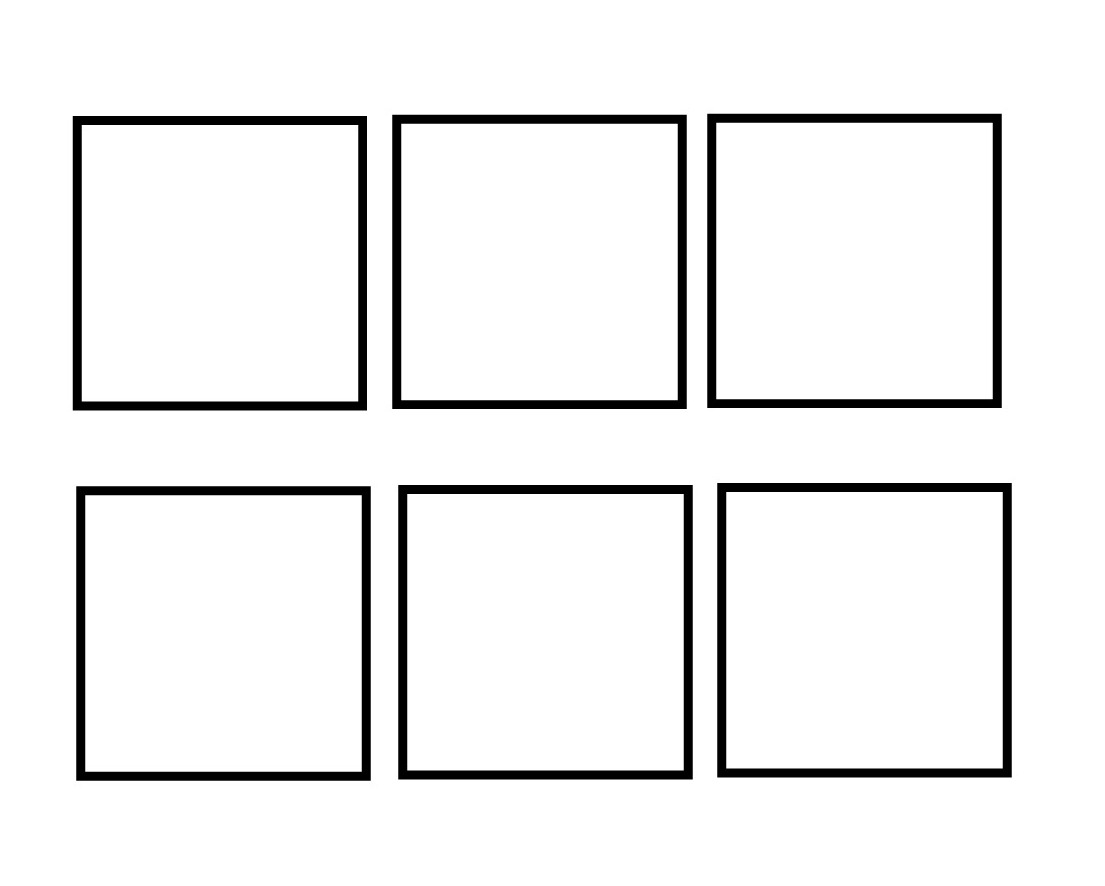
- 6 equal squares of fabric (20 x 20 inches is what is used for this bag)
- scrap piece of fabric roughly 7 x 7
- thread to match
You can use fat quarters for this project (6 total), but you will need to cut them down to 18 x 18 since fq’s are usually 18 x 21 in size.
Direction:
1. Cut six squares equally.
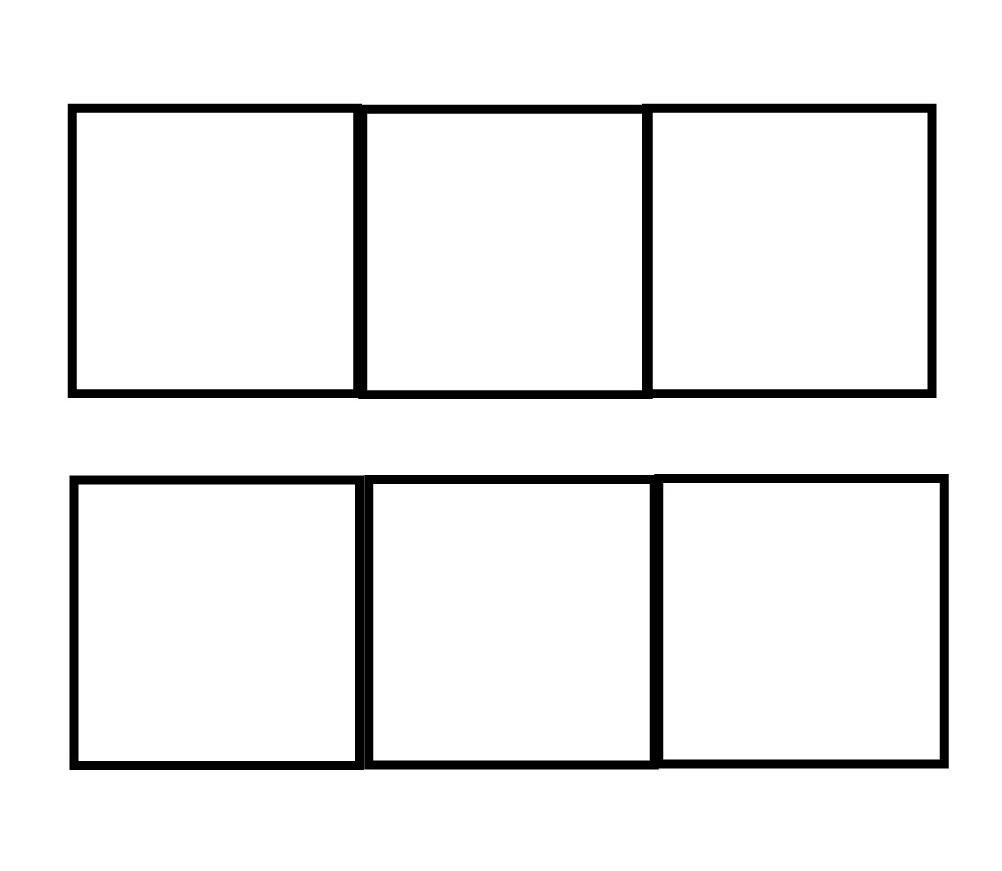
2. Lengthwise, sew 3 squares together.
3. Next, with RIGHT SIDES TOGETHER, place one set of square on top of the other.

4. Sew around three sides, leaving one small side open. Then, flip it right sides out, and toptstitch around those same 3 sides. 
5. Fold inward the one side left open and topstitch it down.
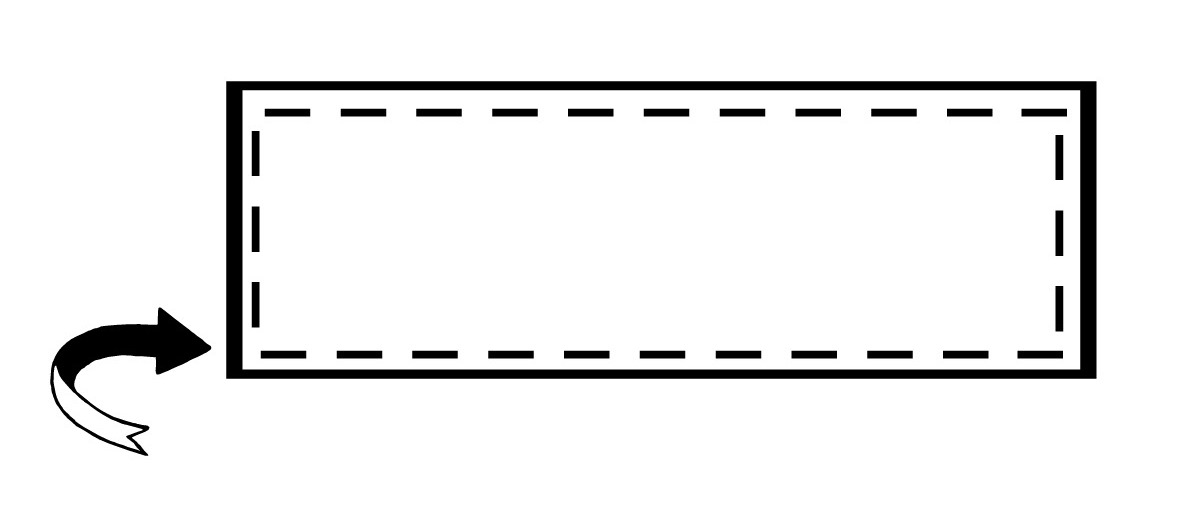
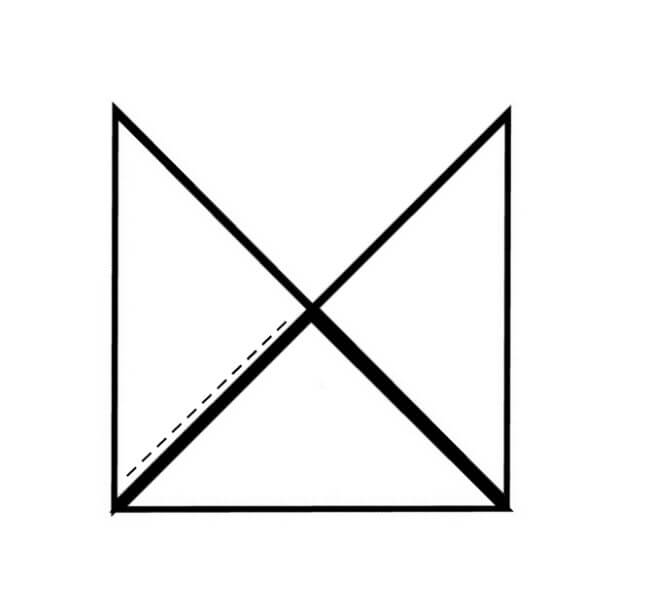
6. Now it’s the origami time. First, fold the left side up as the arrow points:
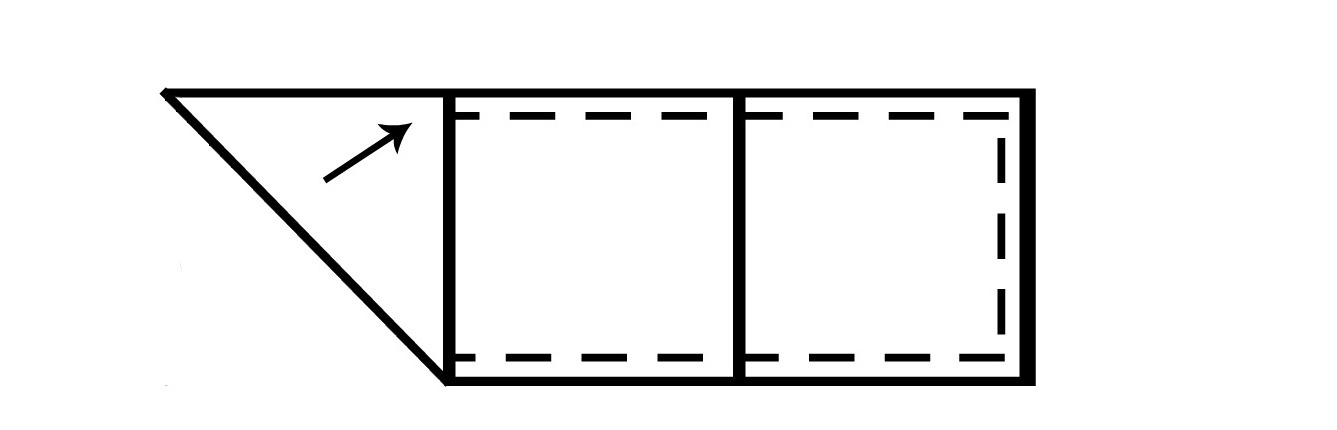
7. Next, fold the right side down as the arrow points.
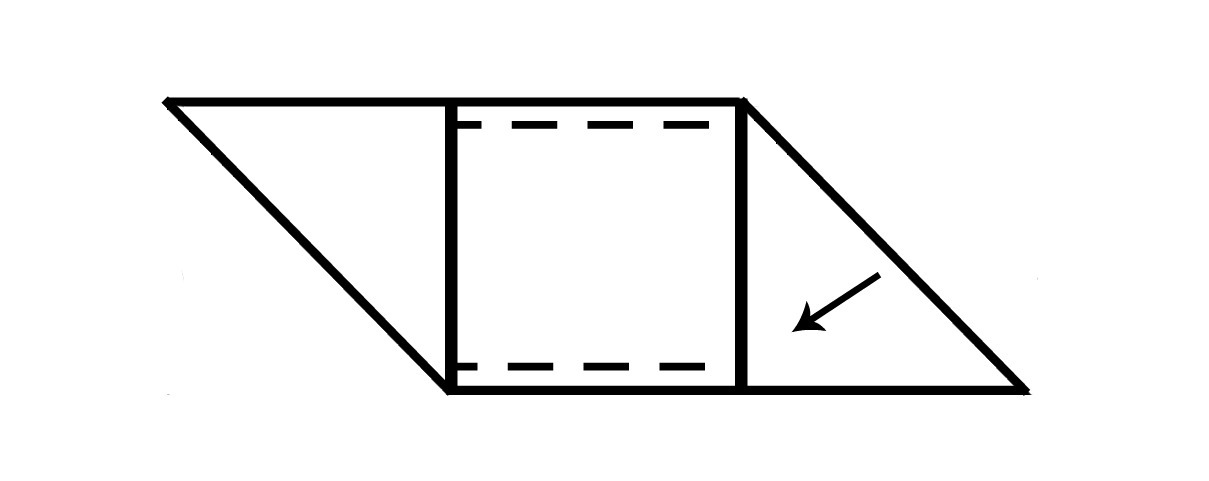
8. Now you’ll fold the middle square upwards from right to left.
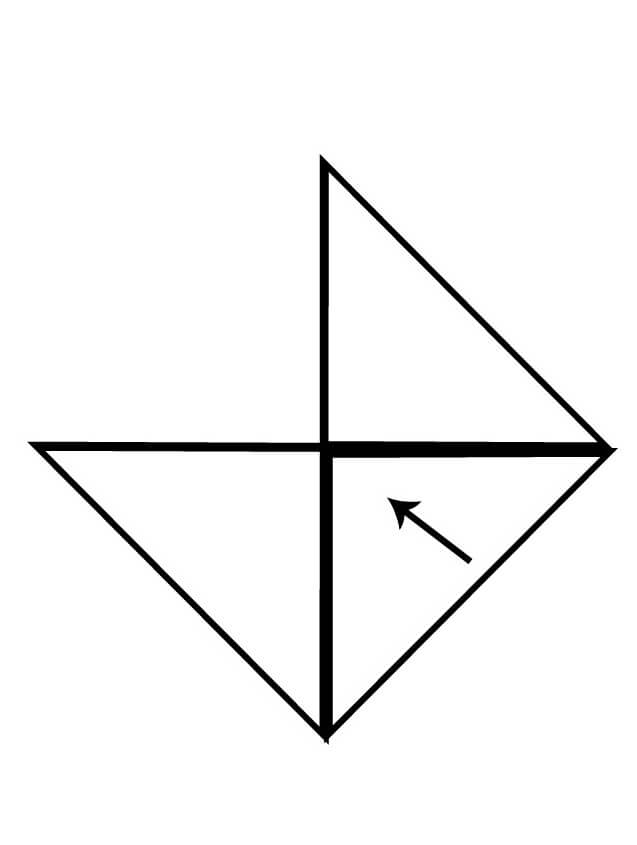
9. Turn it so the 2 points face upwards, and you’ll see how the bag is going to form. Then, with RIGHT SIDES TOGETHER, pin and then sew along the open seam indicated by the dotted line. Then, flip the bag to the back and sew the open seam just like this one.
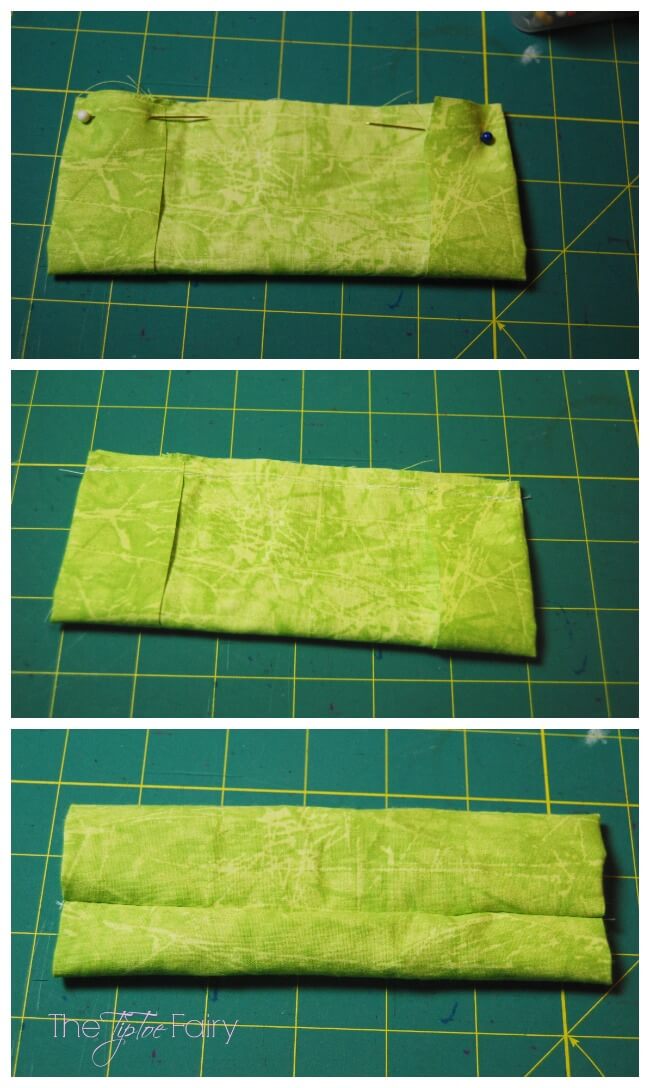
10. Now it’s time to create the strap. First, you’ll sew a tube. I fold the raw edges in ward, then with right sides together, I sew the long tube and flip it right side out.
11. Next, scrunch the tube onto one of the triangle points. Then, overlap the two triangle points and tack them together.
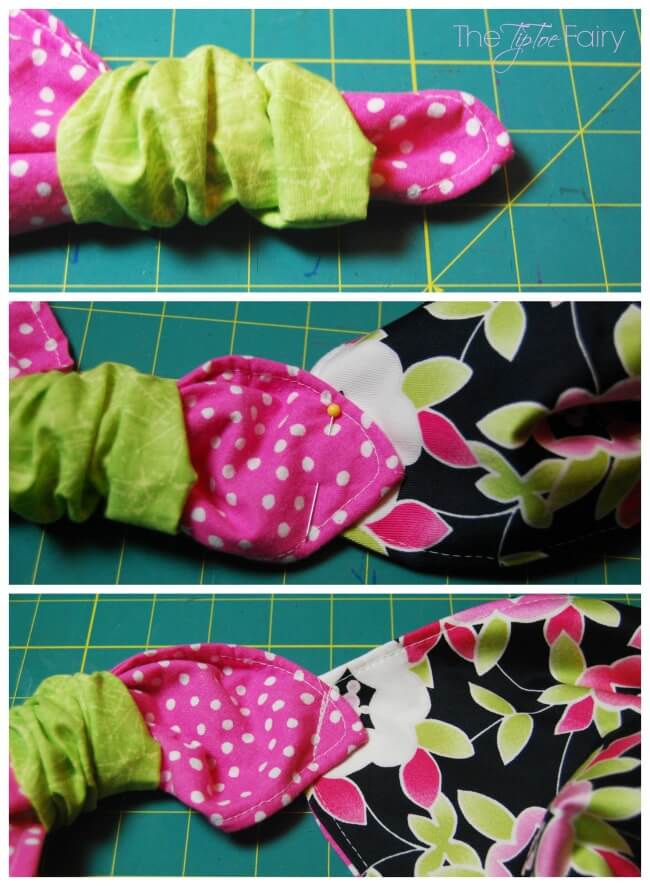
12. Slide the tube over both points. And you’re done!
Here’s a little video I made to visualize how to make the Origami Bag:
29 comments
That bag is awesome. Who wouldn’t love that?
What a great idea! I suppose if you wanted to get fancy you could figure out ways to add pockets and such, but I love this for a project or shopping bag. Good job with the tutorial, too!
Adorable bag! It looks a bit too difficult for me, but I will for sure repin this post so my sewing pals can get a look at it!
What a beautiful craft, I am not into sewing but seems this bag is easy to make and what a better present than that one done with your own hands.
This is a cute bag. I love the colors and I hope that your mom enjoys it.
Oh that’s a beautiful bag! I would love a bag like that! Wondeful tutorial!
The bag looks lovely! And awesome giveaway, too!
Great gift ideas and tutorial for Mother’s Day!
A lot of great gift ideas! I love the bag. I may have to share this with my mom so she can make it for me. lol!
Wow! This looks perfect for a mothers day gift. This DIY is worth a try. Sharing this to my wife.
What a pretty bag! And it’s easy to do, too. This will be a perfect Mother’s Day gift.
What an adorable bag! And I love how you outlined the tutorial so that it looks like something even I could do. #client
I love your bag how cute. I need to get out my sewing machine and start putting it to use!
Ooo, I love the way that looks. The fun patterns and colors are so right for a spring bag!
What an awesome idea for a Mother’s Day gift! Love it!!
This is an awesome gift idea for Mother’s Day indeed. I love making things like this for gifts. The video makes it look so easy to do too. Thanks for sharing.
very cool!! love it! I’ll have to pass this along to a few friends.
I love this. Hopefully I can me a couple before I go on vacation. The scrap piece for the top seems to be missing a measurement. It says 7 x . What would that be. A rough estimate would be great.
I like it
I love this bag. However, 20 inches square gives a huge bag. lovely project nonetheless.
Hi Kar Bar,
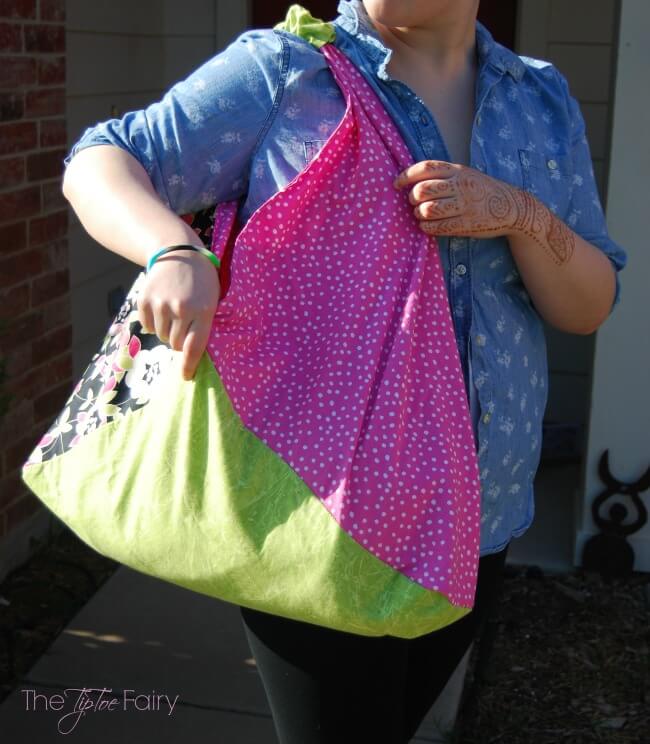
You can make the bag however size you’d like. That’s what so great about squares! I even made an American Girl size from 5 inch squares. The 20-inch size is a great size for many things. It’s perfect to carry towels to the beach, and it actually is the perfect size for my 17-inch laptop.
I sure do like the Origami bag. What a great idea. I would like to see the full version of the video but can’t seem to find it. I was a little confused on how to sew the last triangle after you have folded the middle square. I would love it if you could tell me where to find the full length video.
Thanks so much,
Linda
I put a short little instagram video in the post. Here is the direct link: https://instagram.com/p/2RXezurgEz/
I fell in love with the pattern.I wrote some of the directions down but not all. I had been ill for a while. I went to make it but I forgot how to fold it. I’ m glad I found the tutatorial.I made mine out of 6 men’s red and black hankies. So far I like it. Thank you.
Wow! This looks great, I want a roomy shoulder bag to carry swimming gear in and this looks just the job. Can’t wait to try it.
I am the bag lady. having said that, I must explain that I quite dislike hard edged purses that dig into my fluffy body. and this is EASY—-SMART LOOKING—- SOFT TOUCH——UP SCALE— and all of this is just up my little alley. thanks for sharing. You are a clever lady, keep on keeping on.
I just made this bag, and it was fast and simple. But you do not tell how to sew the fold together as they are finished edges. If you overlap and sew one eye on top of the other, you cannot sew into the corner. The only thing I could figure was to sew the finished edges together as a normal seam. Any suggestions.
Since it’s not a reversible bag, I just sew them together like you would a raw edge with a thin seam allowance.