
I don’t believe in psychics and fortune tellers, but I love the fun of it all. When I saw all the fortune teller Halloween stuff at Michaels a few weeks ago, I knew what this year’s Halloween wreath was going to be – a Fortune Teller Halloween Wreath!
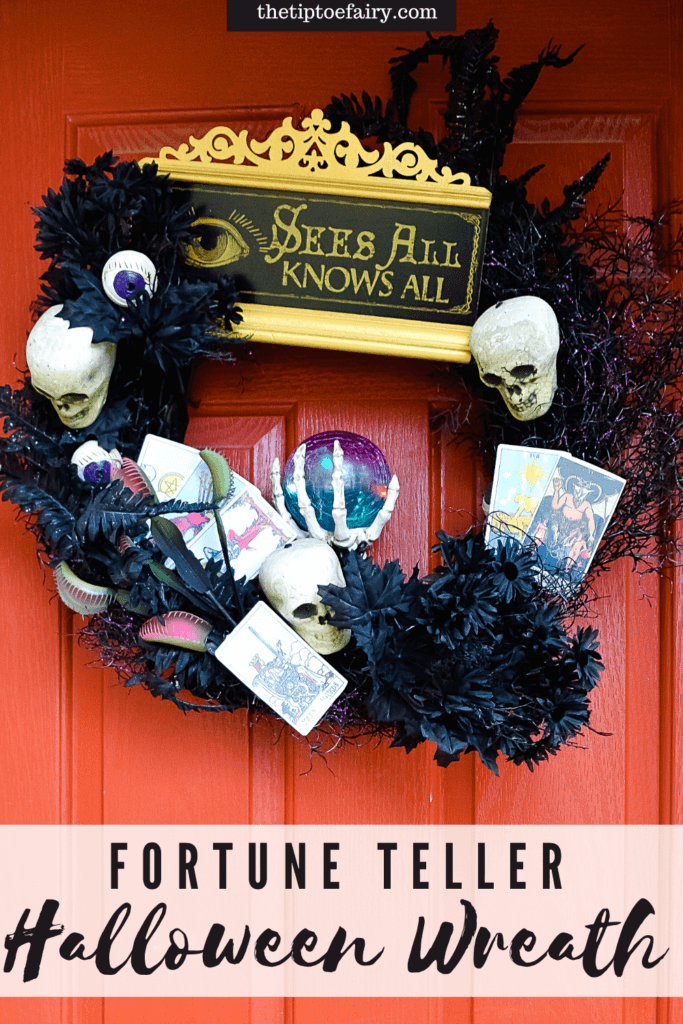
I started with a crystal ball held by a skeleton hand that lights and then based everything around that.
Table of Contents
What do you need to make a Fortune Teller Halloween Wreath?
I started with a basic 20-inch vine wreath. Then, I collected various things that I thought went well with a fortune teller wreath:
- painted resin eyeballs
- black floral picks
- venus fly trap floral picks
- a psychic/fortune teller sign
- printable tarot cards
- light up crystal ball
- small styrofoam skulls
- zip ties
- hot glue gun
- black spray paint
How do you make a Fortune Teller Halloween Wreath?
I didn’t take photos of the process of making the wreath as that is a very easy thing to do with hot glue.
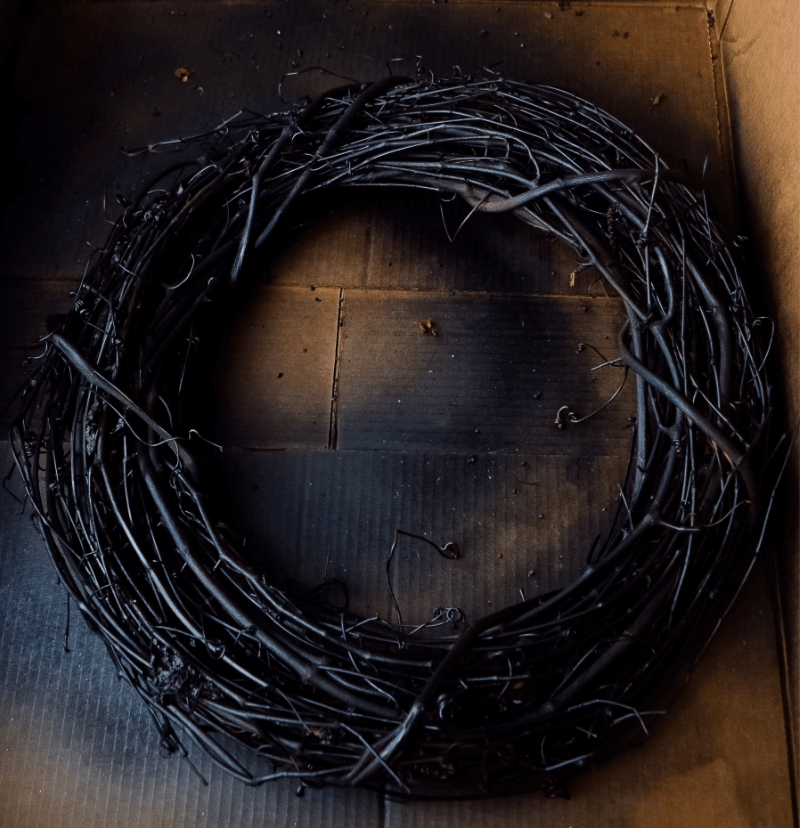
I started out with a regular wreath and spray painted it black. I let it sit for a couple days to completely dry.
First, I chose the best part of the wreath to be the center bottom to hold the light up crystal ball with the skeleton hand.
Next, I laid out the black floral picks all around the wreath and hot glued them to the wreath form.
Then, I chose where the psychic sign would best fit, which I decided was at the very top.
I began placing the resin eyeballs and the skulls around the wreath and hot gluing them. Then, I hot glued the sign in place.
Now it’s time to attach the crystal ball. I was able to loosen one of the larger vines and fit it between this vine and the rest of the wreath. As this one lights up, I made sure it was positioned so I could easily switch it on and off at the bottom back of the wreath. Then, I attached it securely to the vines with zip ties. To hide the zip ties, I added some additional black flowers and a skull.
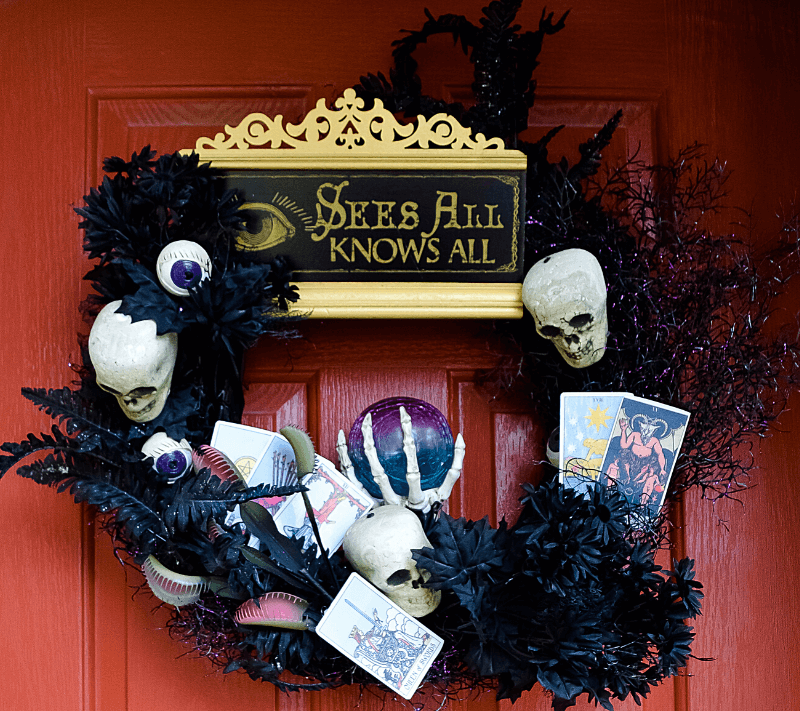
Lastly, I decided every fortune teller needs tarot cards. So, I bought a digital download on Etsy for tarot cards. I printed them on paper and laminated them so that rain would not destroy them. Then, I just hot glued them together and placed them around the wreath.