
This post is part of a social shopper marketing insight campaign with Pollinate Media Group® and Glad, but all my opinions are my own. #pmedia #pressnsealhacks http://my-disclosur.es/OBsstV
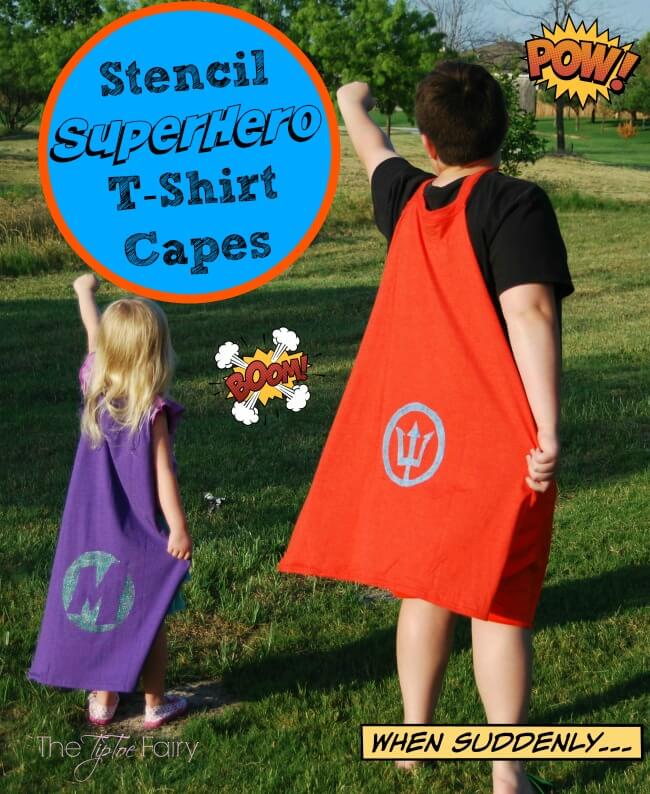
With all the superhero movies around, my two youngest kids love to play supers. Capes are usually towels or old scarves we find at thrift stores. I decided to upcycle some old t-shirts into new superhero t-shirt capes. To make them special, I created superhero logos with stencils using Glad Press’n Seal. You can do this, too!
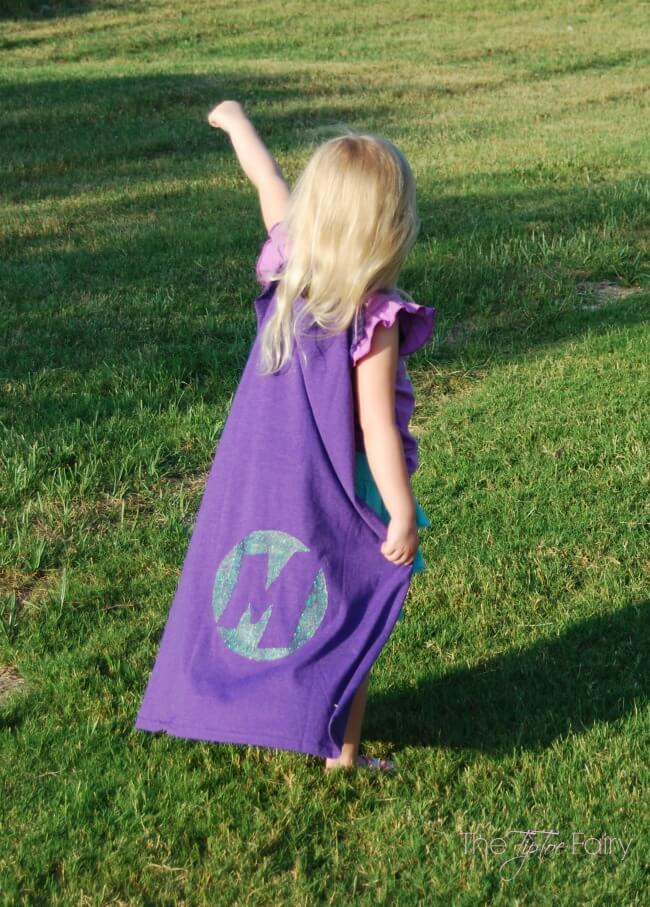
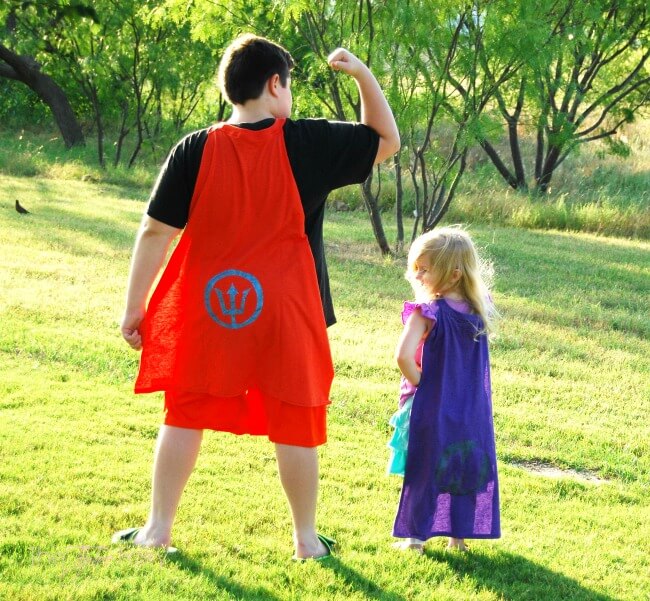
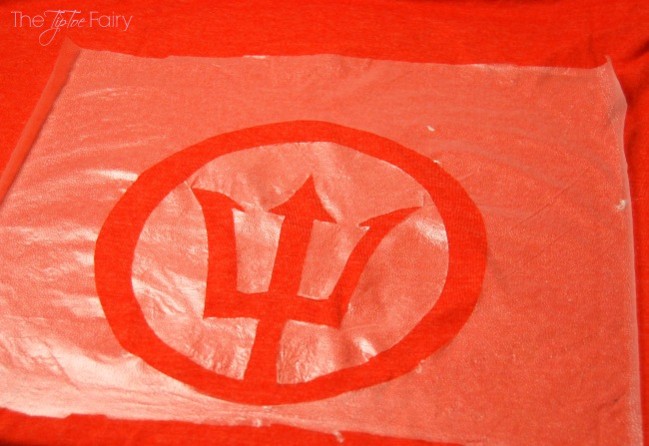
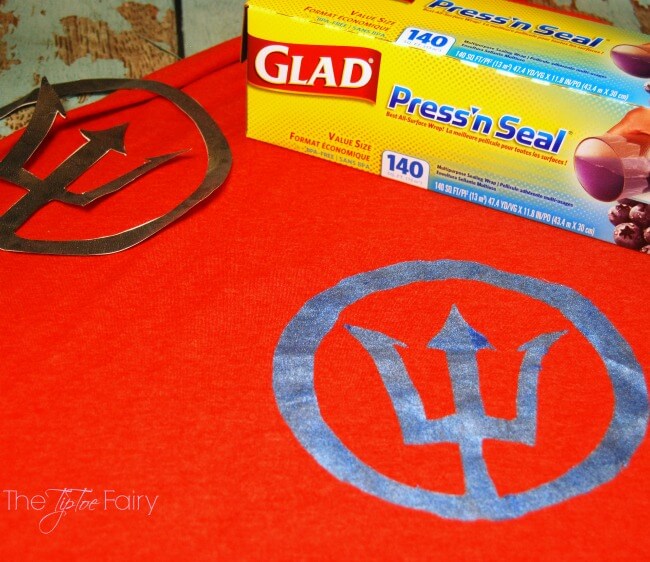
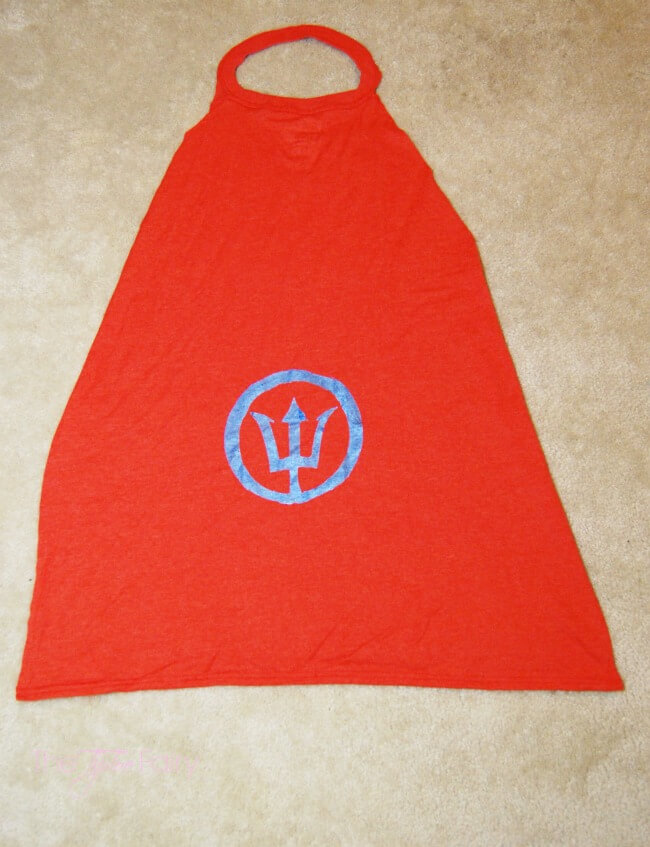
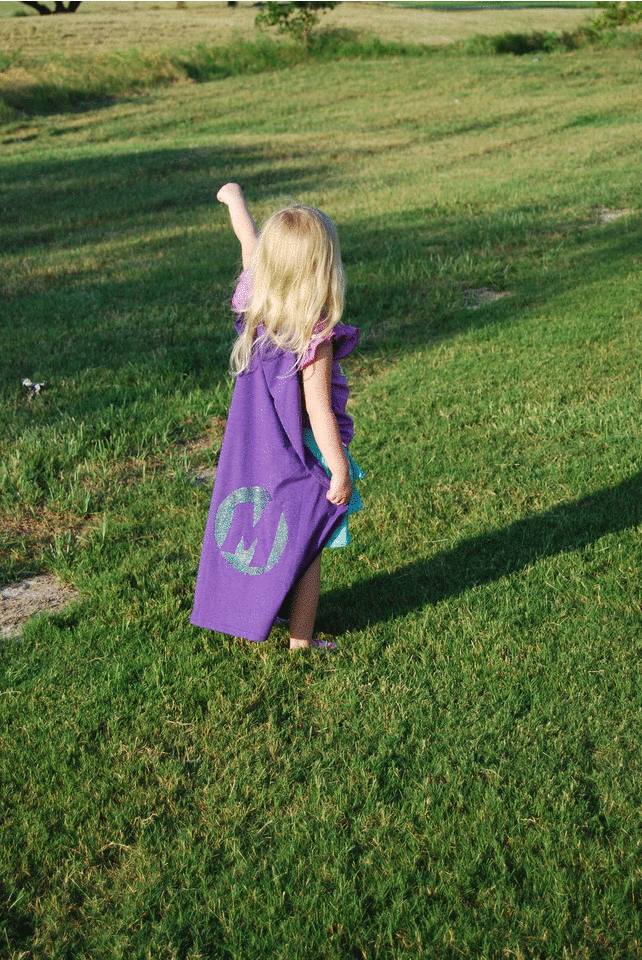
Mr. E chose a trident, so I used a circle with a trident like one of his favorite books series, Percy Jackson. I tried to talk him into being “Mystery” since that’s what Mr. E sounds like when I call him that, but he informed me he wanted “something cool.” Molly is always Super Molly, so I used PicMonkey and created a circle with a letter M in one of the comic book fonts.
A word of advice, make it simple! I was going to attempt a double circle with the M, but cutting that stencil out and then putting it all together as a stencil can be quite time consuming, so we ended up with just once circle.
So here’s how to do this:
Table of Contents
Super Hero Capes with Stencils
Supplies:
- An old t-shirt with a blank back side.
- Cheap acrylic paint – metallics, glitter, etc.
- Sponge brushes
- Stencils printed on regular paper
- Rotary cutter or Exacto knife
- Glad Press’n Seal
Directions:
1. First decide on your super hero logo. To make this M I just created a simple circle in PicMonkey with a letter M in Smash font. Next, I made it as big as possible to print on an 8 1/2 x 11 inch paper in a word document and printed it in landscape.

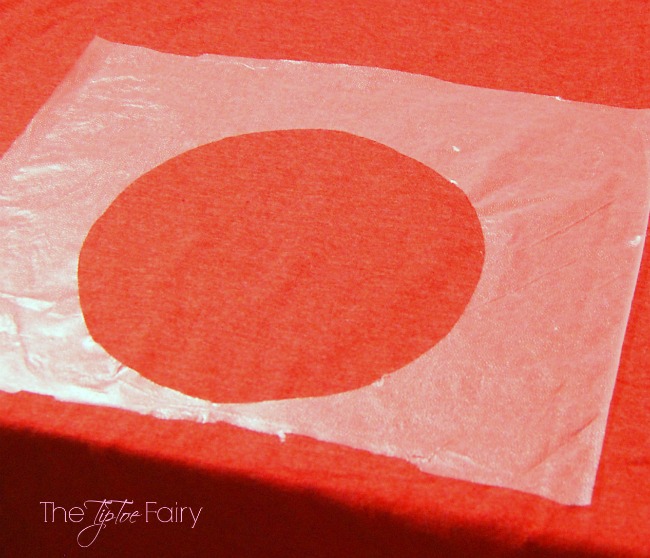
2. Now cover it in a piece of Glad Press’n Seal. Make sure to smooth it out. It will grab the paper and hold tight.
3. Now using scissors, a rotary cutter, or an Exacto knife cut out the entire thing. I found a combination of a rotary cutter on the big parts and Exacto knife on the intricate lines worked easy.
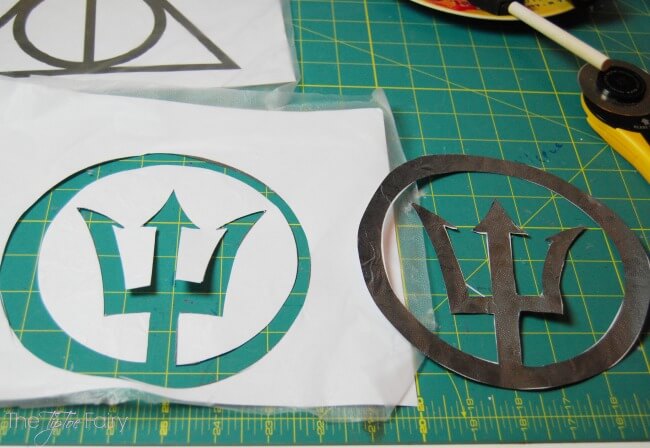
4. Once it’s cut out, decide if you want to use the actual cut out or the negative image of what you cut out. I did a combination of both for our capes.
5. This might be a little hard, but carefully separate the Glad Press’n Seal from the paper. Then, lay out the t-shirt with the backside up — make sure it’s smoothed out completely.
6. Position the Glad Press-n Seal on the t-shirt and smooth it out exactly where you want it.
7. Next, it’s time to paint. I used a glitter acrylic and a metallic one for added “pop.”
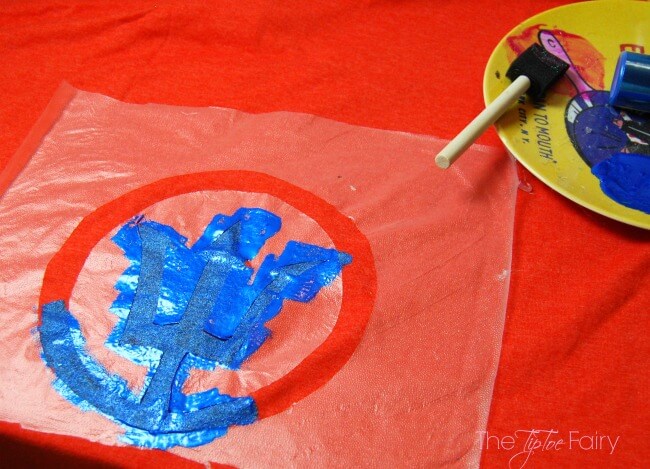
8. Make sure to cover the whole area with a couple of coats.
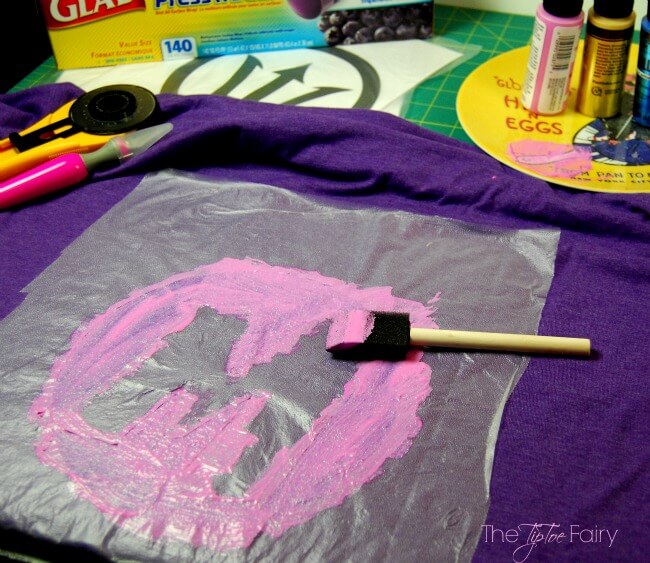
9. Let it dry overnight. Then, carefully peel off the Glad Press’n Seal.
10. For the cape. you will cut down the side seams up to the arms holes. Then, cut off both arm holes at the seams and round the edges to the ribbed neck. Be careful not to cut the ribbed neck!
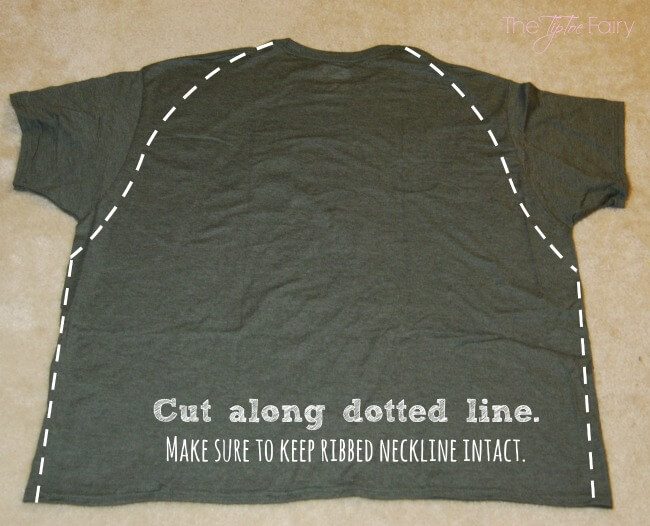
11. Carefully cut the front of the t-shirt just below the ribbed neck. You want to keep the entire ribbed neck in one piece.

12. Slip the ribbed neck over your kid’s head and they have a cape. To prevent choking, you can cut the ribbed neck right in front and add a piece of sticky velcro to each side. This way it can easily pull off if it gets stuck with no choking hazard.
TIPS: My 5 yr old wears a 4/5T and I bought her a Medium Adult. It’s a little big, so I could probably get away with a LG Child. My 11 yr old wears an Adult Large t-shirt, so I used a size XXL so his cape would be long.
I found Glad Press n’Seal at Walmart. You can find it both in rolls of 70 sq ft or 140 sq ft. I have fallen in love with Glad Press’n Seal. I love the way it sticks to itself and other things. It’s so easy to use, and I have so many more projects planned with it.
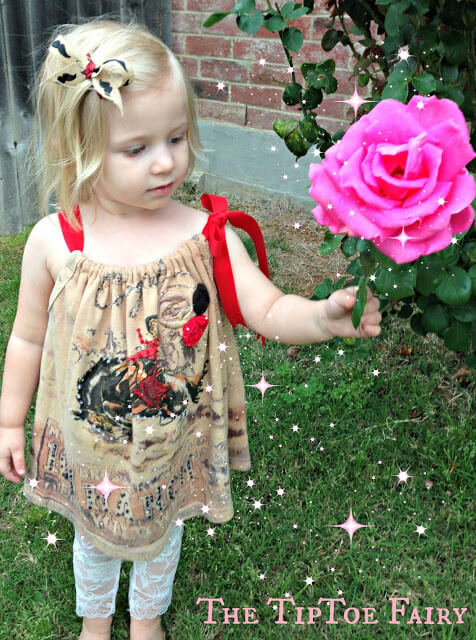
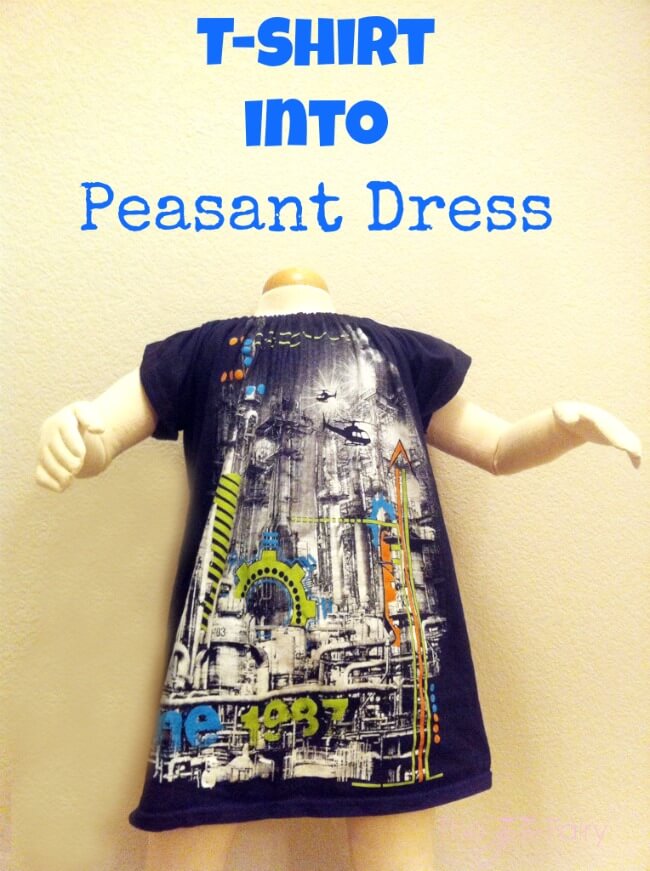
Looking for more T-Shirt Upcycle Ideas? Try these:
17 comments
What FUN kids can experience wearing these T-shirt capes, Stephanie! FAB idea for birthday parties if kids can run outside! Thanks for your tutorial, simple & inexpensive! Sarah in Minneapolis
That is such a fun idea! What kid doesn’t love wearing capes and it’s even better that you used t-shirts to make these! LOVE!
These are so fun! I’d love to show these to the teachers next year. This would be a great back to school activity.
These are super cute! My girls love capes. We’ll have loads of fun making them. Thanks for the idea.
This is such an awesome idea! I would have never in a million years thought to use Press and Seal for crafts like this. Your capes came out awesome!
My kids are older now, and they STILL play superheros! Lol! I have a collection of capes, but they’re quickly getting too tall for them. I should make some like this for them!
I love this project idea. Little kids are sure to love to have these capes to play with.
i love tshirt capes! I think we have four or five but I never thought Press N Seal would work to stencil them! Brilliant!
What a neat way to use the press n seal. I never would have thought about that, and I just love these capes. I have so many extra t-shirts I could use for these!
These superhero capes are a fantastic idea! A great idea for a DIY Halloween costume too. I’ll keep these in mind.
oh wow how neat is that so cute such lovely super hero caps nicely made
This is going to be a great summer project with our youngest! I can’t wait to do this with her and see how excited she gets.
What a great Idea! I can’t wait to do this with my three children!
What a nice DIY! And from an old shirt! very creative… I think I’ll be making two of these.
Why was I late reading this? We had a superhero costume Party last week and I ended up sawing cut outs for our emblem. The stensils with Glad Press n Seal would have looked more cool!
Love it! I’m going to look into that peasant dress pattern one too. I love it.
That’s so cute! My boys will go crazy about these capes. Some of their father’s old t-shirts are perfect to be recycled this way. Thank you for the great idea!