
Now this one is the pièce de résistance! I am really happy with how it came out. My 14 year old was on the fence about dressing up for Halloween last year, but I renewed her spirits with this one. This was an instant hit with her. She was also the star of high school on Halloween Day. People took pictures of her and with her. She loved it!
Sorry for the bad pictures. This was when I had no clue about lighting and had just been given my DSLR.

I found several pins on Pinterest of various headless people costumes. This one had a tutorial that helped us a lot. Start early, like 2-3 days before you need it. There’s still time to make this one if you start now. My darling daughter did not agree to it until the morning the day before Halloween, so I had my work cut out for me.
Table of Contents
The Headless Woman
Supplies
- Long sleeve and long length dress from thrift store (Ours was 49 cents on clearance)
- Gloves
- 1/2 – 1 inch diameter PVC piping
- old backpack
- Large bag of polyfil
- Newspaper
- Duct tape -2-3 rolls
- 2 wire hangers
- Liquid starch
- zip ties (2)
- Skin color spray paint
- Acrylic paint in red, green, brown
Instructions:
1. Try to find a dress as long as possible to hide your knees since it will be raised above you a good 1 to 2 feet. Also look for a dress with an empire waist so you can easily cut a hole at a waist seam for your head to go through.

2. For the torso, you can use a dress form or a real person. You only need to make the shape from half the neck down to the waist. I made ours on a dress form while she was at school since we were running out of time. I used an adult sized wrought iron dress form that I have for decoration. I put one of my son’s old t shirts on it that would fit tightly, and then began wrapping duct tape around it. I added about 2 layers of duct tape. I also created arms on the duct tape torso. I used a long sleeve shirt and stuffed the sleeves with polyfil down to past the elbow for arm shapes to duct tape.
3. Take care to make the neck very sturdy and rounded. As this will be the only body part showing outside of the dress.
4. Once the body is sturdy, cut the duct tapped torso off the dress form (or person) and stuff the inside with polyfil. Then, duct tape the bottom closed making it as flat bottomed as possible. At this point the torso could sit on the table flat. I checked for any weakness in the torso and covered them with extra strips of duct tape.

5. Now it’s time to paper mache. Pour liquid starch in a large shallow bowl. Cut 2-inch wide strips of newspapers about 12 inches long. Dip the newspaper strips in the liquid starch and then paste on smoothly criss-crossing the torso. The hardest part was the neck. It’s very hard to get it smooth. If we had more time, I would have worked harder on that spot.
6. Allow the paper mache to dry. We used a fan and hair dryer to speed up the process.
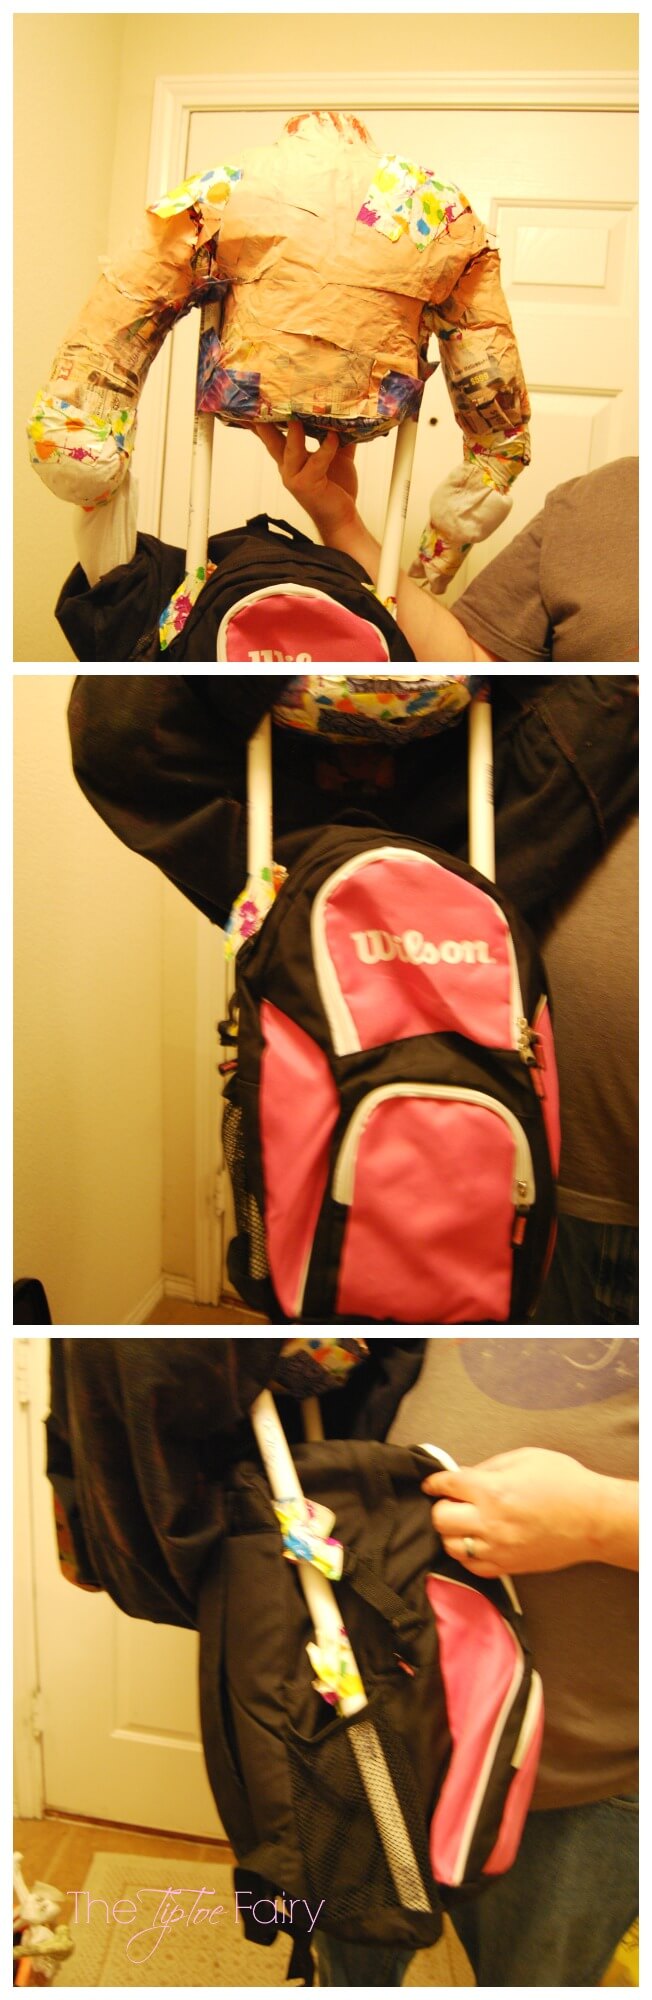
7. You need something to hold up the torso. I read about bamboo sticks, but could not find any at the home improvement stores. So, I went with the smallest diameter PVC piping I could find. Cut the PVC piping into 2 pieces, each piece will be 2.5 inches tall. We zip tied the PVC into the side pockets of a backpack in 3 places on each side for security.
8. Spray paint the torso and allow to completely dry, which can take about a day. The most important part to cover is the neck and upper chest just in case they are seen.
9. Once it’s dry, make the bloody party of the neck. Mix red, a little green, and a little brown acrylic paint and paint a circular area over the top of the neck. Then, add some dribbles down the neck.
10. We found the best way was to insert the PVC was directly into the arm pits of the torso. Cut a large hole with a large knife at each armpit, which is harder than it looks when you have paper mache, duct tape, and polyfil. We then slid the torso onto the PVC piping and duct taped all around the opening and onto the PVC for a secure fit.

11. To create the arms. You need hands to look like they are holding your head. In order to do this you need gloves and wires. I’ve seen some examples where people used really long opera gloves. I originally used a long sleeve t shirt for the torso, which I turned into arms.
Since we had a long sleeved dress, we did not need super long opera gloves. We used short gloves. Using wire cutters and dry cleaner wire hangers, we created a wire “hand” with 3 fingers along with a wire arm that was about 12 inches long that we shoved up into the polyfil in the arm. Next, we inserted the 3 fingers into the middle 3 fingers of the gloves and shoved polyfil in them. Then, we taped the upper part of the glove onto the inside t-shirt “arm” that was hidden by the dress sleeve.

12. Next it’s time to try it on. Put the backpack brace on then dress the torso with the long dress so that the person’s head is inside the dress. Now it’s easy to determine the right place to pull the person’s head through. This is when an empire dress is perfect since there is a seam right there to easily cut open at the waist. Make sure you make a fairly small hole at first so that you don’t end up cutting it too big.
13, After you’ve determined head placement, then get 1-2 zip ties and zip tie the pinky fingers of the gloves together to hold your head.
Makeup Tips:
We simply used white Halloween makeup paint and black eye shadow. Cover the entire face and down a little part of the neck with white. Then apply black shadow around the eyes, blending under the eyes. Apply the black shadow to the gaunts under the cheek bones. Pat down with just a little nude powder.
Have fun being the hit Halloween!
1 comment
Stephanie, you are so creative! And what a great costume! No wonder she was the belle of the ball! Awesome!